In the previous part, we built the React chatbot UI and managed conversation context in React. could send and display messages, remember short context, and feel polished — but it still didn’t think.
Now, let's make the chatbot smarter by connecting it to an AI service. To do this, we'll set up a Node.js backend using Express. This backend will act as a middle layer between your React app and the OpenAI API.
This step is essential when you want to create chatbot for website with React and Node.js, because:
- It keeps your API keys secure (never expose them directly in frontend code).
- It allows you to preprocess, filter, or enrich user input before sending it to an AI model.
- It gives you flexibility to swap AI providers or add business logic later.
You’ll learn how to securely connect your React frontend with OpenAI GPT or Google Gemini, handle API requests, manage environment variables, and deploy the entire app to production.
Backend Setup with Node.js
Step 1: Initialize the Node.js project
In a new folder (e.g., server/), run:
mkdir server && cd server
npm init -y
npm install express cors dotenv axios joi express-rate-limit helmet
This installs:
- express → Web framework to build an API.
- cors → Allows your React app to make requests to the backend.
- dotenv → Securely load your OpenAI API key.
- axios → To call the OpenAI API.
- joi → Input validation and sanitization.
- express-rate-limit → Rate limiting to prevent abuse.
- helmet → Security headers for Express.
Step 2: Configure package.json for ES modules
Important: Since we're using modern ES6 import statements, we need to configure the project to use ES modules. Update your package.json:
  "description": "",
  "main": "index.js",
  "scripts": {
+    "start": "node index.js",
+    "dev": "node --watch index.js",
+    "kill": "pkill -f 'node index.js' || pkill -f 'node --watch index.js' || echo 'No server process found'",
     "test": "echo \\\\"Error: no test specified\\\\" && exit 1"
  },
  "keywords": [],
  "author": "",
  "license": "ISC",
-  "type": "commonjs",
+  "type": "module",
  "dependencies": {
The key changes:
- "type": “module” → Enables ES6 import/export syntax
- Added start script → Production server startup with npm start
- Added dev script → Development server with auto-restart on file changes using npm run dev
- Added kill script → Cleanly stop the server process with npm run kill
Step 3: Create a basic Express server
Create a file called index.js:
import express from "express";
import cors from "cors";
import dotenv from "dotenv";
import axios from "axios";
import Joi from "joi";
import rateLimit from "express-rate-limit";
import helmet from "helmet";

dotenv.config();
const app = express();
const PORT = process.env.PORT || 3001;

// Security middleware
app.use(helmet());
app.use(cors({
  origin: process.env.ALLOWED_ORIGINS?.split(',') || ['http://localhost:5173'],
  credentials: true
}));

// Rate limiting
const limiter = rateLimit({
  windowMs: 15 * 60 * 1000, // 15 minutes
  max: 100, // limit each IP to 100 requests per windowMs
  message: 'Too many requests from this IP, please try again later.',
  standardHeaders: true,
  legacyHeaders: false,
});

app.use('/chat', limiter);
app.use(express.json({ limit: '10mb' }));

// Input validation schema
const messageSchema = Joi.object({
  message: Joi.string().min(1).max(1000).required(),
  history: Joi.array().items(
    Joi.object({
      role: Joi.string().valid('user', 'assistant').required(),
      content: Joi.string().required()
    })
  ).max(50).optional()
});

// POST /chat endpoint
app.post("/chat", async (req, res) => {
  try {
    // Validate input
    const { error, value } = messageSchema.validate(req.body);
    if (error) {
      return res.status(400).json({
        error: "Invalid input",
        details: error.details[0].message
      });
    }

    const { message, history } = value;

    // Check API key
    if (!process.env.OPENAI_API_KEY) {
      return res.status(500).json({ error: "API key not configured" });
    }

    const response = await axios.post(
      "https://api.openai.com/v1/chat/completions",
      {
        model: "gpt-4o-mini", // You can switch to GPT-4.1 or GPT-5 if available
        messages: [
          { role: "system", content: "You are a helpful chatbot." },
          ...(history || []),
          { role: "user", content: message },
        ],
        max_tokens: 1000,
        temperature: 0.7,
      },
      {
        headers: {
          Authorization: `Bearer ${process.env.OPENAI_API_KEY}`,
          "Content-Type": "application/json",
        },
        timeout: 30000, // 30 second timeout
      },
    );

    res.json({
      reply: response.data.choices[0].message.content,
    });
  } catch (error) {
    console.error('Chat API Error:', error.response?.data || error.message);

    if (error.code === 'ECONNABORTED') {
      return res.status(408).json({ error: "Request timeout" });
    }

    if (error.response?.status === 429) {
      return res.status(429).json({ error: "Rate limit exceeded" });
    }

    if (error.response?.status === 401) {
      return res.status(500).json({ error: "Authentication failed" });
    }

    res.status(500).json({ error: "Something went wrong" });
  }
});

app.listen(PORT, () => {
  console.log(`Server running on http://localhost:${PORT}`);
});
Key points:
- Uses ES6
importstatements (requires"type": "module"in package.json). - Clean URLs without angle brackets.
- Proper error handling and logging.
>> Read more: In-Depth Tutorial for Mastering React Error Boundaries
Step 4: Add environment configuration
To use the OpenAI API, you'll need an API key:
- Go to the OpenAI API Keys page.
- Sign in (or create an account if you don't have one).
- Click Create new secret key and copy it.
Create a .env.example file in your server/ folder:
# OpenAI API Configuration
OPENAI_API_KEY=your_openai_api_key_here

# Server Configuration
PORT=3001
Then create your actual .env file:
cp .env.example .env
# Edit .env and replace 'your_openai_api_key_here' with your actual API key
⚠️ Important: Keep your API key private. Never hardcode it directly in your React frontend — always use a backend (like the one we just set up) to handle it securely. Never commit .env to GitHub — only commit .env.example.
Step 5: Run the server
For development (recommended):
npm run devThis starts the server with auto-restart on file changes and shows all logs in real-time.
For production:
npm startTo stop the server:
npm run killYou should see:
Server running on http://localhost:3001Development vs Production:
npm run dev→ Usesnode --watchfor automatic restarts when you modify filesnpm start→ Standard production mode without file watchingnpm run kill→ Safely terminates any running server process
You now have a working backend with a /chat endpoint that:
- Receives user messages (and optional chat history).
- Sends them to the OpenAI API.
- Returns the chatbot's reply back to your React frontend.
Step 6: Test the API via CLI
Before connecting your React frontend, let's test the API to make sure everything works correctly. You can test the /chat endpoint using curl or any HTTP client.
Basic Test: Test with a simple message:
curl -X POST http://localhost:3001/chat \
  -H "Content-Type: application/json" \
  -d '{"message": "Hello, how are you?"}'
Expected response (the reply might be different):
{
    "reply": "Hello! I’m just a program, so I don’t have feelings, but I’m here and ready to help you. How can I assist you today?"
}
What this achieves:
- Your chatbot now has intelligent, AI-powered responses.
- All sensitive API keys are safely hidden in the backend.
- You can expand this backend to log chats, enforce rate limits, or integrate business data.
Troubleshooting:
- If you get "Cannot use import statement outside a module" → Make sure
"type": "module"is in yourpackage.json - If the server won't start → Check that all dependencies are installed with
npm install - If API calls fail → Verify your
.envfile has the correctOPENAI_API_KEY
Next, we'll connect your React frontend to this /chat endpoint to complete the flow.
Integrating AI APIs into Your React Chatbot
With the backend ready, it’s time to connect your React app so that user messages are sent to the server and intelligent responses come back from an AI model.
This is the step that transforms a simple chat UI into a fully functional React AI chatbot using either OpenAI GPT-4o or Google Gemini through the existing /chat endpoint. You can easily swap providers later without changing your React code.
Step 1: Install Axios
First, install axios to make API calls:
npm install axiosStep 2: Update Your Chat Component
Here are the changes needed to connect your React chat to the AI backend:
@@ -1,43 +1,41 @@
 import React, { useState } from "react";
+import axios from "axios";
 import { Card, CardContent } from "@/components/ui/card";
 import { Input } from "@/components/ui/input";
 import { Button } from "@/components/ui/button";
 import { useChatStore } from "@/store/chatStore";

 export default function ChatWindow() {
-  const { messages, userName, addMessage, setUserName } = useChatStore();
+  const { messages, addMessage } = useChatStore();
   const [input, setInput] = useState("");
+  const [loading, setLoading] = useState(false);
+  const API_BASE_URL = import.meta.env.VITE_CHAT_API_BASE_URL || 'http://localhost:3001';

-  const sendMessage = () => {
+  const sendMessage = async () => {
     if (!input.trim()) return;

     addMessage({ sender: "user", text: input });
     setInput("");
+    setLoading(true);

-    setTimeout(() => {
-      const botResponse = getBotResponse(input);
-      addMessage({ sender: "assistant", text: botResponse });
-    }, 800);
-  };
-
-  // Example assistant reply (with context awareness)
-  const getBotResponse = (userMessage: string) => {
-    const message = userMessage.toLowerCase();
+    try {
+      const res = await axios.post(`${API_BASE_URL}/chat`, {
+        message: input,
+        history: messages.map((m) => ({
+          role: m.sender,
+          content: m.text,
+        })),
+      });

-    if (message.includes("my name is")) {
-      const name = userMessage.split("my name is")[1].trim();
-      setUserName(name);
-      return `Nice to meet you, ${name}! I'll remember your name.`;
+      addMessage({ sender: "assistant", text: res.data.reply });
+    } catch (error: unknown) {
+      let errorMessage = "⚠️ Oops! Something went wrong. Please try again.";
+
+      if (error && typeof error === 'object' && 'response' in error) {
+        const axiosError = error as { response?: { status?: number } };
+        if (axiosError.response?.status === 429) {
+          errorMessage = "⚠️ Too many requests. Please wait a moment and try again.";
+        } else if (axiosError.response?.status === 401) {
+          errorMessage = "⚠️ Authentication error. Please check your API key.";
+        } else if (axiosError.response?.status === 408) {
+          errorMessage = "⚠️ Request timeout. Please try again.";
+        }
+      } else if (!navigator.onLine) {
+        errorMessage = "⚠️ No internet connection. Please check your network.";
+      }
+
+      addMessage({ sender: "assistant", text: errorMessage });
+      console.error("Error sending message:", error);
+    } finally {
+      setLoading(false);
     }
-
-    if (message.includes("hello") || message.includes("hi")) {
-      if (userName) {
-        return `Hello ${userName}! How can I help you?`;
-      }
-      return "Hello! How can I help you?";
-    }
-
-    return "Thanks for your message! I'm a simple chatbot learning to respond.";
   };

   const handleKeyDown = (e: React.KeyboardEvent<HTMLInputElement>) => {
@@ -62,6 +60,9 @@ export default function ChatWindow() {
             {msg.text}
           </div>
         ))}
+        {loading && (
+          <p className="text-sm text-gray-400 italic">Bot is thinking...</p>
+        )}
       </CardContent>

       <div className="flex items-center gap-2 border-t p-3">
@@ -72,7 +73,9 @@ export default function ChatWindow() {
           placeholder="Type your message..."
           className="flex-1"
         />
-        <Button onClick={sendMessage}>Send</Button>
+        <Button onClick={sendMessage} disabled={loading}>
+          Send
+        </Button>
       </div>
     </Card>
   );
What This Code Does:
- User types a message → Gets added to the chat
- Message sent to backend → Your server calls the AI API
- AI responds → Response gets added to the chat
- Loading state → Shows "Bot is thinking..." while waiting
Now your chatbot is connected to the backend and can provide live responses from OpenAI (or Gemini).
Step 3: Your Chat Store (Already Set Up!)
The chat store is already working perfectly for AI integration. It keeps track of all messages and provides a simple way to add new ones.
Key Features:
- ✅ Stores all chat messages
- ✅ Adds unique IDs to each message
- ✅ Includes a welcome message
- ✅ Simple
addMessage()function
Step 4: Test Your Chatbot!
- Start your backend server (from the server folder):
npm start- Start your React app (from the frontend folder):
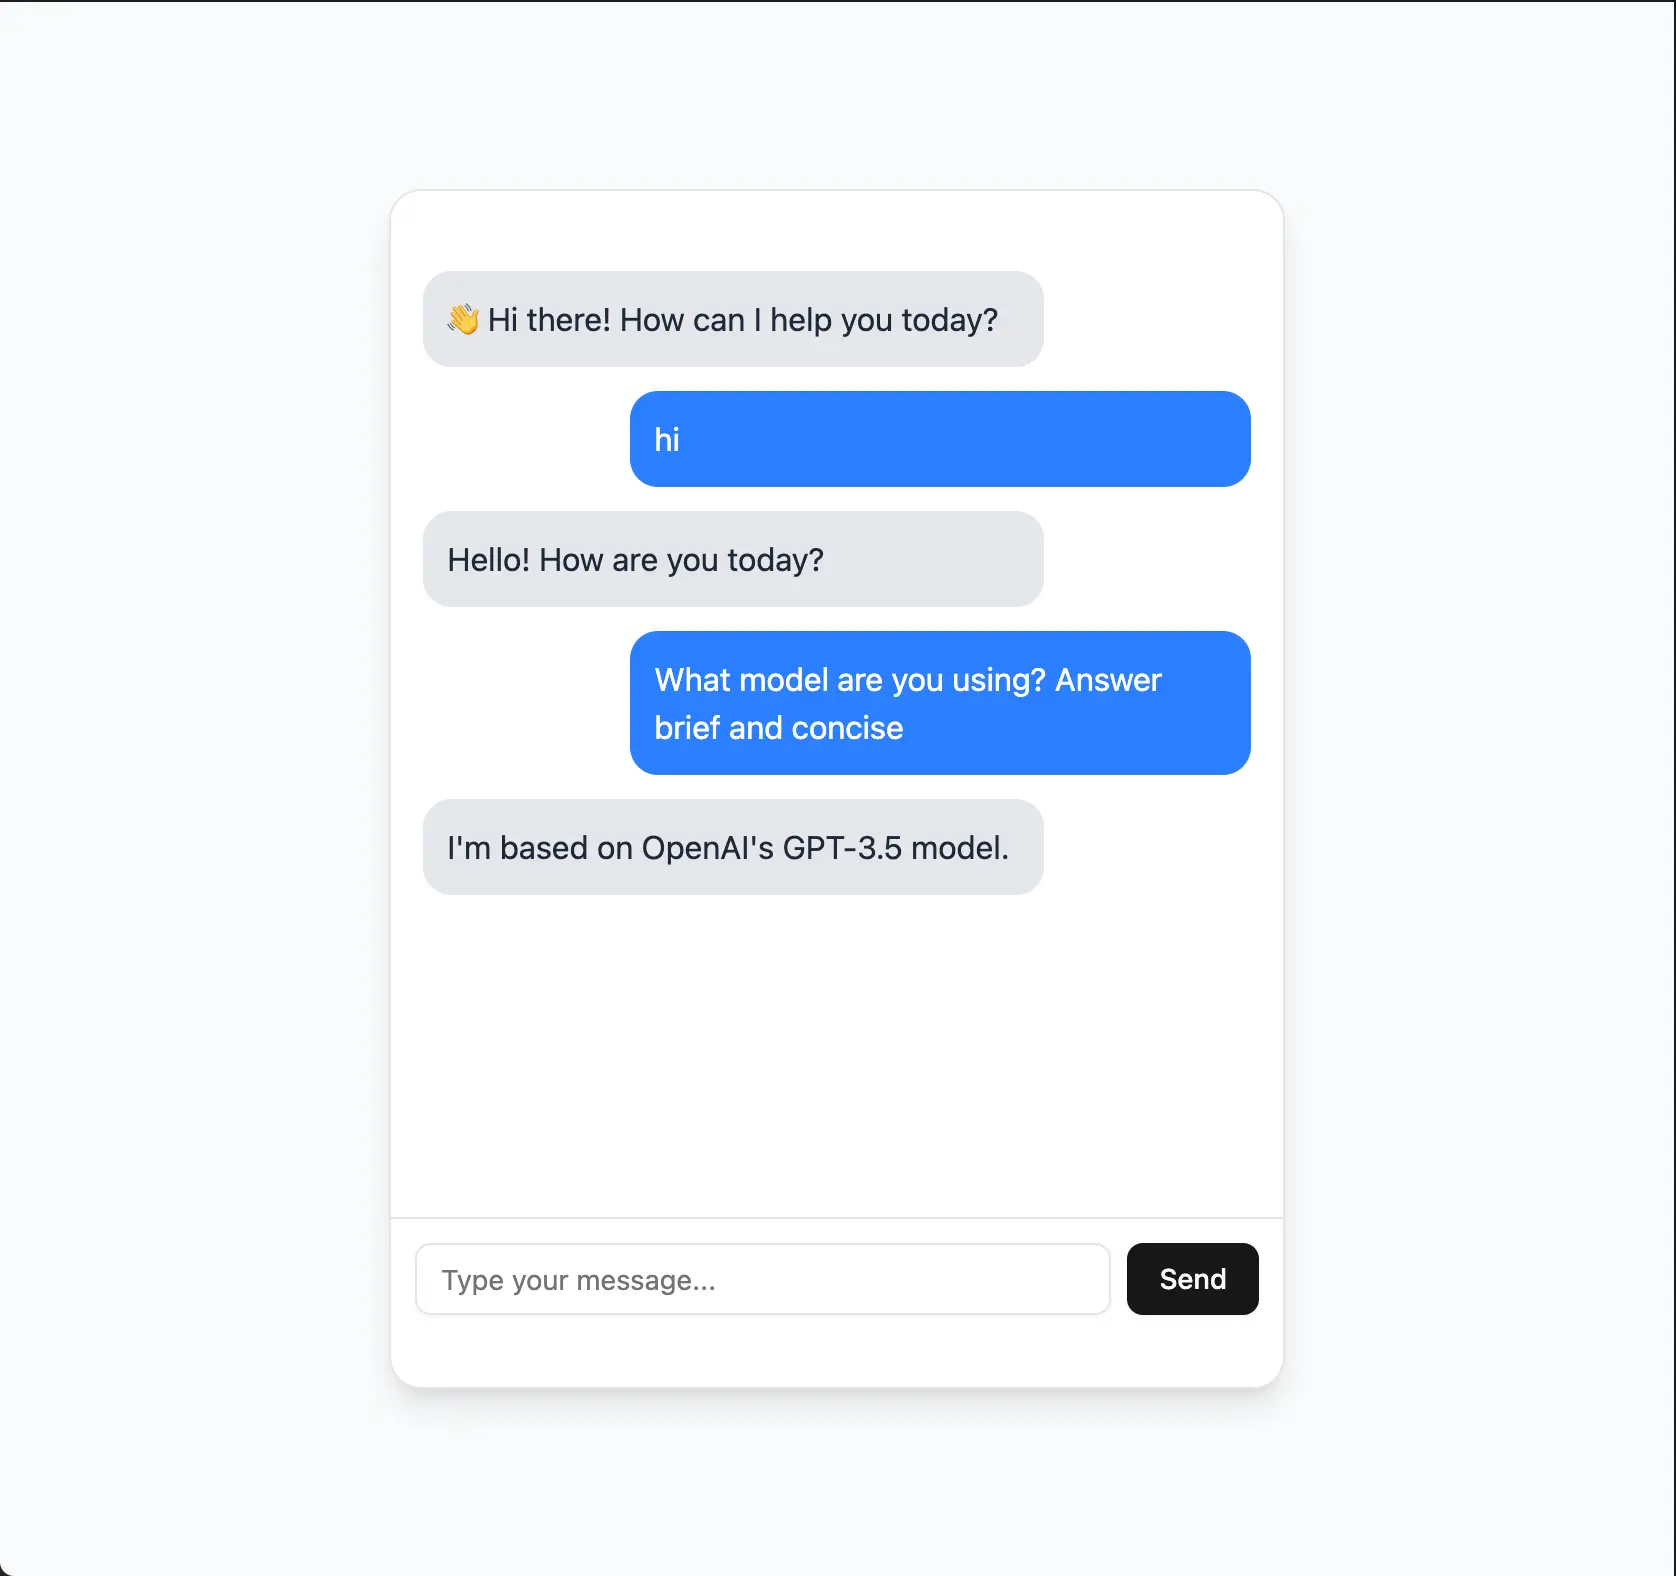
npm run dev- Open your browser and start chatting with your AI!
Here is an example after all changes.
Beginner Tips:
- Free Credits: Both OpenAI and Google offer free credits when you sign up
- Simple Testing: Start with short messages to test the connection
- Error Handling: The code includes simple error messages if something goes wrong
- No Complex Setup: Just send the current message - no need to manage conversation history manually
Testing Your Fully Function React AI Chatbot
Before deploying your chatbot, it's crucial to implement comprehensive testing. This section covers unit testing, integration testing, and end-to-end testing strategies.
Unit Testing with Vitest
Vitest is the recommended unit testing framework for Vite projects, offering fast execution and excellent TypeScript support.
Install testing dependencies:
npm install -D vitest @testing-library/react @testing-library/jest-dom @testing-library/user-event jsdomConfigure Vitest in vite.config.ts:
import { defineConfig } from 'vite'
import react from '@vitejs/plugin-react'
import path from 'path';

export default defineConfig({
  plugins: [react()],
  resolve: {
    alias: {
      "@": path.resolve(__dirname, "./src"),
    },
  },
  test: {
    globals: true,
    environment: 'jsdom',
    setupFiles: ['./src/test/setup.ts'],
  },
});
Create test setup file src/test/setup.ts:
import '@testing-library/jest-dom';Example component test src/components/__tests__/ChatWindow.test.tsx:
import { render, screen, fireEvent, waitFor } from '@testing-library/react';
import userEvent from '@testing-library/user-event';
import { describe, it, expect, vi, beforeEach } from 'vitest';
import ChatWindow from '../ChatWindow';

// Mock the chat store
vi.mock('@/store/chatStore', () => ({
  useChatStore: () => ({
    messages: [
      { id: '1', sender: 'assistant', text: 'Hello! How can I help you?' }
    ],
    addMessage: vi.fn(),
  }),
}));

// Mock axios
vi.mock('axios', () => ({
  default: {
    post: vi.fn(() => Promise.resolve({ data: { reply: 'Test response' } })),
  },
}));

describe('ChatWindow', () => {
  beforeEach(() => {
    vi.clearAllMocks();
  });

  it('renders welcome message', () => {
    render(<ChatWindow />);
    expect(screen.getByText('Hello! How can I help you?')).toBeInTheDocument();
  });

  it('sends message when user types and clicks send', async () => {
    const user = userEvent.setup();
    render(<ChatWindow />);

    const input = screen.getByPlaceholderText('Type your message...');
    const sendButton = screen.getByText('Send');

    await user.type(input, 'Hello bot!');
    await user.click(sendButton);

    expect(input).toHaveValue('');
  });

  it('sends message when user presses Enter', async () => {
    const user = userEvent.setup();
    render(<ChatWindow />);

    const input = screen.getByPlaceholderText('Type your message...');

    await user.type(input, 'Hello bot!');
    await user.keyboard('{Enter}');

    expect(input).toHaveValue('');
  });
});
>> Read more: Implement React Unit Testing with Jest and React Testing Library
Integration Testing
Test the interaction between your frontend and backend API.
Example API integration test:
import { describe, it, expect } from 'vitest';
import axios from 'axios';

describe('Chat API Integration', () => {
  const API_BASE_URL = 'http://localhost:3001';

  it('should send message and receive response', async () => {
    const response = await axios.post(`${API_BASE_URL}/chat`, {
      message: 'Hello, how are you?',
      history: []
    });

    expect(response.status).toBe(200);
    expect(response.data).toHaveProperty('reply');
    expect(typeof response.data.reply).toBe('string');
  });

  it('should handle empty message gracefully', async () => {
    try {
      await axios.post(`${API_BASE_URL}/chat`, {
        message: '',
        history: []
      });
    } catch (error: any) {
      expect(error.response.status).toBe(400);
    }
  });
});
End-to-End Testing with Playwright
For comprehensive user journey testing, use Playwright.
Install Playwright:
npm install -D @playwright/test
npx playwright install
Configure playwright.config.ts:
import { defineConfig, devices } from '@playwright/test';

export default defineConfig({
  testDir: './e2e',
  fullyParallel: true,
  forbidOnly: !!process.env.CI,
  retries: process.env.CI ? 2 : 0,
  workers: process.env.CI ? 1 : undefined,
  reporter: 'html',
  use: {
    baseURL: 'http://localhost:5173',
    trace: 'on-first-retry',
  },
  projects: [
    {
      name: 'chromium',
      use: { ...devices['Desktop Chrome'] },
    },
  ],
  webServer: {
    command: 'npm run dev',
    url: 'http://localhost:5173',
    reuseExistingServer: !process.env.CI,
  },
});
Example E2E test e2e/chatbot.spec.ts:
import { test, expect } from '@playwright/test';

test('complete chatbot conversation flow', async ({ page }) => {
  await page.goto('/');

  // Check if chatbot loads
  await expect(page.getByText('Hi there! How can I help you today?')).toBeVisible();

  // Send a message
  await page.getByPlaceholder('Type your message...').fill('Hello, how are you?');
  await page.getByRole('button', { name: 'Send' }).click();

  // Wait for response
  await expect(page.getByText('Hello, how are you?')).toBeVisible();
  await expect(page.locator('.bg-gray-200')).toContainText(/Hello|Hi|I'm doing well/);

  // Test typing indicator
  await page.getByPlaceholder('Type your message...').fill('What can you help me with?');
  await page.getByRole('button', { name: 'Send' }).click();

  // Should show typing indicator briefly
  await expect(page.getByText('Bot is thinking')).toBeVisible();
});

test('handles API errors gracefully', async ({ page }) => {
  // Mock API to return error
  await page.route('**/chat', route => {
    route.fulfill({
      status: 500,
      contentType: 'application/json',
      body: JSON.stringify({ error: 'Server error' })
    });
  });

  await page.goto('/');
  await page.getByPlaceholder('Type your message...').fill('Test message');
  await page.getByRole('button', { name: 'Send' }).click();

  // Should show error message
  await expect(page.getByText(/Error|Something went wrong/)).toBeVisible();
});
Running Tests
Add test scripts to package.json:
{
  "scripts": {
    "test": "vitest",
    "test:ui": "vitest --ui",
    "test:coverage": "vitest --coverage",
    "test:e2e": "playwright test",
    "test:e2e:ui": "playwright test --ui"
  }
}
Run tests:
# Unit tests
npm test

# Tests with UI
npm run test:ui

# Coverage report
npm run test:coverage

# End-to-end tests
npm run test:e2e
Testing Best Practices
Test Coverage Goals:
- Components: 80%+ coverage for UI components
- Utilities: 90%+ coverage for helper functions
- API Integration: All endpoints tested
- User Flows: Critical paths covered
What to Test:
- User interactions (typing, sending messages)
- API error handling
- Loading states and indicators
- Message persistence
- Responsive design
- Accessibility features
What Not to Test:
- Third-party library internals
- Implementation details
- Styling (use visual regression tests instead)
Enhancing User Experience
This guide covers the essential UX enhancements already implemented in your chatbot:
- Typing indicators for clear feedback
- Error handling for graceful failures
- Chat persistence for continuity
- Auto-scroll for seamless navigation
>> Explore more: Implement Machine Learning in Your React App for Better UX
Typing Indicators
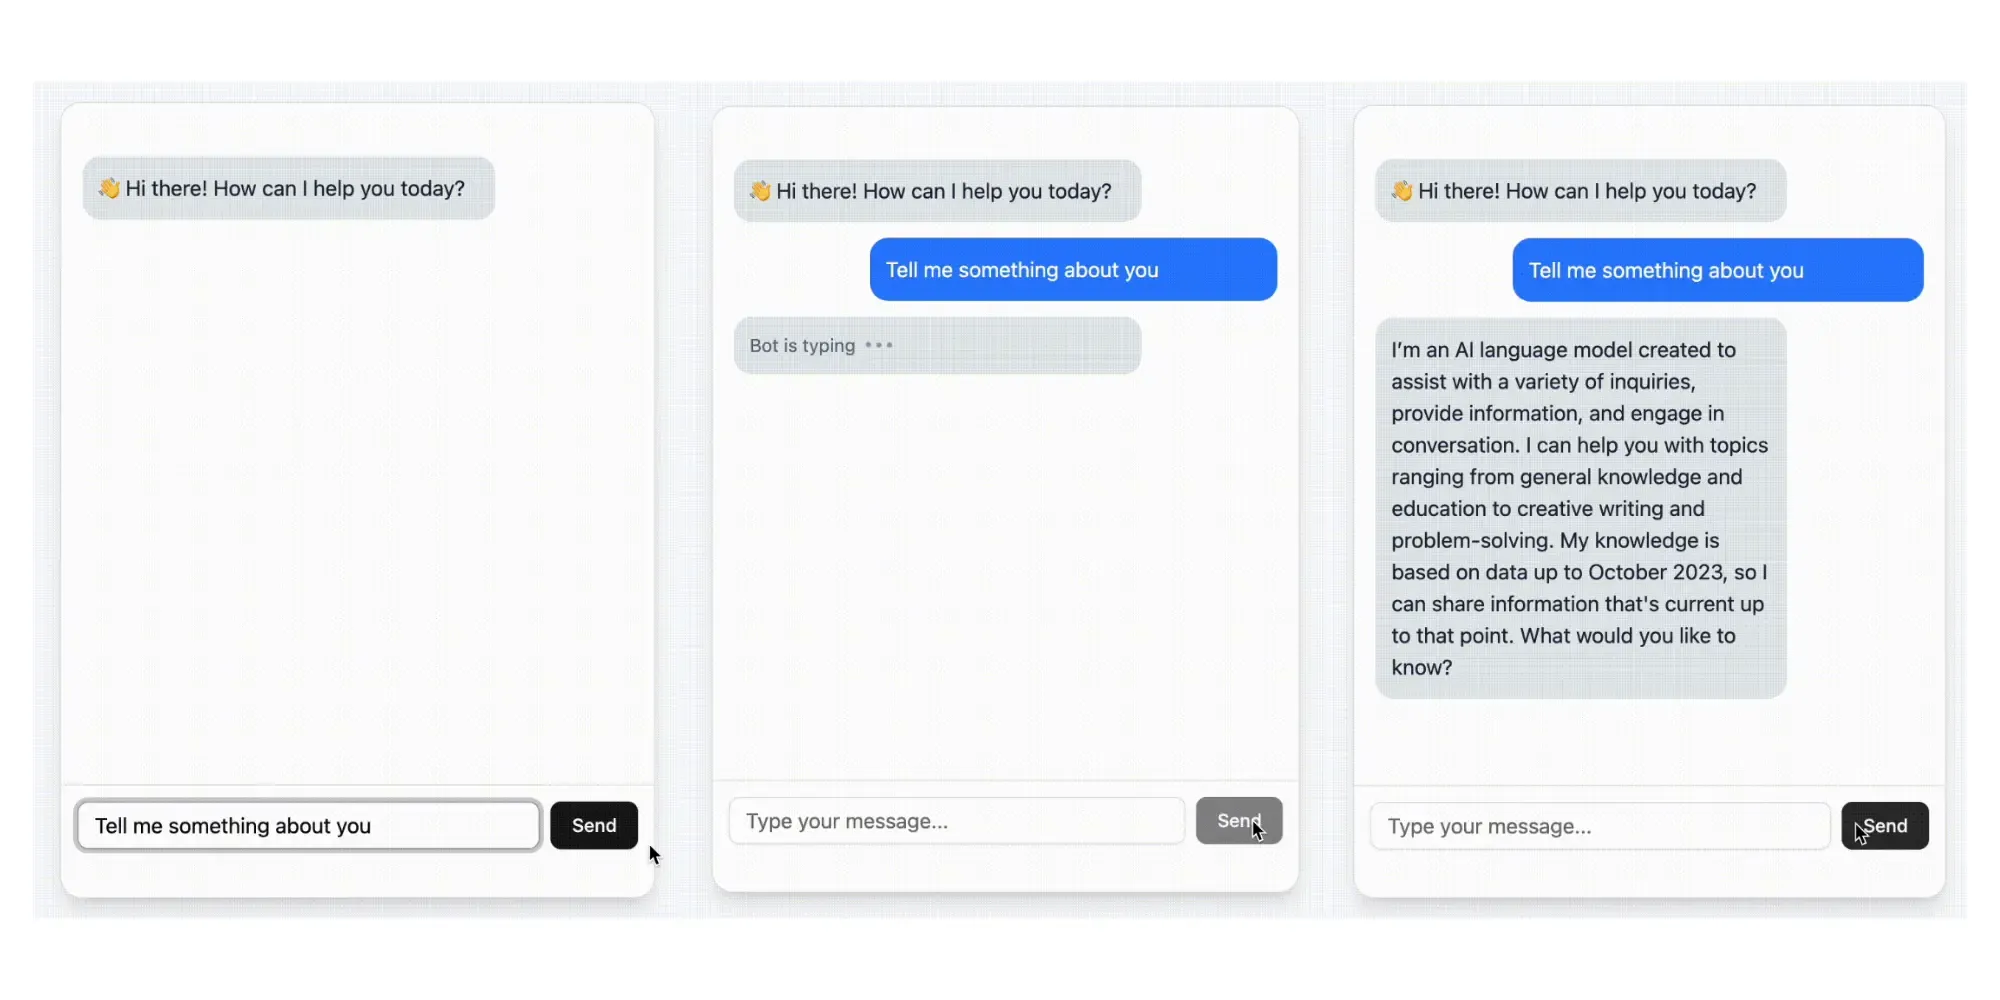
Silence after sending a message confuses users. Your chatbot shows a clean "Bot is typing" indicator with animated dots, making conversations feel natural.
Implementation:
+ const [isTyping, setIsTyping] = useState(false);

  const sendMessage = async () => {
    if (!input.trim()) return;

    addMessage({ sender: "user", text: input });
    setInput("");
+   setIsTyping(true);

    try {
      // ... API call ...
      addMessage({ sender: "assistant", text: res.data.reply });
    } catch (error: unknown) {
      // ... error handling ...
    } finally {
+     setIsTyping(false);
    }
  };

  // In render section
+ {isTyping && (
+   <div className="bg-gray-200 text-gray-500 p-3 rounded-xl max-w-[75%] mr-auto">
+     <div className="flex items-center space-x-2">
+       <span className="text-sm">Bot is typing</span>
+       <div className="flex space-x-1">
+         <div className="w-1 h-1 bg-gray-400 rounded-full animate-bounce"></div>
+         <div className="w-1 h-1 bg-gray-400 rounded-full animate-bounce" style={{animationDelay: '0.1s'}}></div>
+         <div className="w-1 h-1 bg-gray-400 rounded-full animate-bounce" style={{animationDelay: '0.2s'}}></div>
+       </div>
+     </div>
+   </div>
+ )}
Benefits:
- Clear feedback that the bot is processing
- Prevents multiple simultaneous requests (button disabled)
- Creates natural conversation flow
Error Handling
APIs fail due to network issues, rate limits, or server problems. Your chatbot handles these gracefully with specific, user-friendly error messages.
Implementation:
  try {
    const res = await axios.post("http://localhost:3001/chat", {
      message: input,
      history: messages.map((m) => ({
        role: m.sender,
        content: m.text,
      })),
    });
    addMessage({ sender: "assistant", text: res.data.reply });
- } catch (error) {
-   addMessage({
-     sender: "assistant",
-     text: "⚠️ Error: Unable to get a response.",
-   });
-   console.error("Error sending message:", error);
+ } catch (error: unknown) {
+   let errorMessage = "⚠️ Oops! Something went wrong. Please try again.";
+
+   if (error && typeof error === 'object' && 'response' in error) {
+     const axiosError = error as { response?: { status?: number } };
+     if (axiosError.response?.status === 429) {
+       errorMessage = "⚠️ Too many requests. Please wait a moment and try again.";
+     } else if (axiosError.response?.status === 401) {
+       errorMessage = "⚠️ Authentication error. Please check your API key.";
+     }
+   } else if (!navigator.onLine) {
+     errorMessage = "⚠️ No internet connection. Please check your network.";
+   }
+
+   addMessage({ sender: "assistant", text: errorMessage });
+   console.error("Error sending message:", error);
  } finally {
    setIsTyping(false);
  }
Error Types Handled:
- Rate limiting (429) - Too many requests
- Authentication (401) - Invalid API key
- Network issues - No internet connection
- Generic errors - Fallback message
Chat History Persistence
Users expect to pick up where they left off. Your chatbot automatically saves conversations to localStorage and restores them after page refreshes.
Implementation:
- import { create } from "zustand";
+ import { create } from "zustand";
+ import { persist } from "zustand/middleware";

  interface Message {
    id: string;
    sender: "user" | "assistant";
    text: string;
+   timestamp: Date;
  }

  interface ChatState {
    messages: Message[];
    userName: string;
-   addMessage: (message: Omit<Message, "id">) => void;
+   addMessage: (message: Omit<Message, "id" | "timestamp">) => void;
    setUserName: (name: string) => void;
    clearChat: () => void;
  }

  const WelcomeMessage: Message = {
    id: "welcome",
    sender: "assistant",
    text: "👋 Hi there! How can I help you today?",
+   timestamp: new Date(),
  };

- export const useChatStore = create<ChatState>((set) => ({
+ export const useChatStore = create<ChatState>()(
+   persist(
+     (set) => ({
      messages: [WelcomeMessage],
      userName: "",
      addMessage: (message) =>
        set((state) => ({
          messages: [
            ...state.messages,
            {
              ...message,
              id: crypto.randomUUID(),
+             timestamp: new Date(),
            },
          ],
        })),
      setUserName: (name) => set({ userName: name }),
      clearChat: () =>
        set({
          messages: [WelcomeMessage],
          userName: "",
        }),
- }));
+     }),
+     {
+       name: "chat-storage",
+       partialize: (state) => ({
+         messages: state.messages,
+         userName: state.userName
+       }),
+     }
+   )
+ );
How it works:
- Automatically saves messages and username to localStorage
- Restores chat history on page load
- Excludes temporary states (like typing indicators)
- Creates app-like persistence until browser data is cleared
Auto-scroll
Your chatbot automatically scrolls to new messages, ensuring users always see the latest content
- import React, { useState } from "react";
+ import React, { useState, useRef, useEffect } from "react";

  export default function ChatWindow() {
    const { messages, addMessage } = useChatStore();
    const [input, setInput] = useState("");
    const [isTyping, setIsTyping] = useState(false);
+   const messagesEndRef = useRef<HTMLDivElement>(null);

+   const scrollToBottom = () => {
+     messagesEndRef.current?.scrollIntoView({ behavior: "smooth" });
+   };

+   useEffect(() => {
+     scrollToBottom();
+   }, [messages]);

    // In render section
        ))}
+       <div ref={messagesEndRef} />
      </CardContent>
Message Timestamps
All messages are automatically timestamped for better context (already implemented in the chat store above).
Here is the UI changes accordingly in this section.
If possible, consider adding:
- Message reactions (thumbs up/down feedback)
- Chat export (save conversations as files)
- Theme customization (dark/light mode)
- Accessibility improvements (screen reader support)
React AI Chatbot Deployment
Prepare Your Code for Deployment
Before deploying, you need to configure your application to work in production. This involves setting up environment variables and CORS configuration.
- Configure Frontend Environment Variables
Create a .env file in your frontend root directory:
# Frontend .env file
VITE_CHAT_API_BASE_URL=http://localhost:3001
Update your ChatWindow.tsx to use the environment variable:
// src/components/ChatWindow.tsx
+ const API_BASE_URL = import.meta.env.VITE_CHAT_API_BASE_URL || 'http://localhost:3001';

  const sendMessage = async () => {
    if (!input.trim()) return;

    addMessage({ sender: "user", text: input });
    setInput("");
    setIsTyping(true);

    try {
-     const res = await axios.post("http://localhost:3001/chat", {
+     const res = await axios.post(`${API_BASE_URL}/chat`, {
        message: input,
        history: messages.map((m) => ({
          role: m.sender,
          content: m.text,
        })),
      });
      addMessage({ sender: "assistant", text: res.data.reply });
    } catch (error: unknown) {
      // ... error handling ...
    } finally {
      setIsTyping(false);
    }
};- Configure Backend CORS
Update your server/index.js to use environment variables for CORS origins:
import express from "express";
import cors from "cors";
import dotenv from "dotenv";
import axios from "axios";

dotenv.config();
const app = express();
const PORT = process.env.PORT || 3001;

- app.use(cors());
+ const allowedOrigins = process.env.ALLOWED_ORIGINS?.split(',') || ['http://localhost:5173'];
+
+ app.use(cors({
+   origin: allowedOrigins,
+   credentials: true
+ }));
This approach allows you to configure allowed origins via environment variables instead of hardcoding them.
Deploy Your Backend First
Your Node.js backend must be online before deploying the frontend. Popular options include:
- Render → One-click deploy with free tier.
- Railway → Developer-friendly with fast setup.
- AWS Lambda → Scalable and cost-efficient for serverless deployments.
I'll deploy with Render in this case
- Push your backend code to GitHub.
- Go to Render.com and select New Web Service.
- Connect your repo, select Node.js, and set your
index.jsas the entry point. - Add your environment variables:
OPENAI_API_KEY=sk-xxxxxx
PORT=3001
ALLOWED_ORIGINS=http://localhost:5173
Your server will be live at https://your-app.onrender.com.
Deploy Your Frontend
Now that your backend is deployed, configure and deploy your frontend:
Frontend Hosting Options:
- Vercel → Seamless integration with Vite, automatic HTTPS, and instant rollbacks.
- Netlify → Easy Git-based deployments with global CDN.
- GitHub Pages → Basic option, though limited for serverless features.
Deploy with Vercel:
- Update your frontend environment variable to point to your deployed backend:
# In your frontend .env file
VITE_CHAT_API_BASE_URL=https://your-app.onrender.com- Deploy to Vercel:
# From the React project root
npm run build
npx vercel deploy --prod- Configure environment variables in Vercel:
- Go to your project dashboard
- Navigate to Settings → Environment Variables
- Add:
VITE_CHAT_API_BASE_URL=https://your-app.onrender.com
Deploy with Netlify
- Update your frontend environment variable to point to your deployed backend
- Deploy to Netlify:
npm run build
npx netlify deploy --prod --dir=dist- Configure environment variables in Netlify:
- Go to Site settings → Environment variables
- Add:
VITE_CHAT_API_BASE_URL=https://your-app.onrender.com
Update Backend CORS with Frontend URL
After deploying your frontend, update your backend's ALLOWED_ORIGINS environment variable with the actual frontend URL:
In Render dashboard:
- Go to your backend service settings
- Navigate to Environment Variables
- Update ALLOWED_ORIGINS to include your deployed frontend URL:
ALLOWED_ORIGINS=http://localhost:5173,https://your-actual-frontend-url.vercel.appFor multiple frontend deployments:
ALLOWED_ORIGINS=http://localhost:5173,https://your-app.vercel.app,https://your-app.netlify.appThe backend will automatically restart with the new CORS configuration.
Test Your Deployment
- Open your chatbot in the browser
- Send a few messages to confirm responses
- Check console logs for any errors
- Test on mobile (to ensure responsive design)
With your chatbot now deployed, you're ready to share it with the world, collect user feedback, and iterate further.
Conclusion
You’ve now built and deployed a complete AI chatbot with React and Node.js — a secure backend powered by Express, connected to OpenAI or Gemini, and integrated with your React frontend. Your chatbot can now process messages, generate intelligent responses, and run seamlessly in production.
From here, you can take things further with advanced capabilities like real-time streaming, RAG-based knowledge bases, and plugin integrations, which we’ll explore in the next part. Let's see how to transform this simple React AI Chatbot into a production-ready AI assistant.
>>> Follow and Contact Relia Software for more information!

- coding