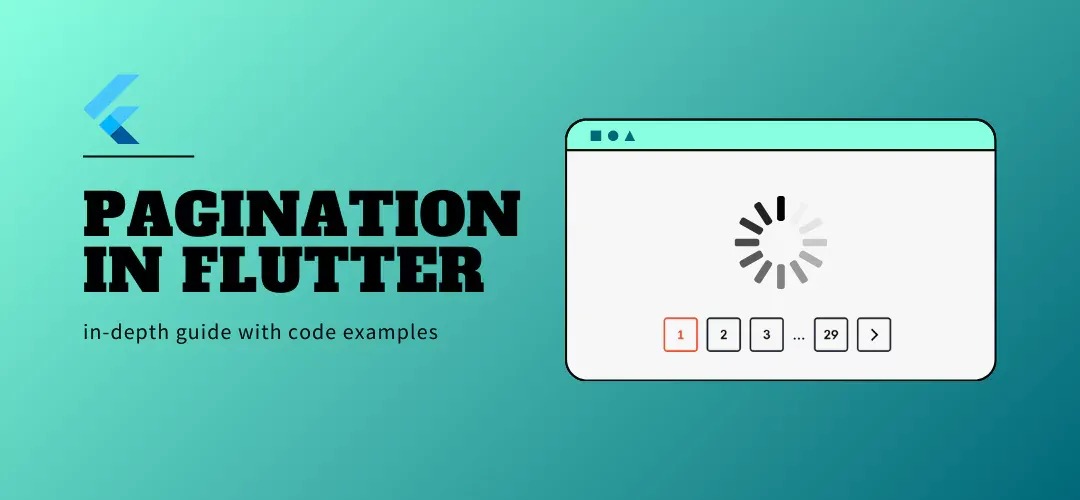
Pagination is an essential concept in mobile applications, especially when dealing with large datasets. By loading data in smaller chunks, you can massively reduce the load on memory and improve your app performance. With Flutter - a robust UI toolkit, you have several techniques to implement pagination efficiently. This article will explore various techniques, including infinite scroll, numbered pages, and lazy loading to optimize data rendering and user experience.
>> Read more about Flutter coding:
- The In-depth Guide for Mastering Navigation in Flutter
- Dependency Injection in Flutter with Provider, GetIt, and Riverpod
- Deep Dive into Clean Architecture Flutter for Better Apps
- Step-by-Step Tutorial to Master Flutter TextField Validation
What is Pagination in Flutter?
Pagination in Flutter is a technique that allows you to load large sets of data in smaller, manageable chunks, rather than fetching everything at once. This approach is ideal when dealing with data-heavy apps like social media feeds, product catalogs, or article listings. By breaking the data into smaller pages, it improves both performance and user experience, as the app only loads what’s necessary when it’s needed.
Basic Pagination in Flutter with ListView
You can implement basic pagination in Flutter using a ListView paired with a scroll listener, allowing you to load more data as the user scrolls. This approach commonly involves fetching a limited number of items from an API or a local database and appending them to the current list when the user reaches the end of the list. Here’s a simple example implementation:
class BasicPagination extends StatefulWidget {
  @override
  _BasicPaginationState createState() => _BasicPaginationState();
}

class _BasicPaginationState extends State<BasicPagination> {
  ScrollController _scrollController = ScrollController();
  List<int> _items = List.generate(10, (index) => index);
  bool _isLoading = false;

  @override
  void initState() {
    super.initState();
    _scrollController.addListener(() {
      if (_scrollController.position.pixels == _scrollController.position.maxScrollExtent && !_isLoading) {
        _loadMoreItems();
      }
    });
  }

  void _loadMoreItems() async {
    setState(() {
      _isLoading = true;
    });
    await Future.delayed(Duration(seconds: 2)); // Simulate network delay
    setState(() {
      _items.addAll(List.generate(10, (index) => _items.length + index));
      _isLoading = false;
    });
  }

  @override
  Widget build(BuildContext context) {
    return ListView.builder(
      controller: _scrollController,
      itemCount: _items.length + (_isLoading ? 1 : 0),
      itemBuilder: (context, index) {
        if (index == _items.length) {
          return Center(child: CircularProgressIndicator());
        }
        return ListTile(title: Text('Item ${_items[index]}'));
      },
    );
  }
}
This technique, while straightforward, can sometimes lead to common issues such as loading duplicate data or handling state inconsistently. These can be avoided by carefully managing API calls and using appropriate state management techniques.
Advanced Pagination Techniques
Infinite Scroll Pagination
Infinite scroll loads data continuously as the user scrolls. You can achieve this using ListView.builder along with a condition to trigger API calls when the user nears the end of the list. Here's a code sample:
ListView.builder(
  itemCount: _items.length,
  itemBuilder: (context, index) {
    if (index == _items.length - 1) {
      // Load more data when the user reaches the end
      _fetchMoreItems();
    }
    return ListTile(title: Text('Item ${_items[index]}'));
  },
)
Edge cases such as handling no more data or retrying failed API requests should be considered.
Pagination with Lazy Loading
Lazy loading optimizes performance by loading data only when needed. Integration with packages like flutter_bloc or infinite_scroll_pagination helps implement this pattern effectively. Lazy loading is ideal for reducing the memory footprint in data-heavy applications.
Here is some example code:
class LazyLoadingPagination extends StatefulWidget {
  @override
  _LazyLoadingPaginationState createState() => _LazyLoadingPaginationState();
}

class _LazyLoadingPaginationState extends State<LazyLoadingPagination> {
  ScrollController _scrollController = ScrollController();
  List<int> _items = List.generate(10, (index) => index);
  bool _isLoading = false;

  @override
  void initState() {
    super.initState();
    _scrollController.addListener(() {
      if (_scrollController.position.pixels == _scrollController.position.maxScrollExtent) {
        _loadMoreItems();
      }
    });
  }

  void _loadMoreItems() async {
    if (_isLoading) return;

    setState(() {
      _isLoading = true;
    });

    await Future.delayed(Duration(seconds: 2)); // Simulate network delay

    setState(() {
      _items.addAll(List.generate(10, (index) => _items.length + index));
      _isLoading = false;
    });
  }

  @override
  Widget build(BuildContext context) {
    return Scaffold(
      appBar: AppBar(title: Text('Lazy Loading Pagination')),
      body: ListView.builder(
        controller: _scrollController,
        itemCount: _items.length + (_isLoading ? 1 : 0),
        itemBuilder: (context, index) {
          if (index == _items.length) {
            return Center(child: CircularProgressIndicator());
          }
          return ListTile(title: Text('Item ${_items[index]}'));
        },
      ),
    );
  }

  @override
  void dispose() {
    _scrollController.dispose();
    super.dispose();
  }
}Explanation:
- ScrollController: This tracks the user's scroll position.
- Lazy Loading: When the user scrolls to the end of the list, new data is fetched and added to the list.
- Simulated Network Delay: A delay simulates data fetching from an API.
- Loading Indicator: A
CircularProgressIndicatoris shown at the bottom while new data is being fetched.
State Management for Pagination
Using Riverpod
Riverpod is a powerful state management solution that simplifies pagination by making data fetching reactive. Here’s how you can implement it:
- Define a StateNotifier for Pagination Logic:
Create a PaginationNotifier class that extends StateNotifier to handle pagination logic such as fetching more data and updating the list.
import 'package:flutter_riverpod/flutter_riverpod.dart';

class PaginationNotifier extends StateNotifier<List<String>> {
  PaginationNotifier() : super([]);

  bool isLoading = false;
  int currentPage = 1;

  Future<void> fetchItems() async {
    if (isLoading) return;

    isLoading = true;
    try {
      // Simulate a network call to fetch data
      await Future.delayed(Duration(seconds: 2));
      final newItems = List.generate(10, (index) => 'Item ${(currentPage - 1) * 10 + index + 1}');
      state = [...state, ...newItems];
      currentPage++;
    } finally {
      isLoading = false;
    }
  }
}- Create a Provider for the Notifier:
Define a provider to expose the state of the PaginationNotifier.
final paginationProvider = StateNotifierProvider<PaginationNotifier, List<String>>(
  (ref) => PaginationNotifier(),
);- UI Implementation:
In your Widget, use ConsumerWidget to listen to the paginationProvider and display the list of items with pagination logic.
import 'package:flutter/material.dart';
import 'package:flutter_riverpod/flutter_riverpod.dart';

class PaginationScreen extends ConsumerWidget {
  @override
  Widget build(BuildContext context, ScopedReader watch) {
    final items = watch(paginationProvider);
    final notifier = context.read(paginationProvider.notifier);

    return Scaffold(
      appBar: AppBar(title: Text('Pagination with Riverpod')),
      body: ListView.builder(
        itemCount: items.length + 1,
        itemBuilder: (context, index) {
          if (index == items.length) {
            notifier.fetchItems(); // Trigger pagination when the user reaches the end
            return Center(child: CircularProgressIndicator());
          }
          return ListTile(title: Text(items[index]));
        },
      ),
    );
  }
}- Auto Fetch More Data:
The call to fetchItems is triggered when the user reaches the end of the list. This automatically fetches more items and appends them to the existing list.
Explanation:
- StateNotifier: Handles the logic for pagination, including fetching new items and updating the list’s state.
- StateNotifierProvider: Exposes and notifies the state to the UI.
- ConsumerWidget: Rebuilds the UI whenever there’s a change in the state.
This implementation efficiently handles pagination and data fetching, while Riverpod simplifies the state management.
Using Provider
Provider is a popular choice for state management in Flutter applications. For pagination, Provider can manage both the data and loading state efficiently. It’s simpler compared to Riverpod but may require more boilerplate code for handling complex state scenarios. Here are the steps needed to implement pagination using Provider:
- Create a Pagination Model:
Define a PaginationModel that manages the state and logic for fetching paginated data.
import 'package:flutter/material.dart';

class PaginationModel extends ChangeNotifier {
  List<String> items = [];
  bool isLoading = false;
  int currentPage = 1;

  Future<void> fetchItems() async {
    if (isLoading) return;
    isLoading = true;
    notifyListeners();

    try {
      await Future.delayed(Duration(seconds: 2)); // Simulate network call
      final newItems = List.generate(10, (index) => 'Item ${(currentPage - 1) * 10 + index + 1}');
      items.addAll(newItems);
      currentPage++;
    } finally {
      isLoading = false;
      notifyListeners();
    }
  }
}- Set Up Provider:
Use the ChangeNotifierProvider to provide the PaginationModel to the widget tree.
import 'package:flutter/material.dart';
import 'package:provider/provider.dart';

void main() {
  runApp(
    ChangeNotifierProvider(
      create: (context) => PaginationModel(),
      child: MyApp(),
    ),
  );
}

class MyApp extends StatelessWidget {
  @override
  Widget build(BuildContext context) {
    return MaterialApp(
      home: PaginationScreen(),
    );
  }
}- UI Implementation:
Implement a widget that listens to the PaginationModel using Consumer. In this example, more items are loaded when the user scrolls to the bottom of the list.
import 'package:flutter/material.dart';
import 'package:provider/provider.dart';

class PaginationScreen extends StatelessWidget {
  @override
  Widget build(BuildContext context) {
    final paginationModel = Provider.of<PaginationModel>(context);

    return Scaffold(
      appBar: AppBar(title: Text('Pagination with Provider')),
      body: ListView.builder(
        itemCount: paginationModel.items.length + (paginationModel.isLoading ? 1 : 0),
        itemBuilder: (context, index) {
          if (index == paginationModel.items.length) {
            return Center(child: CircularProgressIndicator());
          }
          return ListTile(title: Text(paginationModel.items[index]));
        },
        controller: ScrollController()..addListener(() {
          if (!paginationModel.isLoading &&
              paginationModel.items.length - 1 == index) {
            paginationModel.fetchItems();
          }
        }),
      ),
    );
  }
}Explanation:
- PaginationModel: Manages the loading state and holds the paginated items. It also handles the logic for fetching more data as the user scrolls.
- Provider:
ChangeNotifierProvideris used to inject thePaginationModelinto the widget tree so that widgets can access and listen to changes in the pagination state. - UI: The
ListView.builderlistens to the changes in the model and triggers fetching more items when the user reaches the bottom of the list.
>> Read more: How to Use Flutter Bloc for State Management in Flutter Apps?
Error Handling and Performance Optimization
Error Handling
Handling errors in pagination, such as network failures or exceeding API rate limits, is crucial for user experience. Implement retry mechanisms and display user-friendly messages when errors occur.
Common Error Scenarios:
- Network Failures: Failures caused by lost internet connection or timeouts.
- API Rate Limits: When your API provider limits the number of requests made within a certain time frame.
- Empty Data Responses: When an API returns no data, either because there are no more items to load or due to other errors.
Example: Handling API Failures with Retry Logic
Future<void> _fetchPage(int pageKey) async {
  try {
    final newItems = await fetchItemsFromApi(pageKey);
    final isLastPage = newItems.length < _pageSize;
    if (isLastPage) {
      _pagingController.appendLastPage(newItems);
    } else {
      final nextPageKey = pageKey + newItems.length;
      _pagingController.appendPage(newItems, nextPageKey);
    }
  } catch (error) {
    _pagingController.error = error;
    // Show error UI or retry option
  }
}
In this code snippet, if an error occurs during data fetching, we catch it and pass the error to the PagingController, which will then trigger an error state in the UI. This allows you to handle errors gracefully by displaying a retry button or message.
Retry Mechanism with Exponential Backoff
In cases of network failure or exceeding API rate limits, you can implement an exponential backoff strategy, which increases the delay between retry attempts to avoid overwhelming the server with requests.
Future<void> _fetchPageWithRetry(int pageKey, int retryCount) async {
  final int delay = (pow(2, retryCount) * 1000).toInt(); // Exponential backoff delay
  try {
    await Future.delayed(Duration(milliseconds: delay));
    final newItems = await fetchItemsFromApi(pageKey);
    _pagingController.appendPage(newItems, pageKey + newItems.length);
  } catch (error) {
    if (retryCount < 5) {
      _fetchPageWithRetry(pageKey, retryCount + 1); // Retry up to 5 times
    } else {
      _pagingController.error = error; // Final error state after retries
    }
  }
}
This approach ensures that you don’t continuously retry requests when an API is down or rate-limited, allowing for more effective error handling.
Performance Optimization
Performance optimization tips include reducing memory usage by disposing of unused controllers and using caching strategies to avoid redundant data fetching.
- Dispose of Unused Controllers
Ensure that you dispose of unused ScrollController or any other controllers to free up memory when they are no longer needed:
@override
void dispose() {
  _scrollController.dispose();
  super.dispose();
}Exlanation: Disposing of controllers ensures efficient memory management by preventing memory leaks, especially when handling large datasets over extended periods of time.
- Caching Strategies to Reduce Redundant Data Fetching
Caching strategies are vital for optimizing performance in pagination, especially when dealing with large datasets. They help reduce network calls, improve load times, and provide a smoother user experience. Here are some caching techniques:
-
- In-Memory Caching:
- Store paginated data in memory, so re-fetching is unnecessary when revisiting previous pages.
- Best for short-term data or when the app remains open.
- Disk Caching:
- Store data locally on the device's storage.
- Useful for offline access or long-term data storage.
- Cache Expiry:
- Define time limits for cache validity, ensuring data is refreshed periodically.
- Helps balance between stale data and unnecessary API calls.
- Optimistic Caching:
- Assume data is available or correct during navigation, showing cached data while fetching the latest version in the background.
- Caching Packages:
- Using packages like
flutter_cache_manageror custom-built cache layers allows fine-tuned control over how and when data is cached and invalidated.
- Using packages like
- In-Memory Caching:
Example: Caching Strategy Using a Simple In-Memory Cache
You can cache fetched data to avoid redundant network calls, you can also save your data to shared preference or a local database of your choice.
Map<int, List<String>> _cache = {}; //Cache list

Future<void> fetchItems(int page) async {
  if (_cache.containsKey(page)) {
    // Use cached data
    _items = _cache[page]!;
  } else {
    // Fetch new data and cache it
    final newItems = await _fetchDataFromAPI(page);
    _cache[page] = newItems;
    _items.addAll(newItems);
  }
}
Explanation: Using a simple cache to store previously fetched pages reduces redundant API calls and optimizes performance. This ensures that you don’t fetch the same data multiple times.
Testing Pagination in Flutter
Testing ensures that your pagination logic works correctly under various scenarios. Unit tests verify the functions that fetch data, while integration tests ensure the entire pagination flow works as expected.
Unit Testing
Unit tests focus on individual components, such as pagination functions, to ensure they work as expected. For example, you can test your pagination logic (e.g., fetching data, managing state, handling errors).
Example:
void main() {
  test('should fetch more items when paginated', () {
    final paginationModel = PaginationModel();

    expect(paginationModel.items.length, 0);
    paginationModel.fetchItems();

    // Simulate delay
    Future.delayed(Duration(seconds: 2), () {
      expect(paginationModel.items.length, greaterThan(0));
    });
  });
}
In this unit test, you check that the fetchItems function adds items to the list when called.
Integration Testing
Integration tests ensure that all parts of the pagination flow, including UI and backend calls, work together as expected. These tests simulate user interaction and cover edge cases like reaching the end of the list or dealing with network failures.
Example:
void main() {
  testWidgets('should display loading indicator while fetching more data', (WidgetTester tester) async {
    await tester.pumpWidget(ChangeNotifierProvider(
      create: (context) => PaginationModel(),
      child: PaginationScreen(),
    ));

    expect(find.byType(CircularProgressIndicator), findsNothing);

    // Simulate user scrolling
    await tester.drag(find.byType(ListView), const Offset(0, -500));
    await tester.pump();

    expect(find.byType(CircularProgressIndicator), findsOneWidget);
  });
}
This test simulates scrolling in the ListView and verifies that a loading indicator appears when fetching more items.
Testing for Edge Cases
Edge cases in pagination often involve scenarios where the app behaves differently than under normal conditions. Common edge cases include reaching the end of the dataset, dealing with poor network conditions, or managing failed API requests. Below are a few key tests for such scenarios:
- End of List Handling: Test what happens when there are no more items to load, ensuring the app gracefully stops further API requests and perhaps displays a "No more data" message.
- Network Error Handling: Test how the app behaves during network errors, such as lost internet connections or server timeouts. Verify that an error message is shown, and a retry mechanism is available.
Example:
testWidgets('should display error message when fetch fails', (WidgetTester tester) async {
  final paginationModel = PaginationModel();

  await tester.pumpWidget(ChangeNotifierProvider(
    create: (_) => paginationModel,
    child: PaginationScreen(),
  ));

  paginationModel.hasError = true; // Simulate an error

  await tester.pump();

  expect(find.text('Error: Failed to load data'), findsOneWidget);
  expect(find.text('Retry'), findsOneWidget);
});
In this test, we simulate an API failure and verify that an error message ("Error: Failed to load data") and a retry button are displayed. This ensures that the user is notified of the issue and can take action to retry the operation.
Mocking API Calls
When testing API-driven pagination, you can mock the API responses to ensure the app behaves correctly when receiving different data. Libraries like mockito can help simulate API responses during testing.
Example of Mocking API Calls Using mockito:
import 'package:mockito/mockito.dart';

class MockApiService extends Mock implements ApiService {}

void main() {
  test('should fetch and append items on successful API call', () async {
    final mockApiService = MockApiService();
    final paginationModel = PaginationModel(apiService: mockApiService);

    // Mock API response
    when(mockApiService.fetchItems(page: 1)).thenAnswer((_) async => ['Item 1', 'Item 2', 'Item 3']);

    await paginationModel.fetchItems();
    expect(paginationModel.items, equals(['Item 1', 'Item 2', 'Item 3']));
  });
}
By thoroughly testing both individual components and the entire pagination flow, you can ensure that your app delivers a seamless and reliable experience to users, even under challenging conditions. Here are the importance of testing pagination:
- Data Integrity: Ensure that all pages of data are loaded and displayed correctly.
- Performance: Verify that pagination does not negatively impact performance (e.g., memory leaks, slow rendering).
- Resilience: Confirm that your pagination handles errors gracefully, providing a smooth user experience under various network conditions.
>> Read more: Making HTTP Requests in Flutter with Dio: A Step-by-Step Tutorial
Conclusion
Pagination in Flutter is a crucial concept for optimizing the performance and user experience of applications dealing with large datasets. By mastering techniques like infinite scrolling, lazy loading, and using state management solutions like Riverpod or Provider, you can build scalable and efficient applications. Always remember to handle errors gracefully and optimize performance by testing your code thoroughly.
Experiment with different techniques and packages to find the best solution for your Flutter projects.
>>> Follow and Contact Relia Software for more information!

- Mobile App Development
- development