Flutter Flame is a practical way to build small 2D games with Flutter, especially when you want more control over movement, input, collision, and game state than normal Flutter widgets provide. In this tutorial, we will build Neon Orbit, a simple one-tap survival game where the player switches between two circular orbits to avoid incoming enemies.
The game is intentionally small and asset-light. Instead of using sprites or image files, we will draw the player, enemies, and orbit effects with code. This keeps the focus on the core game logic: setting up Flame, creating components, handling tap input, moving the player with basic trigonometry, spawning enemies, detecting collisions, tracking score, and restarting the game.
By the end of this guide, you will have a working Flutter Flame game built in a single file. More importantly, you will understand how Flame’s game loop, component system, and Flutter overlays work together inside a real playable example.
What You’ll Build?
You will learn how to:
- Set up Flame in a Flutter project.
- Use
GameWidgetandFlameGame. - Create reusable game components such as
PlayerandEnemy. - Move a player around a circular path with
cos()andsin(). - Handle tap input to switch between two orbits.
- Spawn enemies over time.
- Add collision detection with
CircleHitbox. - Track score and increase difficulty.
- Show a restart button using Flutter overlays.
What is Flame?
Flame is a lightweight 2D game engine built on top of Flutter, providing the core tools that a normal Flutter app does not provide by default, such as a game loop, component system, collision detection, input handling, effects, particles, sprites, and other game-specific utilities.
For Neon Orbit, Flame will handle the continuous update cycle of the game. This means the game can keep moving the player, spawning enemies, checking collisions, and redrawing the screen many times per second.
Set Up the Flutter Flame Project
Add Flame to pubspec.yaml
Open your project's pubspec.yaml file. We are going to add the latest version of Flame. As of early 2026, Flame has matured into a powerhouse of performance, so ensure you're using a modern release to take advantage of the latest rendering optimizations.
dependencies:
  flutter:
    sdk: flutter
  # The star of the show
  flame: ^1.24.0
Initializing the Workspace
Now, let's head over to lib/main.dart. As this is a sample project for this blog and to keep it all in one place, delete everything currently in that file. We're starting from a blank canvas.
Our first lines of code involve importing the necessary Flame and Flutter libraries. We need flame/game.dart for the engine core and flutter/material.dart to bridge the gap between the game and the mobile OS.
Create the Basic Flame Game Structure
Now that Flame is installed, we can create the base structure for Neon Orbit. To the Flutter framework, a Flame game is just another widget called a GameWidget. To the game engine, however, it is a world of its own with its own lifecycle.
In this step, we are going to build the basic framework of Neon Orbit. This includes the entry point (main), the Game Class that manages the state, and placeholder classes for our components. Think of this as the "casting call" before the actors (the player and obstacles) actually take the stage.
For this tutorial, we will start with three classes:
NeonOrbitGame: The main game class. It manages the game world, player, enemies, input, score, and game state.Player: The circular player object that moves around the orbit.Enemy: The obstacle object that moves toward the player and triggers game over on collision.
// The core Game Class
class NeonOrbitGame extends FlameGame with TapCallbacks, HasCollisionDetection {
  @override
  Future<void> onLoad() async {
    // We will initialize components and background here later
  }

  @override
  void onTapDown(TapDownEvent event) {
    // We will handle orbit switching here later
  }
}

// Placeholder for the Player
class Player extends CircleComponent with CollisionCallbacks {
  Player() : super(radius: 10, anchor: Anchor.center);

  @override
  void update(double dt) {
    super.update(dt);
    // Trigonometry logic goes here later
  }
}

// Placeholder for the Obstacles
class Enemy extends CircleComponent with CollisionCallbacks {
  Enemy() : super(radius: 15, anchor: Anchor.center);

  @override
  void update(double dt) {
    super.update(dt);
  }
  // Movement logic goes here later
}
Create the Player Component
In Neon Orbit, the player does not move left, right, or jump like in a normal platform game. Instead, it moves around a fixed center point in a circular path.
To make this work, we need two things:
- an angle that increases over time;
- a radius that controls how far the player is from the center.
The player’s position is calculated from those two values on every frame. This step is where the game starts to feel alive because the player keeps moving even when the user does nothing.
Setup up how circular movement works
To place an object on a circle, we use the polar coordinate formulas. If we know the radius (r) and the angle (θ), the position is calculated as:
x = cos(θ) x r
y= sin(θ) x r
In Flame, the center of the screen isn't (0,0); that's the top-left corner. So, we calculate these offsets and add them to the center of the game canvas.
Implement the Player
We are going to update the placeholder Player class we created earlier. We'll add a speed variable to control how fast it spins and a currentAngle to track its progress. We also define the two possible radius: innerRadius and outerRadius.
class Player extends CircleComponent with HasGameRef<NeonOrbitGame>, CollisionCallbacks {
  double currentAngle = 0;
  double speed = 3.0; // Radians per second
  double targetRadius = 60.0; // Starting at inner orbit
  final double innerRadius = 60.0;
  final double outerRadius = 120.0;

  Player() : super(
    radius: 8,
    anchor: Anchor.center,
    paint: Paint()
      ..color = Colors.cyan
      ..maskFilter = const MaskFilter.blur(BlurStyle.solid, 10), // Neon glow
  );

  @override
  void update(double dt) {
    super.update(dt);
    // 1. Increase the angle over time
    currentAngle += speed * dt;
    // 2. Calculate the center of the screen
    final center = gameRef.size / 2;
    // 3. Apply the math: Position = Center + (Cos/Sin * Radius)
    position.x = center.x + Math.cos(currentAngle) * targetRadius;
    position.y = center.y + Math.sin(currentAngle) * targetRadius;
  }
}
Activate the Player
Simply defining the class isn't enough; we have to tell the game to spawn it when the game starts.
@override
Future<void> onLoad() async {
  // Add the player to the game world
  add(Player());
}
Handle Tap Input to Switch Orbits
Now the player can move around the center, but the game still has no interaction. In Neon Orbit, one tap should move the player between the inner and outer orbit.
To achieve this, we'll use Flame's TapCallbacks. Since our NeonOrbitGame class already includes this mixin, it is constantly listening for touch events. When a tap is detected, we need to tell our Player component to switch its orbit radius.
Store a Reference to the Player
In the previous step, we added the player add(Player()) to the game, but we didn't save a way to talk to it later. First, we'll create a variable to hold our player instance so the game can send it commands.
The Toggle Logic
We will implement a simple "flip-flop" logic. If the player is currently at the innerRadius, we set the targetRadius to the outerRadius, and vice-versa.
class NeonOrbitGame extends FlameGame with TapCallbacks, HasCollisionDetection {
  late Player player; // Reference to our player

  @override
  Future<void> onLoad() async {
    player = Player(); // Initialize the reference
    add(player);
  }

  @override
  void onTapDown(TapDownEvent event) {
    // Tell the player to switch orbits
    player.toggleOrbit();
  }
}

// Inside class Player...
void toggleOrbit() {
  if (targetRadius == innerRadius) {
    targetRadius = outerRadius;
  } else {
    targetRadius = innerRadius;
  }
}
By separating the input (the tap) from the action (the radius change), we keep our code clean. Right now, the switch is instantaneous. Later, if you wanted to make the player slide between orbits smoothly, you would only need to change the logic inside the Player class, the game's input handling would stay exactly the same.
Create the Enemy Component
Now the player can switch between two orbits, but there is still nothing to avoid. To make Neon Orbit feel like a real survival game, we need enemies.
In this game, enemies will spawn outside the visible play area and move toward the center of the screen. The player must switch between the inner and outer orbit to avoid them.
Each enemy needs three main values:
speedto control how fast it moves;directionto tell it where to move;radiusandcolorto make enemies visually different.
Implement the Enemy Logic
We fill in the Enemy class. It needs to know which orbit it is targeting so it can be positioned correctly. We'll also give it a velocity so it knows how fast to move toward the center.
Update the Enemy class like this:
class Enemy extends CircleComponent with HasGameRef<NeonOrbitGame>, CollisionCallbacks {
  final double speed = 150.0;
  final Vector2 direction;

  Enemy({required this.direction, required double radius, required Color color})
      : super(
          radius: radius,
          anchor: Anchor.center,
          paint: Paint()
            ..color = color
            ..maskFilter = const MaskFilter.blur(BlurStyle.solid, 5),
        );

  @override
  void update(double dt) {
    super.update(dt);
    // Move towards the center
    position += direction * speed * dt;

    // Remove if it goes too far past the center
    if (position.distanceTo(gameRef.size / 2) > gameRef.size.x) {
      removeFromParent();
    }
  }
}
Spawn Enemies Over Time
Inside our NeonOrbitGame, we need a timer to consistently throw these obstacles at the player. We'll use a SpawnComponent because it handles the heavy lifting of timing and object creation.
@override
Future<void> onLoad() async {
  player = Player();
  add(player);

  // Add a spawner that runs every 1.5 seconds
  add(SpawnComponent(
    factory: (index) {
      final random = Math.Random();
      final isOuter = random.nextBool();
      final angle = random.nextDouble() * Math.pi * 2;

      // Calculate spawn point at the edge of the screen
      final center = size / 2;
      final spawnDistance = size.x;
      final spawnPos = Vector2(
        center.x + Math.cos(angle) * spawnDistance,
        center.y + Math.sin(angle) * spawnDistance,
      );

      // Calculate direction pointing towards the center
      final direction = (center - spawnPos).normalized();

      return Enemy(
        direction: direction,
        radius: isOuter ? 15 : 10,
        color: isOuter ? Colors.redAccent : Colors.orange,
      )..position = spawnPos;
    },
    period: 1.5,
    selfPositioning: true,
  ));
}
By using SpawnComponent, we do not need to manage timers manually inside the main update() loop. Flame handles the timing and creates new enemies at a fixed interval.
Each enemy calculates its own path toward the center of the screen, creating steady pressure on the player and forces them to switch between orbits at the right time to survive.
Add Collision Detection and Game Over Logic
Up until now, the player and enemies can pass through each other without anything happening. To turn this into a real game, we need collision detection.
In Flame, collision detection works by checking whether the hitboxes of two components overlap during the game loop. A component may look visible on screen, but Flame still needs a hitbox to know where its physical boundary is.
This step gives the game real stakes. We will add circular hitboxes to the player and enemies, then write the logic that ends the game when the player touches an enemy.
Add a Hitbox to the Player
A component in Flame is mainly the visual object shown on screen. To make it collide with another object, we need to add a Hitbox.
Since both the player and enemies are circles, we will use CircleHitbox. Once the hitboxes are added, Flame can detect when the player bumps into an enemy and trigger our collision logic.
We need to do three things:
- Make sure
NeonOrbitGameusesHasCollisionDetection. - Add
CircleHitboxto bothPlayerandEnemy. - Tell the player what to do when it collides with an enemy.
class Player extends CircleComponent
    with HasGameRef<NeonOrbitGame>, CollisionCallbacks {
  // ... existing variables such as currentAngle, speed, and radius values ...

  @override
  Future<void> onLoad() async {
    super.onLoad();

    // Add a circular hitbox that matches the player shape
    add(CircleHitbox());
  }

  @override
  void onCollisionStart(
    Set<Vector2> intersectionPoints,
    PositionComponent other,
  ) {
    super.onCollisionStart(intersectionPoints, other);

    if (other is Enemy) {
      // Game over logic
      gameRef.pauseEngine();
      gameRef.overlays.add('GameOver');
    }
  }

  // ... existing update and toggleOrbit code ...
}
The enemy also needs a hitbox so the player has something to collide with.
class Enemy extends CircleComponent
    with HasGameRef<NeonOrbitGame>, CollisionCallbacks {
  // ... existing constructor ...

  @override
  Future<void> onLoad() async {
    super.onLoad();

    add(CircleHitbox());
  }

  // ... existing update code ...
}
By using onCollisionStart instead of onCollision, we ensure the logic only runs once at the moment of impact. This prevents the "Game Over" code from firing sixty times a second while the circles are overlapping.
Right now, we are just pausing the engine and printing to the console. It's a bit abrupt, but it confirms the core loop is working: Survive or Restart.
Add Score, Restart UI, and Final Polish
The core gameplay now works: the player moves, enemies spawn, and collisions can end the game. The last step is to make the game feel complete.
We will add three things:
- a visual core at the center of the orbit;
- a score that increases while the player survives;
- a restart button using Flutter overlays.
Add the Orbital Core
Right now, the player is orbiting an empty void. Let's add a static "Sun" or "Core" in the center to provide a visual anchor
Add this inside onLoad() after adding the player:
@override
Future<void> onLoad() async {
  // ... existing player and spawner code ...

  // Add a central core
  add(CircleComponent(
    radius: 30,
    anchor: Anchor.center,
    position: size / 2,
    paint: Paint()
      ..color = Colors.white.withOpacity(0.2)
      ..maskFilter = const MaskFilter.blur(BlurStyle.solid, 20),
  ));
}
Add Scoring and Dynamic Difficulty
We want the score to increase the longer the player survives. We'll also increase the player's rotation speed as the score goes up:
Speed = BaseSpeed + (Score x 0.05)
double score = 0;

@override
void update(double dt) {
  super.update(dt);
  if (!paused) {
    score += dt * 10; // 10 points per second
    player.speed = 3.0 + (score * 0.05);
  }
}
Add the Restart Overlay
A game should not end with a console message. When the player loses, we will show a restart button on top of the Flame canvas.
We will trigger a "Game Over" overlay. We need to modify our main() function to register this UI.
void main() {
  runApp(
    GameWidget(
      game: NeonOrbitGame(),
      overlayBuilderMap: {
        'GameOver': (context, NeonOrbitGame game) {
          return Center(
            child: ElevatedButton(
              onPressed: () => game.restart(),
              child: const Text('RESTART'),
            ),
          );
        },
      },
    ),
  );
}
Add the restart method to NeonOrbitGame:
void restart() {
  score = 0;
  overlays.remove('GameOver');
  children.whereType<Enemy>().forEach((e) => e.removeFromParent());
  resumeEngine();
}
Update Player.onCollisionStart to trigger the UI:
if (other is Enemy) {
gameRef.pauseEngine();
gameRef.overlays.add('GameOver'); // Shows the Flutter button
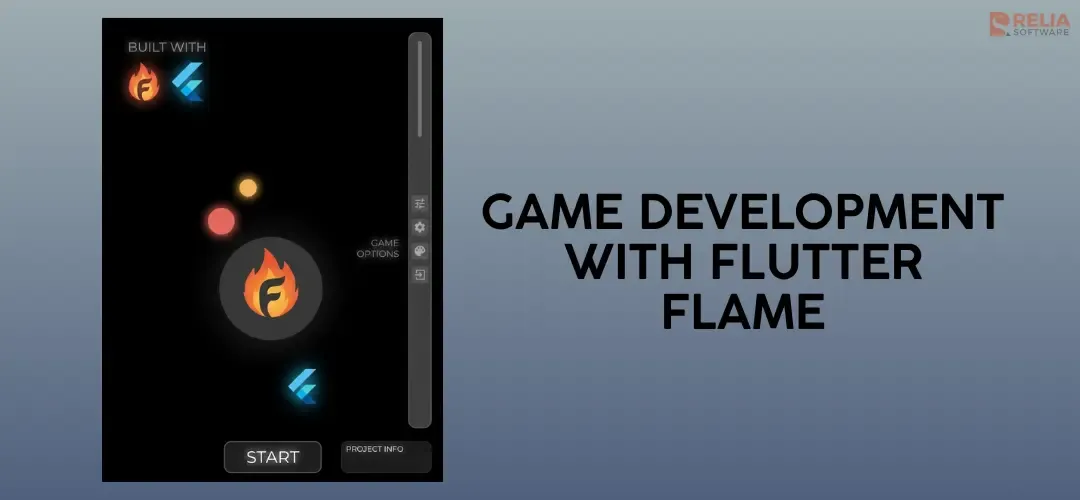
}Now let's look at our result:
Conclusion
Congratulations! You’ve just transformed a blank main.dart file into a fully functional, high-octane arcade game. In just a few hundred lines of code, we’ve bridged the gap between standard UI development and the high-performance world of game engines.
Through the lens of Neon Orbit, we explored the fundamental pillars of game development:
- The Game Loop: Managing state updates and rendering at 60 frames per second.
- Spatial Mathematics: Using trigonometry to move beyond simple linear grids.
- Component-Based Architecture: Organising our logic into modular, reusable pieces like the Player and Enemy.
- Hybrid Rendering: Seamlessly layering Flutter’s powerful UI widgets over Flame’s hardware-accelerated canvas.

- coding
- Mobile App Development