
Right now, tools like Claude and other AI models are very good at understanding what users want through conversation. However, they don’t work smoothly with image generation tools.
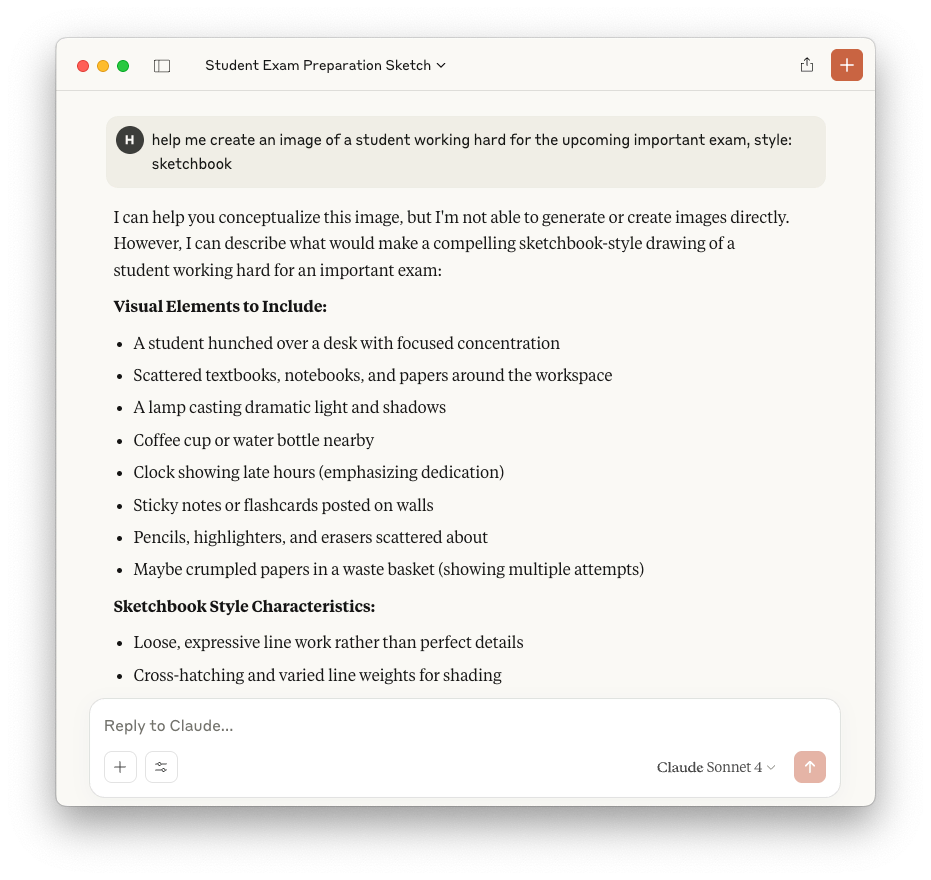
If a user wants to create an image with AI, they often have to switch to a different tool just for that. This switch can cause the chat to lose track of the conversation, and the user has to explain everything again in a new prompt. Even then, it can be hard to get the image just right without trying several times.
Our goal is to fix this problem by building one simple tool that keeps the conversation going, whether the user is asking for text or images, without losing context or making them repeat themselves.
In this tutorial, the expected output is an Model Context Protocol (MCP) which can generate the images based on the user query and be used directly in Claude, Cursor, or other AI tools which integrate MCP. The core image generation feature is powered by Google’s Gemini model, which offers strong vision capabilities even on its free plan.
Prerequisites
In order to set up and use MCP, you must already have installed the following apps in your machine.
- The latest version of Python;
- The latest version of uv (https://docs.astral.sh/uv/) to manage the project;
- An IDE (Visual Studio Code or Cursor or etc.) to help you write code and define the MCP tools of your choice.
- Claude (you can follow the download instructions here: https://claude.ai/download)
- Google Gemini API key. You can sign up for your own API key here: https://aistudio.google.com/apikey
Set Up a Development Environment
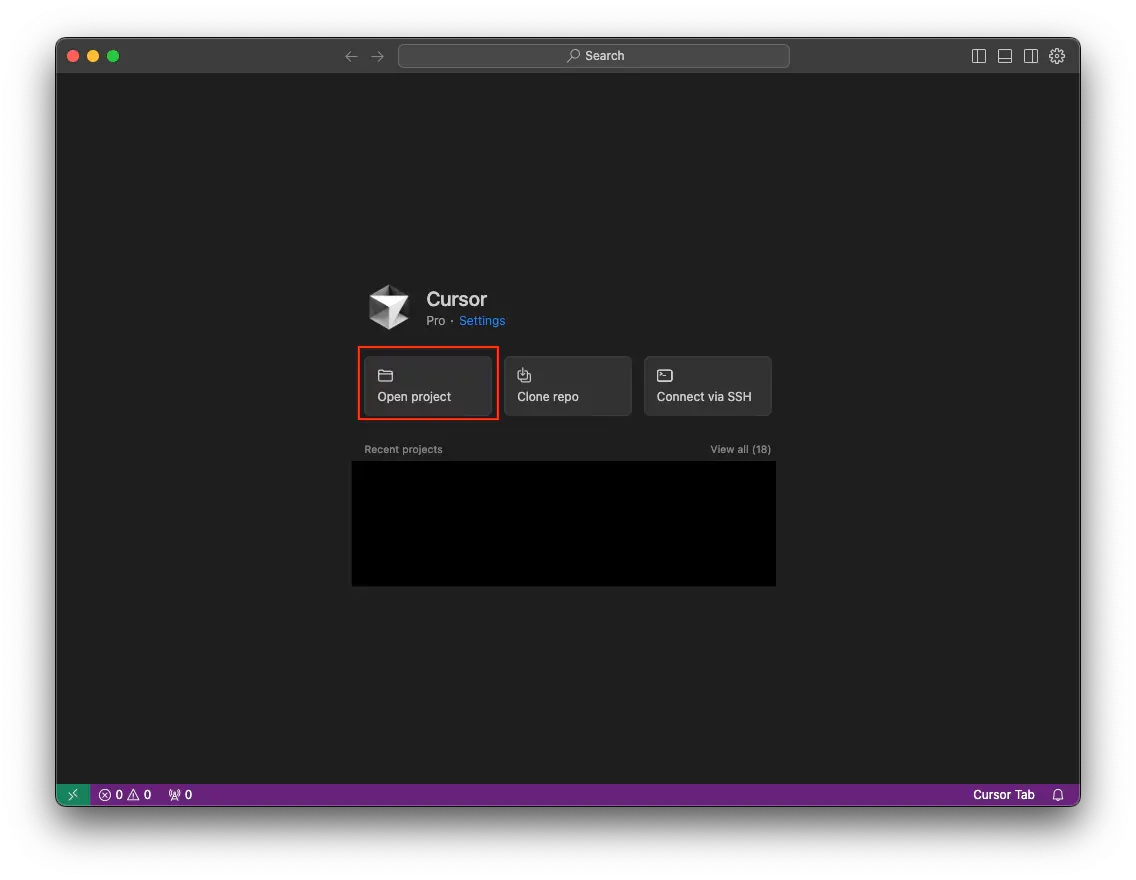
- Open your favorite IDE. In my case, I open Cursor. Then, create a new project by clicking on the button “
Open project”.
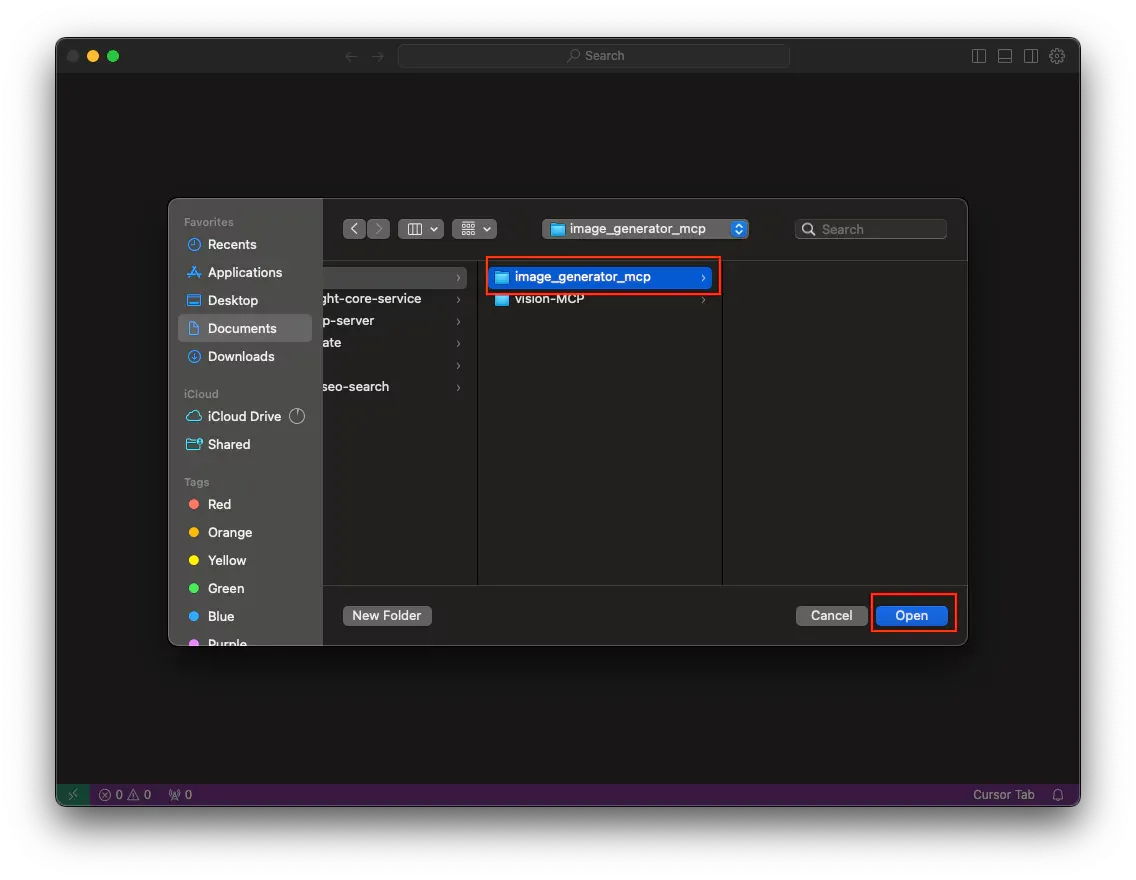
- Create a new directory and continue to click on the “Open” button.
- Now create the file
.envto store your API key which is crucial for the task of generating images in some next steps.
In terms of the GOOGLE_API_KEY, you can sign up an account and get your own API key in this URL https://aistudio.google.com/apikey Gemini offers a free plan, making it easy to experiment with image generation without hitting usage limits too quickly.
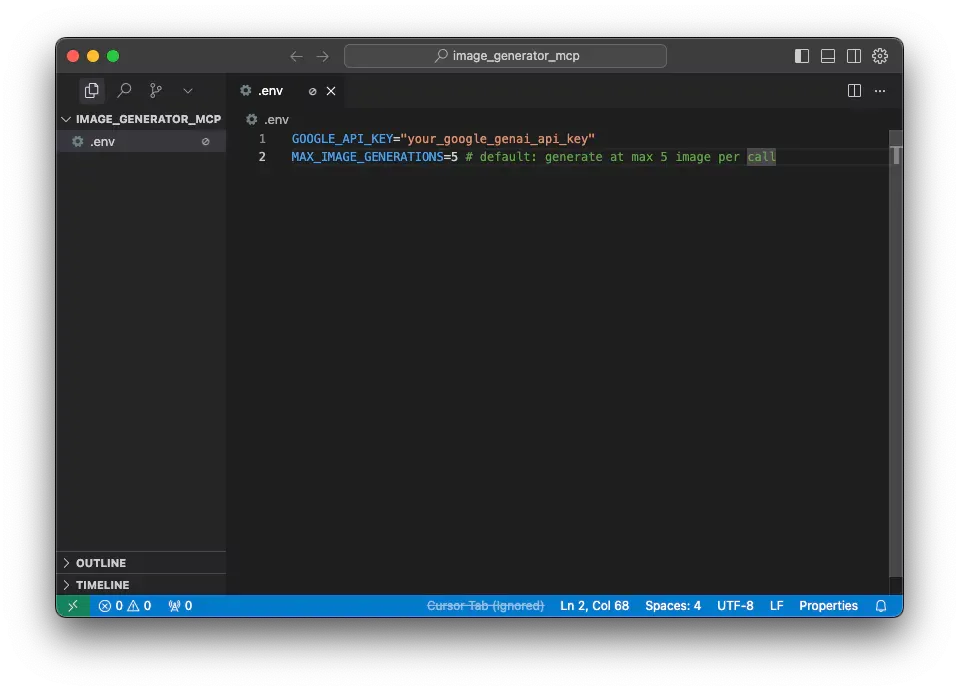
# .env
GOOGLE_API_KEY="your_google_genai_api_key"
MAX_IMAGE_GENERATIONS=5 # default: generate at max 5 image per call
- Create a file
environment.ymlto set the necessary dependencies for this project.
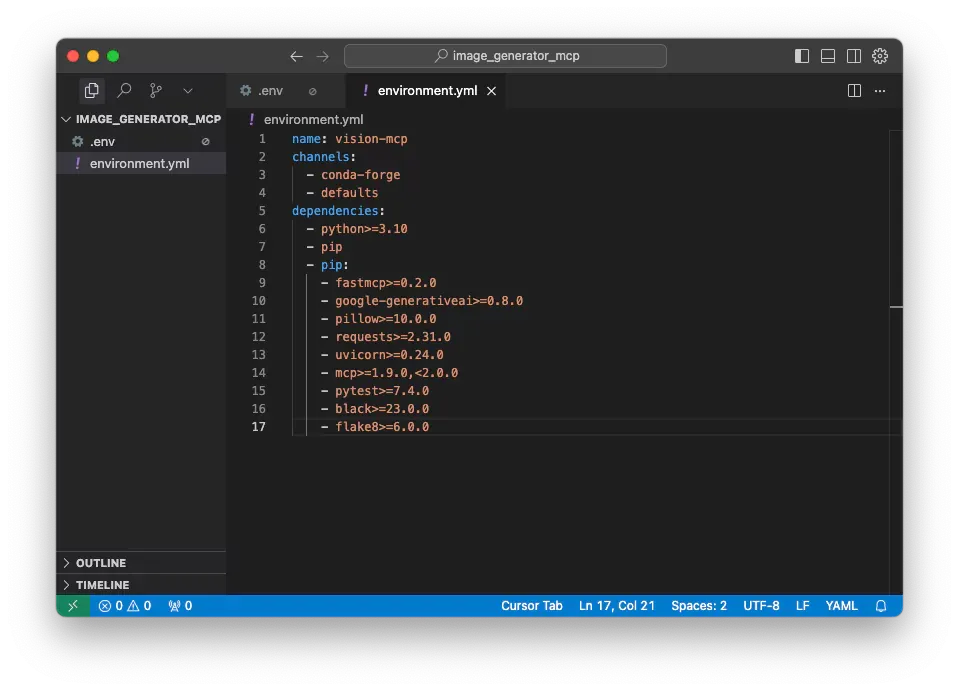
# environment.yml
name: image-generator-mcp
channels:
  - conda-forge
  - defaults
dependencies:
  - python>=3.10
  - pip
  - pip:
    - fastmcp>=0.2.0
    - google-generativeai>=0.8.0
    - pillow>=10.0.0
    - requests>=2.31.0
    - uvicorn>=0.24.0
    - mcp>=1.9.0,<2.0.0
    - pytest>=7.4.0
    - black>=23.0.0
    - flake8>=6.0.0
- Create a Conda environment and install the dependencies
Navigate to the top menu of Terminal, go to select Terminal and choose New Terminal.
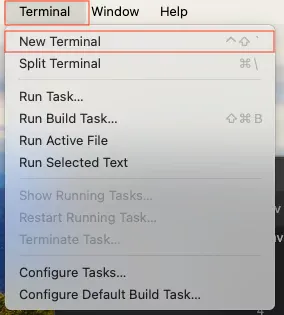
Run the following code in the terminal to create a new Conda environment for this project.
conda env create -f environment.yml
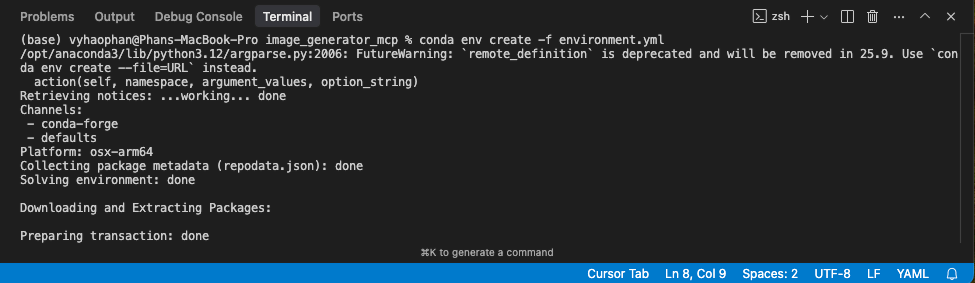
Wait a second to see that it has successfully set up an environment. In my case, a new environment named image-generator-mcp has been installed.
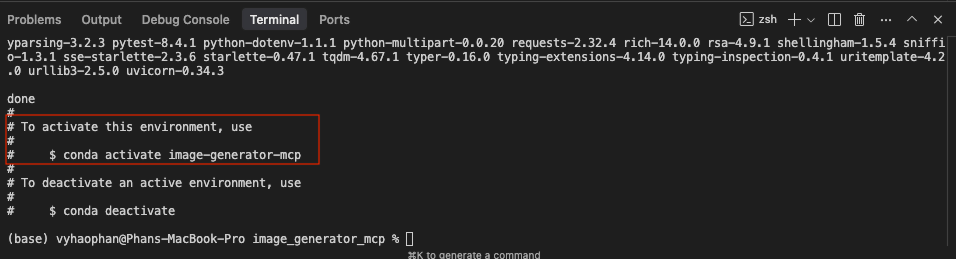
Following this instruction, run the code below to activate the environment.
conda activate image-generator-mcp
Create Response Format for the MCP Tool
Create a file utils.py which contains the functions formatting our response to the MCP-friendly format.
from typing import Dict, Any

def format_error_response(error: Exception) -> Dict[str, Any]:
    """Format error response for MCP tools."""
    return {
        "error": True,
        "message": str(error),
        "type": type(error).__name__
    }

def format_success_response(data: Any, message: str = "Success") -> Dict[str, Any]:
    """Format success response for MCP tools."""
    return {
        "error": False,
        "message": message,
        "data": data
    }

Create A Primary Utility File for LLM Functions
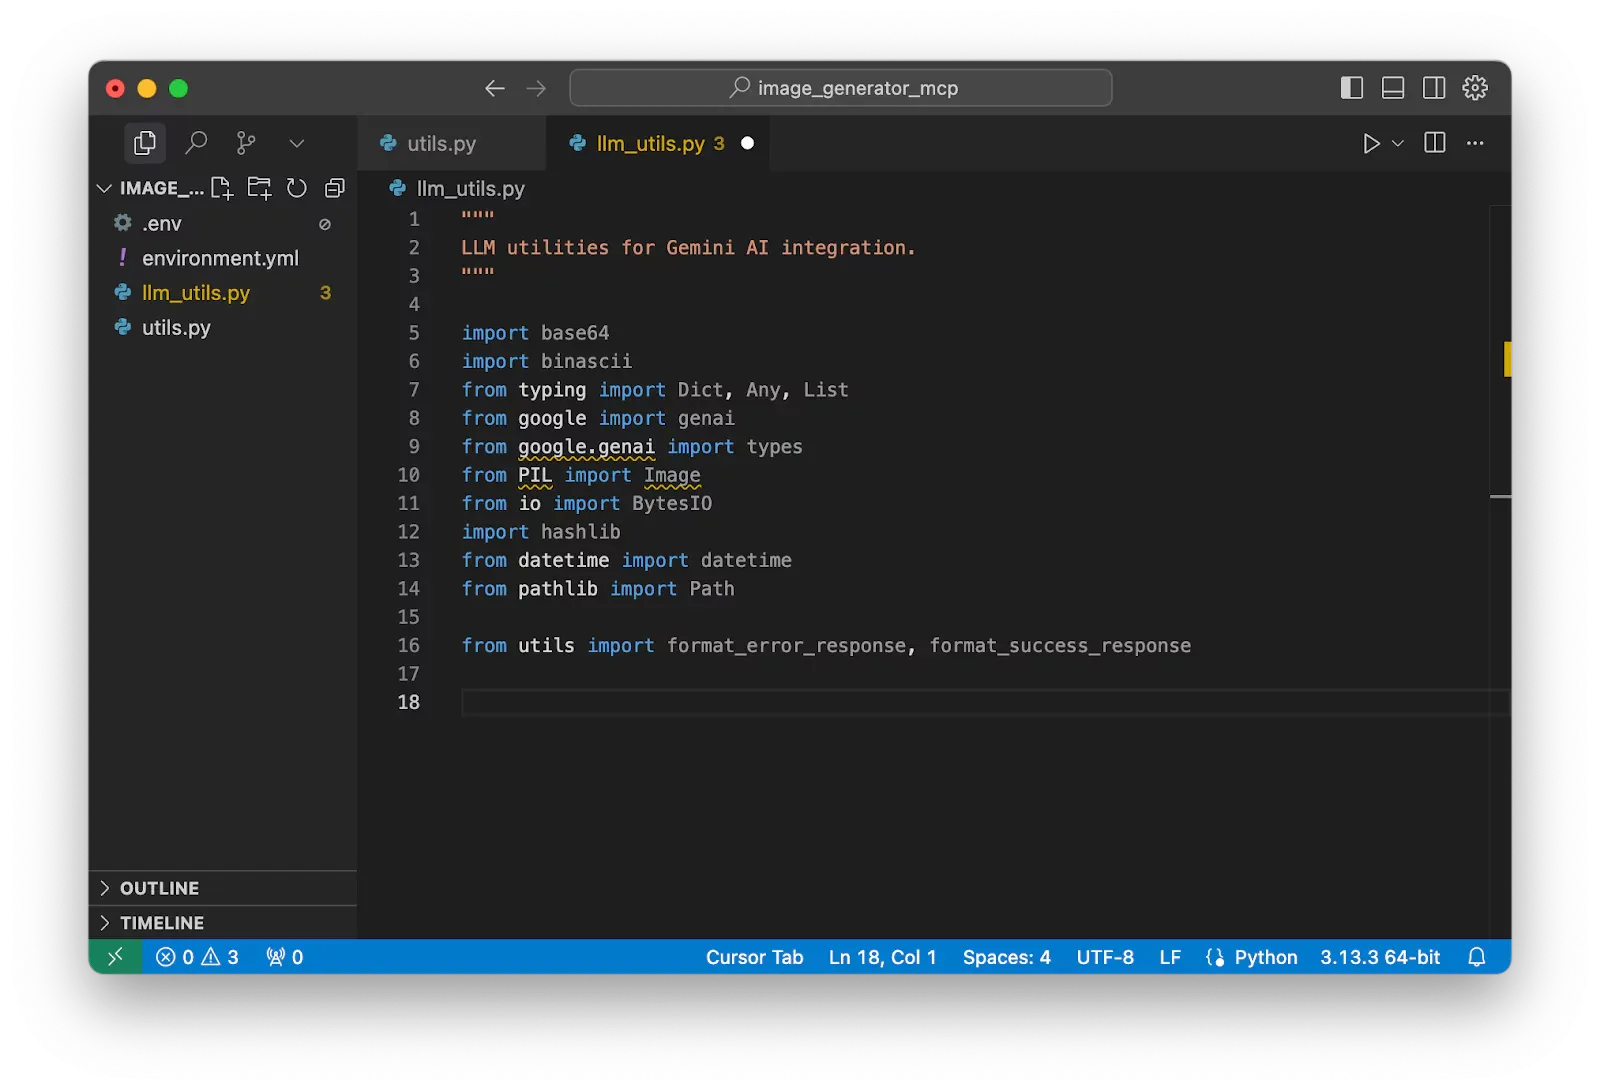
Now let’s create another file named llm_utils.py.
For better managing the code, my style is to separate all code into different files with their respective features. This approach quickly saves my life when debugging or handling issues during deployment or production. It's much easier to review specific blocks of code.
After that, import some necessary packages for our target function of generating images with Gemini.
"""
LLM utilities for Gemini AI integration.
"""

import base64
import binascii
from typing import Dict, Any, List
from google import genai
from google.genai import types
from PIL import Image
from io import BytesIO
import hashlib
from datetime import datetime
from pathlib import Path
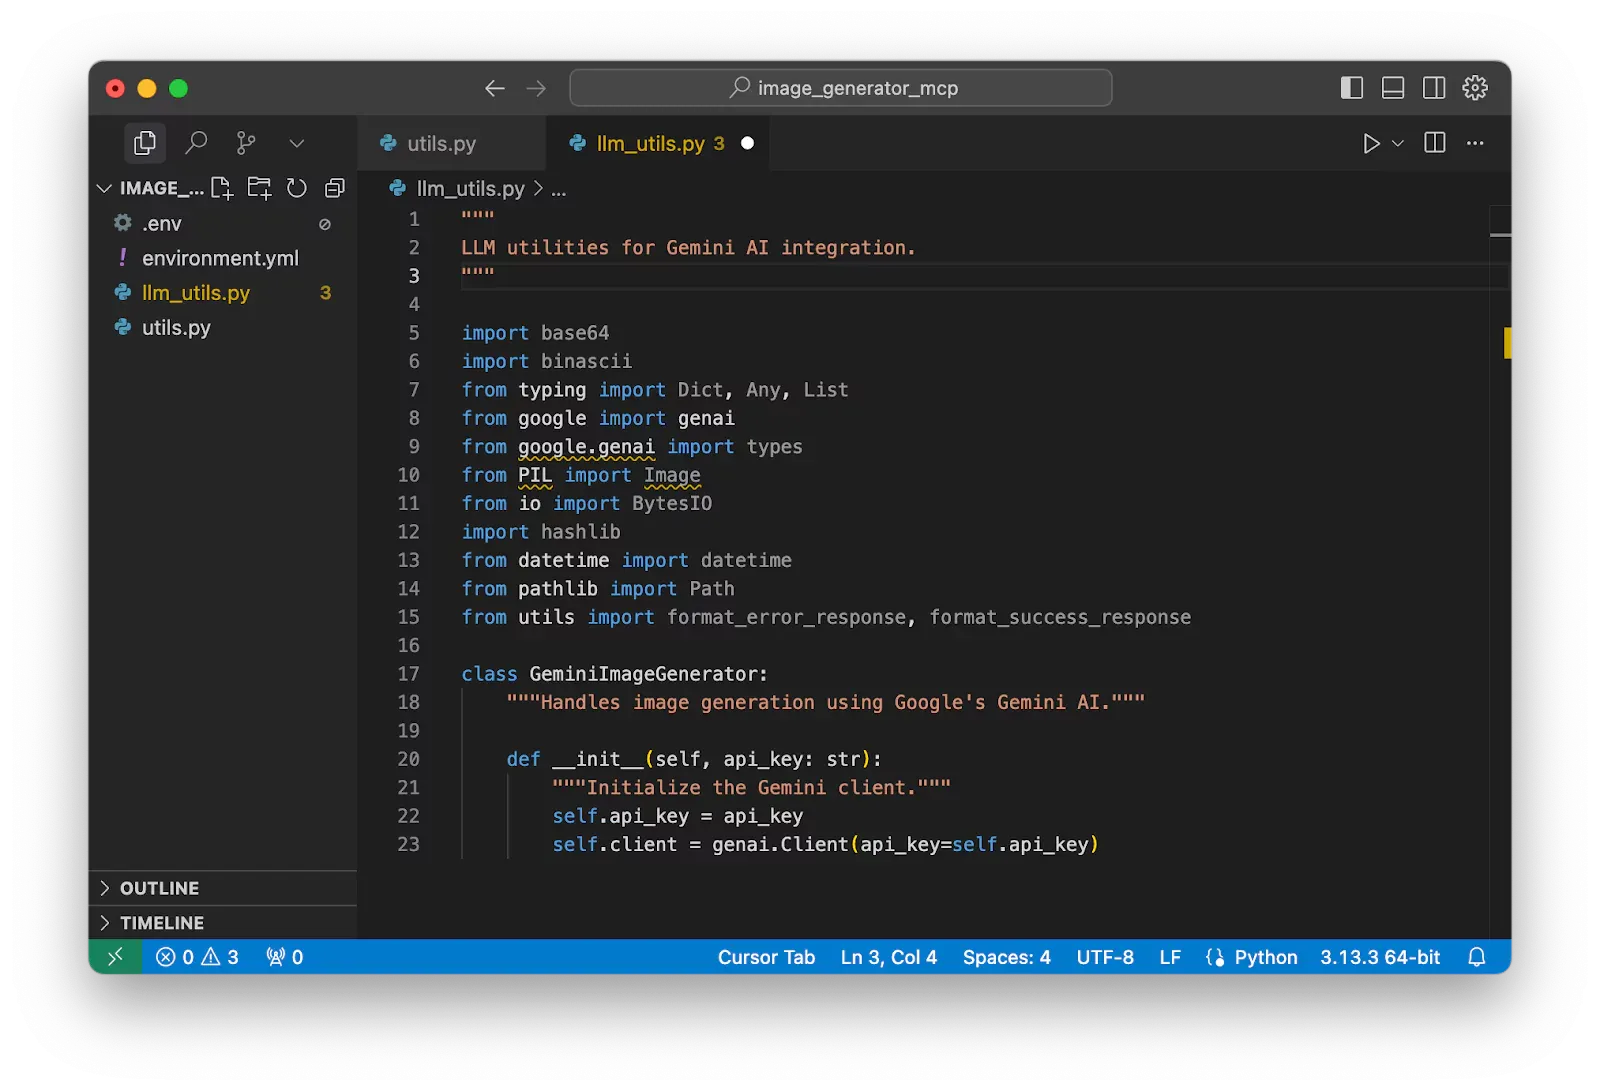
Create the main class of Gemini Generator. In this block, we have set up a class which can be initialized by using an input constructor of an API key. Then, using this API key, the class also initializes the GenAI client with genai.Client().
class GeminiImageGenerator:
    """Handles image generation using Google's Gemini AI."""

    def __init__(self, api_key: str):
        """Initialize the Gemini client."""
        self.api_key = api_key
        self.client = genai.Client(api_key=self.api_key)
Create an internal function inside this class which helps us generate images using the input prompt.
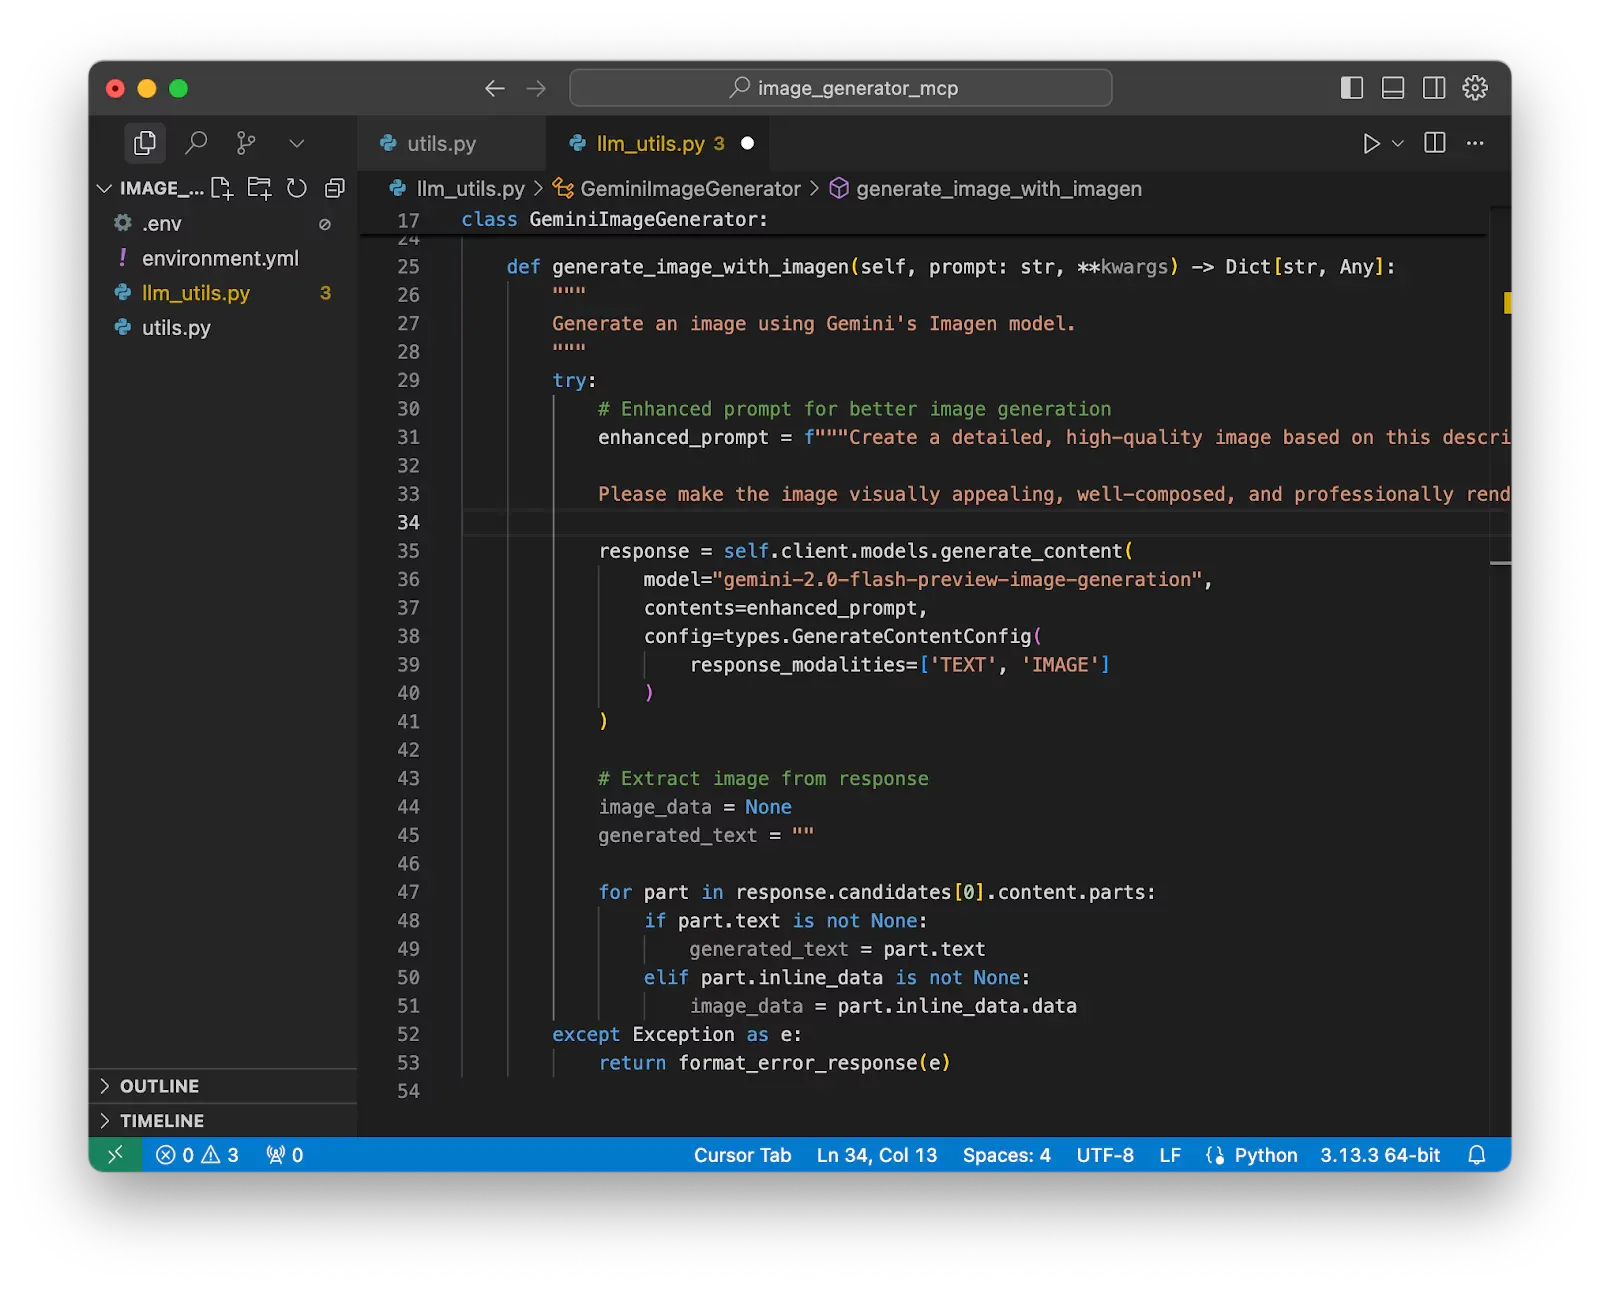
As illustrated in the following code, a new function generate_image_with_imagen has been created with a required input parameter prompt which is what the Agent will ask the MCP to generate (e.g. ‘create a picture of a beautiful singing girl’). But I have combined a little more specific guidance for the given prompt which always helps the model generate correctly and consistent the same style for all images.
You can find it free to modify the variable enhanced_prompt to fit your need and style.
For example, this is the Artistic & Creative Style which is usually preferred for marketing materials or social media content.
enhanced_prompt = f"""Create an artistic and imaginative interpretation of: {prompt}

Style it with creative flair, bold colors, and artistic composition. Think of it as a piece of art with dramatic lighting, interesting textures, and expressive details that evoke emotion and creativity."""
This is another more professional example prompt. This style is preferred for business presentations or professional portfolio, etc.
enhanced_prompt = f"""Generate a clean, professional image depicting: {prompt}

Ensure it has a business-appropriate aesthetic with clear details, neutral lighting, and a polished finish. Focus on accuracy, clarity, and a corporate-friendly appearance suitable for presentations or documentation."""
In my case, I only set up the most general prompt style which tells MCP to generate the most well-composed images.
enhanced_prompt = f"""Create a detailed, high-quality image based on this description: {prompt}
Please make the image visually appealing, well-composed, and professionally rendered."""
This prompt will be used with GenAI by using self.client.models.generate_content(). Here, we are going to use the most popular multi-modal model of Gemini: gemini-2.0-flash-preview-image-generation. This both creates text and images.
After making an API call, the generated text and image are obtained from extracting response.candidates[0].content.parts.
Remember to put the code inside a try/except code block which prevents the application from collapsing by a minor bug.
class GeminiImageGenerator:
    """Handles image generation using Google's Gemini AI."""

    def __init__(self, api_key: str):
        # remaining code ...

    def generate_image_with_imagen(self, prompt: str, **kwargs) -> Dict[str, Any]:
        """
        Generate an image using Gemini's Imagen model.
        """
        try:
            # Enhanced prompt for better image generation
            enhanced_prompt = f"""Create a detailed, high-quality image based on this description: {prompt}

            Please make the image visually appealing, well-composed, and professionally rendered."""

            response = self.client.models.generate_content(
                model="gemini-2.0-flash-preview-image-generation",
                contents=enhanced_prompt,
                config=types.GenerateContentConfig(
                    response_modalities=['TEXT', 'IMAGE']
                )
            )

            # Extract image from response
            image_data = None
            generated_text = ""


            for part in response.candidates[0].content.parts:
                if part.text is not None:
                    generated_text = part.text
                elif part.inline_data is not None:
                    image_data = part.inline_data.data
       except Exception as e:
            return format_error_response(e)
Now you successfully make the call to Gemini service and get the generated text and image. However, this is only a step in the whole workflow.
To show the image, we can store it to a temporary file and load it to the user window.
First, check if the client really generated a valid image.
if not image_data:
    # If no image data, return the text response as a successful result
    return format_success_response({
        "prompt": prompt,
        "enhanced_prompt": enhanced_prompt,
        "generated_text": generated_text,
        "note": "Gemini responded with text content only - no image data available",
        "response_type": "text_only"
    }, "Content generation completed - text response received")
Second, to save the image to a temporary file, we need to get a unique temporary name. In order to do this, we take this approach.
- Encode the prompt to bytes.
- Use a hash function to turn the prompt bytes into a unique hash string.
- Turn the hash string into a unique hexadecimal string.
- Due to the length, we take only the first 12 characters of the generated string and add to the file name besides the prefix and datetime.
# Generate unique filename based on prompt hash
prompt_hash = hashlib.md5(prompt.encode()).hexdigest()[:12]
timestamp = datetime.now().strftime("%Y%m%d_%H%M%S")
img_prefix = f"image_"
image_filename = f"{img_prefix}{timestamp}_{prompt_hash}.png"
Now having a unique image name, we should continue to check for the image type and load them by using PIL.
To ensure the valid image data bytes type, we use the package base64 to load the image string if the client returns a string.
# Ensure image_data is valid base64 encoded data
if isinstance(image_data, str):
    image_bytes = base64.b64decode(image_data)
elif isinstance(image_data, bytes):
    image_bytes = image_data
else:
    raise ValueError(f"Invalid image data type: {type(image_data)}")
Now load the image from generated bytes of the client and return the exception if any error occurs.
# Validate the image data can be opened by PIL
image_buffer = BytesIO(image_bytes)
try:
    image = Image.open(image_buffer)
    # Verify the image is valid by checking format
    image.verify()
    # Re-open for actual use (verify() closes the file)
    image_buffer.seek(0)
    image = Image.open(image_buffer)
except Exception as pil_error:
    # If PIL can't identify the image, it might not be image data
    # Return a success response without trying to display the image
                            return format_success_response({
            "prompt": prompt,
            "enhanced_prompt": enhanced_prompt,
            "generated_text": generated_text,
            "note": "Image data received but could not be processed as a valid image",
            "data_type": type(image_data).__name__,
            "data_size": len(image_bytes) if image_bytes else 0,
            "error_details": str(pil_error),
            "raw_data_sample": str(image_bytes[:100]) if image_bytes else "No data"
        }, "Content generation completed - text response available")
Save the loaded image to the temporary path.
# Save image temporarily
temp_path = Path(f"/tmp/{image_filename}")
image.save(temp_path, "PNG")
Show the image on the user window.
# Load the generated image and display in a preview window
loaded_image = Image.open(temp_path)
loaded_image.show()  # Opens the image in the default image viewer
Now you have successfully completed the task of generating and displaying the image. Then the response must be nicely formatted and returned to the Agent for it to understand that the API was successful.
return format_success_response({
    "prompt": prompt,
    "enhanced_prompt": enhanced_prompt,
    "generated_text": generated_text,
    "image_data_base64": base64.b64encode(image_bytes).decode('utf-8'),
    "image_path": str(temp_path),
    "image_dimensions": f"{image.width}x{image.height}",
    "image_format": image.format,
    "image_size_bytes": len(image_bytes),
    "loaded_image": "Image opened in preview window"
}, "Image generation request processed and displayed")
Now I will help you continue to create another file in this project.
Create the Main MCP Server Application
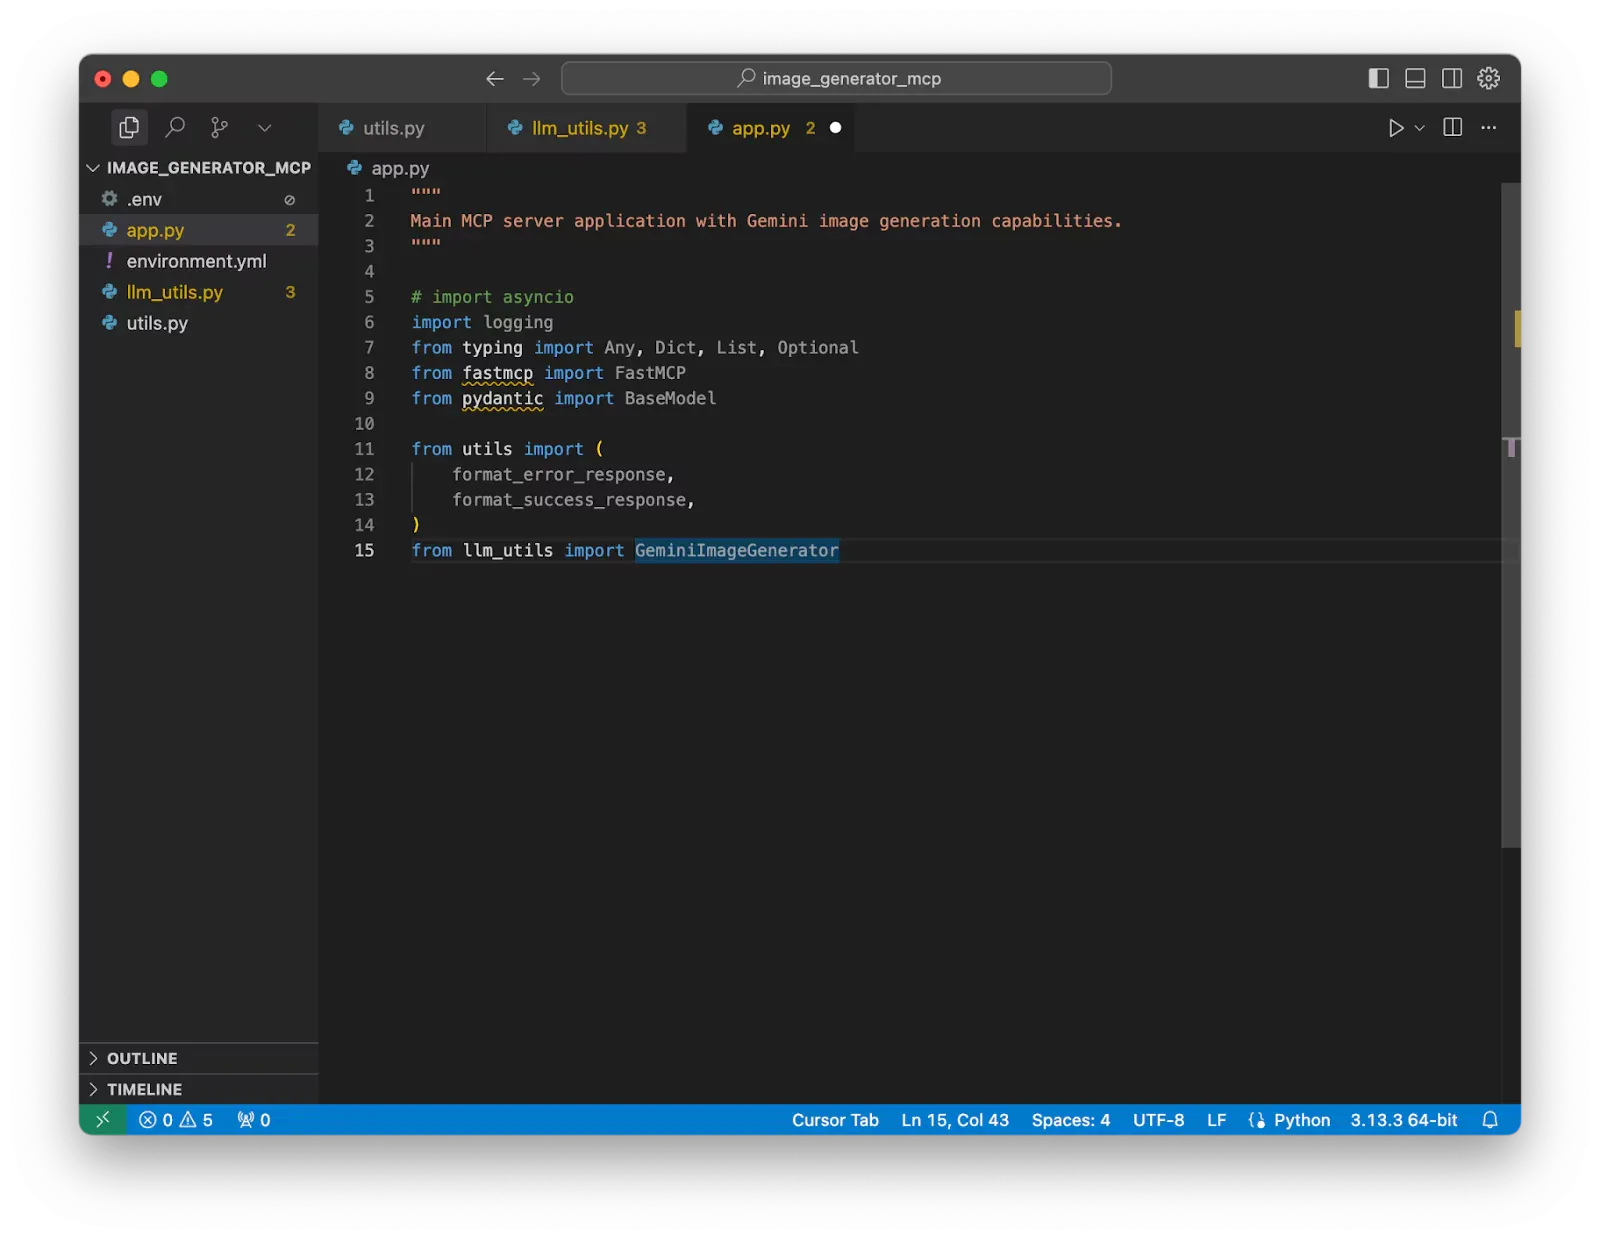
Create a new file named app.py and import some necessary packages.
"""
Main MCP server application with Gemini image generation capabilities.
"""


# import asyncio
import os
import logging
from typing import Any, Dict, List, Optional
from fastmcp import FastMCP
from pydantic import BaseModel
# Load environment variables
from dotenv import load_dotenv
load_dotenv()


from utils import (
    format_error_response,
    format_success_response,
)
from llm_utils import GeminiImageGenerator
Set up the configuration of your Logging, the image generator counter, and load the Google API key from the environment variables.
# Configure logging
logging.basicConfig(level=logging.INFO)
logger = logging.getLogger(__name__)
# Load environment variables
GOOGLE_API_KEY = os.getenv('GOOGLE_API_KEY')
# Configuration constants
MAX_IMAGE_GENERATIONS = int(os.getenv('MAX_IMAGE_GENERATIONS', 3))
# Global counter for image generation limit
_image_generation_count = 0
There’s a powerful tool that makes building MCP (Model Context Protocol) apps much faster and easier: FastMCP.
Instead of writing a lot of complex code, FastMCP lets you use simple decorators like @mcp.tool and @mcp.resource to create tools and connect them to AI models. It handles the tricky parts for you - like managing data formats, connections, and security, so you can focus on what your app should do, not how it works behind the scenes.
FastMCP is perfect for quickly building smart, AI-powered MCPs. Let’s start by importing FastMCP and setting it up:
# Initialize MCP server
mcp = FastMCP("Gemini Image Generator")

# Global generator instance
image_generator: Optional[GeminiImageGenerator] = None
To make sure that the inputs sent from the Agent to the MCP are always correct and well-structured, we can use a Pydantic model. Pydantic helps validate the data automatically and ensures that it matches the expected format. For this MCP, we can define a model like this:
# Pydantic models for tool inputs
class GenerateImageInput(BaseModel):
    prompt: str
    style: Optional[str] = None
    quality: Optional[str] = "standard"
Now we’re going to set up an MCP tool using FastMCP. You can do this by simply adding the @mcp.tool() decorator above a function. FastMCP will automatically recognize that this function should be exposed as an MCP tool.
In this example, we’ll create a function called generate_image, which takes an input of type GenerateImageInput (a Pydantic model we defined earlier). This function will process the input and return a dictionary with the result.
Here’s how it looks:
@mcp.tool()
def generate_image(input: GenerateImageInput) -> Dict[str, Any]:
    # function logic here
In this function, define the first blocks of code to check if the number of generated images has reached the allowed limit (MAX_IMAGE_GENERATIONS). If the limit is exceeded, it returns a formatted error response, preventing further image generation until the server is restarted. This helps manage resource usage and avoids overloading the image generation system.
@mcp.tool()
def generate_image(input: GenerateImageInput) -> Dict[str, Any]:
    """
    Generate an image using Gemini AI based on a text prompt.

    Args:
        prompt: The text description of the image to generate
        style: Optional style modifier (e.g., "photorealistic", "artistic", "cartoon")
        quality: Image quality setting ("standard", "high")

    Returns:
        Dictionary containing image generation result or error information
    """
    global image_generator, _image_generation_count

    # Check image generation limit
    if _image_generation_count >= MAX_IMAGE_GENERATIONS:
        return format_error_response(ValueError(
            f"Image generation limit reached. Maximum {MAX_IMAGE_GENERATIONS} images allowed per session. "
            f"Restart the server to reset the counter."
        ))
- After checking the image generation limit, the function verifies whether a valid
GOOGLE_API_KEYis configured. This key is required to use the Gemini AI image generation service. If the key is missing, the function immediately returns a formatted error response, preventing further execution. - If the API key is present, it proceeds to initialize the
GeminiImageGeneratorinstance using the provided key. This setup ensures that the image generator is only created when needed and that the service won’t run without proper authentication.
@mcp.tool()
def generate_image(input: GenerateImageInput) -> Dict[str, Any]:
    # ...
   if not GOOGLE_API_KEY:
        return format_error_response(ValueError("Google API key not configured"))
    image_generator = GeminiImageGenerator(GOOGLE_API_KEY)
- After initializing the Image Generator Engine, let’s get the prompt from Agent input. Moreover, if the Agent tells the specific image style, we could combine the style into a unified prompt.
- After initializing the Image Generator Engine, let’s get the prompt from Agent input. Moreover, if the Agent tells the specific image style, we could combine the style into a unified prompt.
@mcp.tool()
def generate_image(input: GenerateImageInput) -> Dict[str, Any]:
    ...
    # Get the prompt
    enhanced_prompt = input.prompt
    # Enhance prompt with style if provided
    if input.style:
        enhanced_prompt = f"{input.prompt}, in {input.style} style"
- Now we will step into the most important core function. This will be the call to the function
generate_image_with_imagenwhich is responsible for generating for us a successful image based on our request. - The returned result is assigned to a variable ‘
result’.
@mcp.tool()
def generate_image(input: GenerateImageInput) -> Dict[str, Any]:
    ...
    # Generate image
    result = image_generator.generate_image_with_imagen(
        enhanced_prompt,
        quality=input.quality
    )
- After that, to check if this processing was successful, we get the boolean value from the key ‘
error’ from the return result dictionary. If the result returned the pairerror: False, this would mean the core generation function had successfully generated the images. - Update the generation counter to prevent the Agent from abusing this MCP by consistently generating unlimited images for the session.
@mcp.tool()
def generate_image(input: GenerateImageInput) -> Dict[str, Any]:
    ...
    # Increment counter only if generation was successful
    if result.get('error', True) == False:
        _image_generation_count += 1
        # Add generation count info to the result
        if 'result' in result and isinstance(result['result'], dict):
            result['result']['generation_count'] = _image_generation_count
            result['result']['remaining_generations'] = MAX_IMAGE_GENERATIONS - _image_generation_count
        logger.info(f"Image generated successfully. Count: {_image_generation_count}/{MAX_IMAGE_GENERATIONS}")
    return result
- You have successfully set up your core MCP server file. There is one more suggestion: you should put the code inside a try/except block for better error handling and preventing the server from collapsing by any bug.
- Finally, to make this file truly become a core MCP server, we have to run this MCP server as a local server host. I would go for the default transport method of the MCP functionality. You can find out more about it here: https://modelcontextprotocol.io/docs/concepts/transports#python-client
if __name__ == "__main__":
    mcp.run(
        transport="stdio"
    )
The following is the full version of the code.
@mcp.tool()
def generate_image(input: GenerateImageInput) -> Dict[str, Any]:
    """
    Generate an image using Gemini AI based on a text prompt.

    Args:
        prompt: The text description of the image to generate
        style: Optional style modifier (e.g., "photorealistic", "artistic", "cartoon")
        quality: Image quality setting ("standard", "high")

    Returns:
        Dictionary containing image generation result or error information
    """
    try:
        global image_generator, _image_generation_count

        # Check image generation limit
        if _image_generation_count >= MAX_IMAGE_GENERATIONS:
            return format_error_response(ValueError(
                f"Image generation limit reached. Maximum {MAX_IMAGE_GENERATIONS} images allowed per session. "
                f"Restart the server to reset the counter."
            ))

        if not GOOGLE_API_KEY:
            return format_error_response(ValueError("Google API key not configured"))
        image_generator = GeminiImageGenerator(GOOGLE_API_KEY)

        # Get the prompt
        enhanced_prompt = input.prompt
        # Enhance prompt with style if provided
        if input.style:
            enhanced_prompt = f"{input.prompt}, in {input.style} style"

        # Generate image
        result = image_generator.generate_image_with_imagen(
            enhanced_prompt,
            quality=input.quality
        )

        # Increment counter only if generation was successful
        if result.get('error', True) == False:
            _image_generation_count += 1
            # Add generation count info to the result
            if 'result' in result and isinstance(result['result'], dict):
                result['result']['generation_count'] = _image_generation_count
                result['result']['remaining_generations'] = MAX_IMAGE_GENERATIONS - _image_generation_count

            logger.info(f"Image generated successfully. Count: {_image_generation_count}/{MAX_IMAGE_GENERATIONS}")
        return result

    except Exception as e:
        logger.error(f"Error generating image: {str(e)}")
        return format_error_response(e)
if __name__ == "__main__":
    mcp.run(
        transport="stdio"
)- Now we move to the next step which is integration with Claude.
Claude Setup
To continue, please check if your device has a working version of Claude Desktop. You can try opening the application and ask for some general information such as the weather.

Then you know that your Claude application is working properly.
To check or edit the MCP configuration:
- On macOS: Go to the Claude menu in the top bar → Click Settings.
- On Windows: Click the gear icon in the top-right corner of the Claude app window → Then select Settings from the dropdown menu.
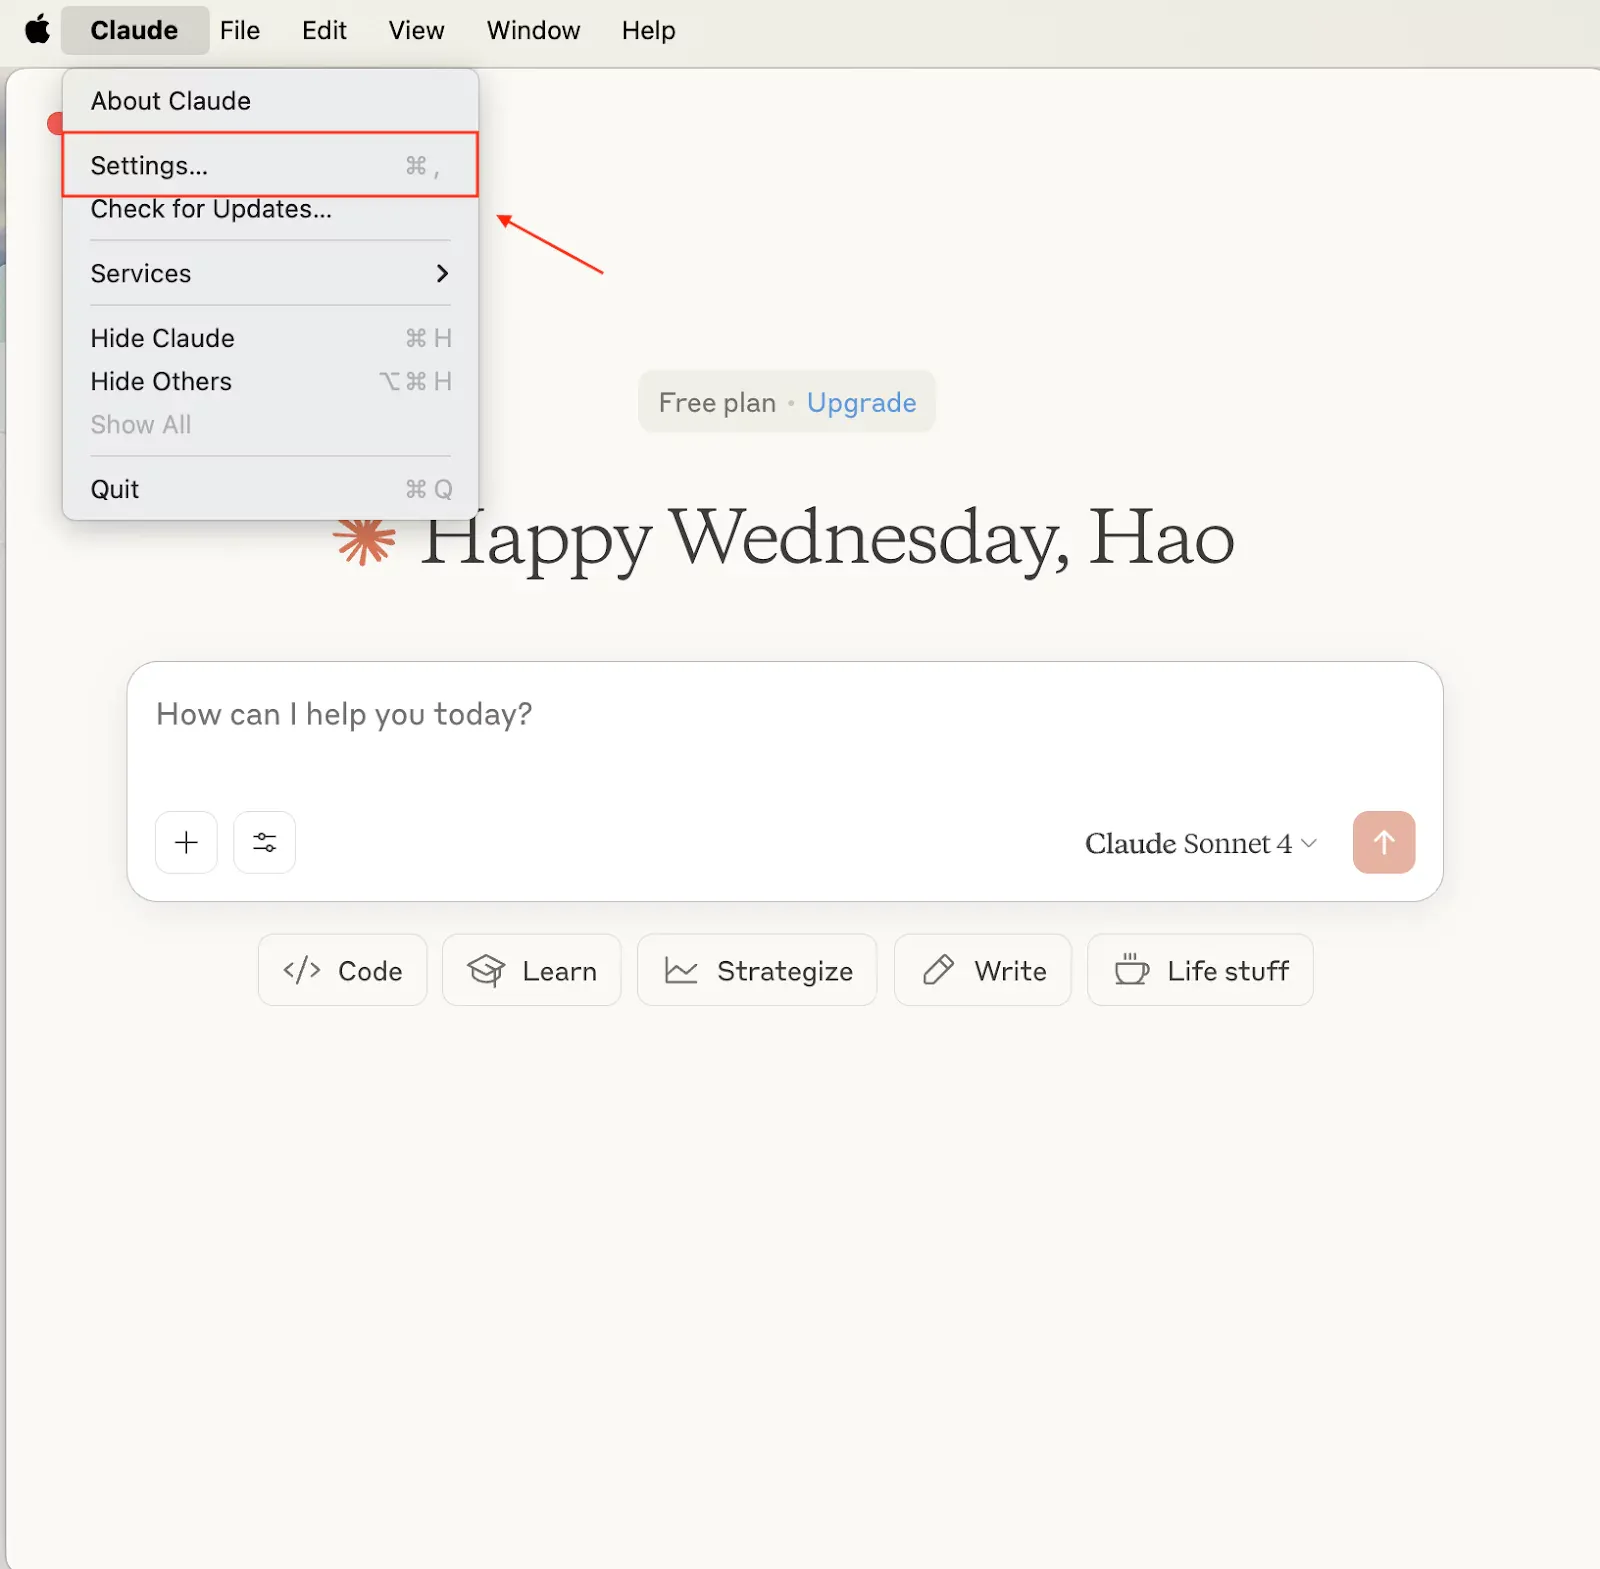
Once you're in Settings, switch to the Developer tab and click Edit Config to configure your MCP.
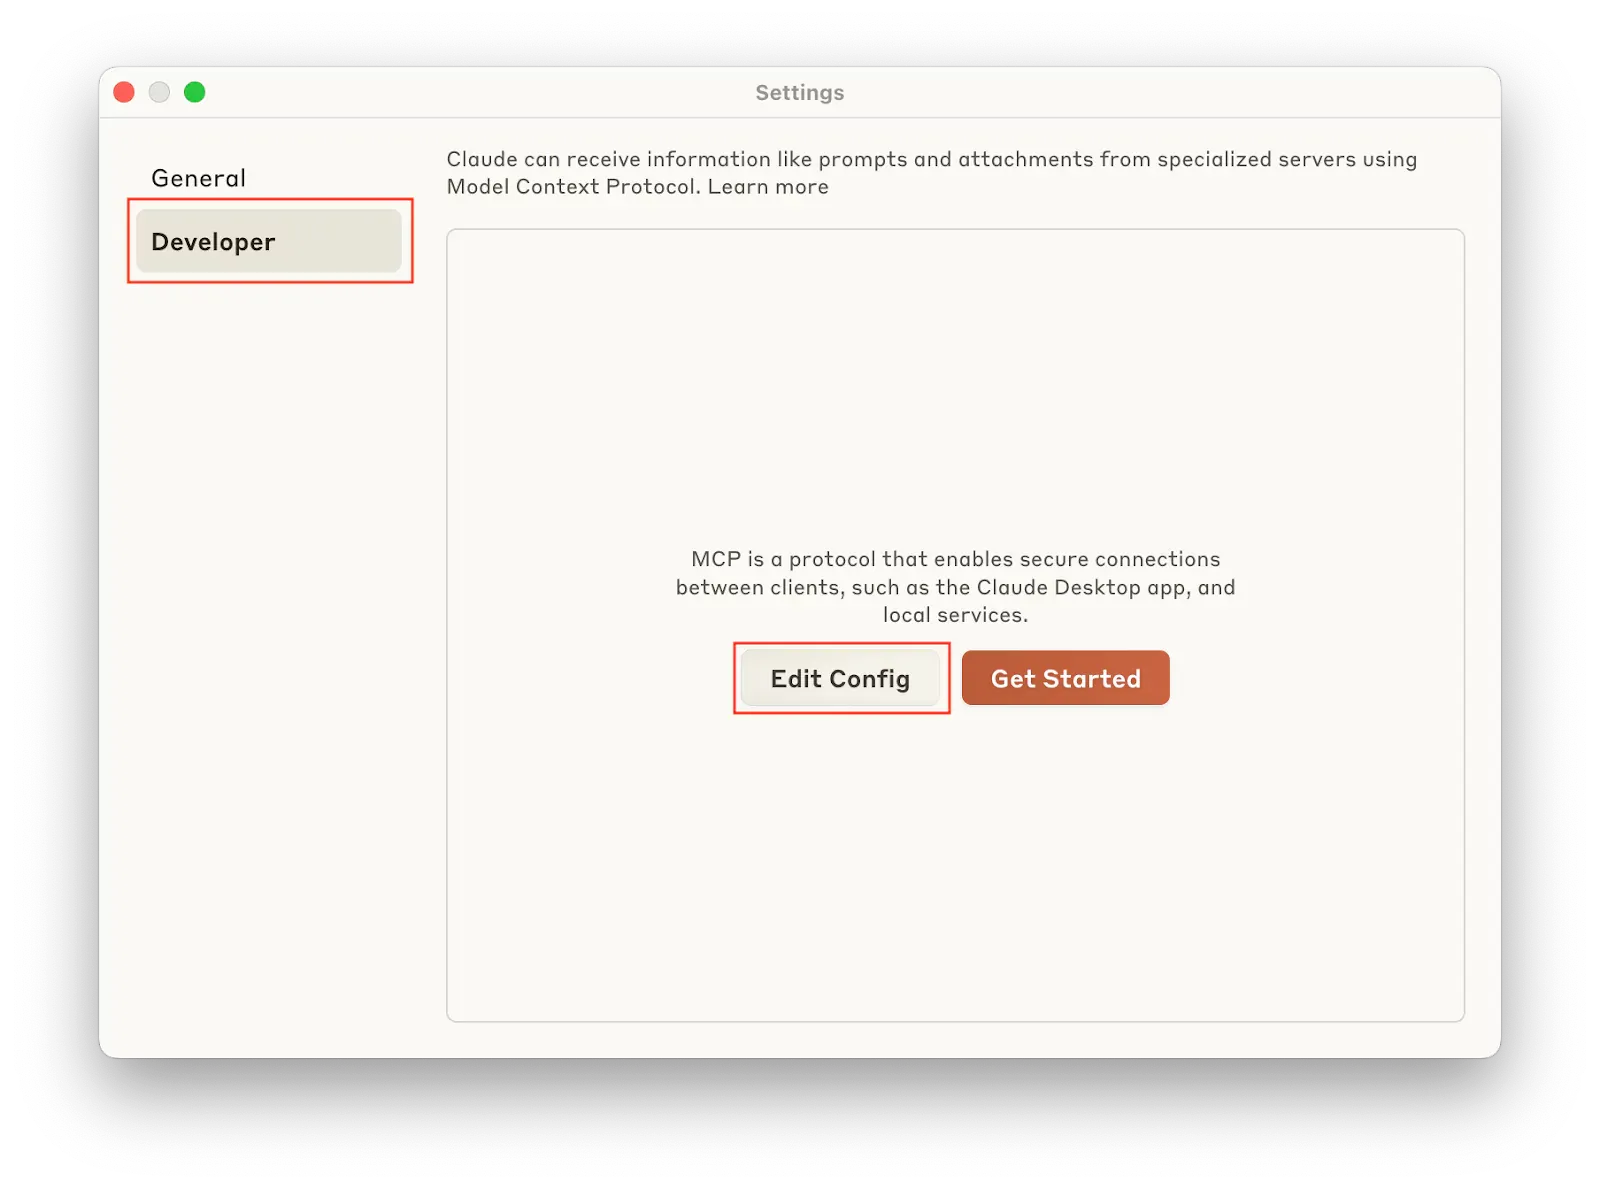
This button opens a new window where Claude is located, the file which contains all the configuration information shows up with highlights as well.
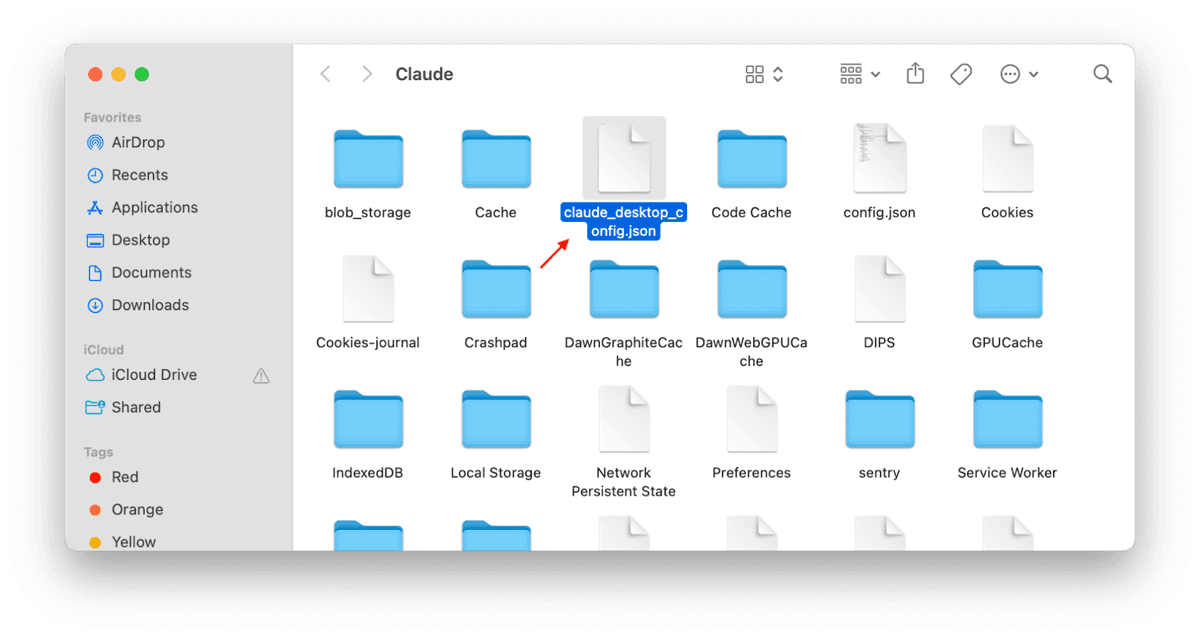
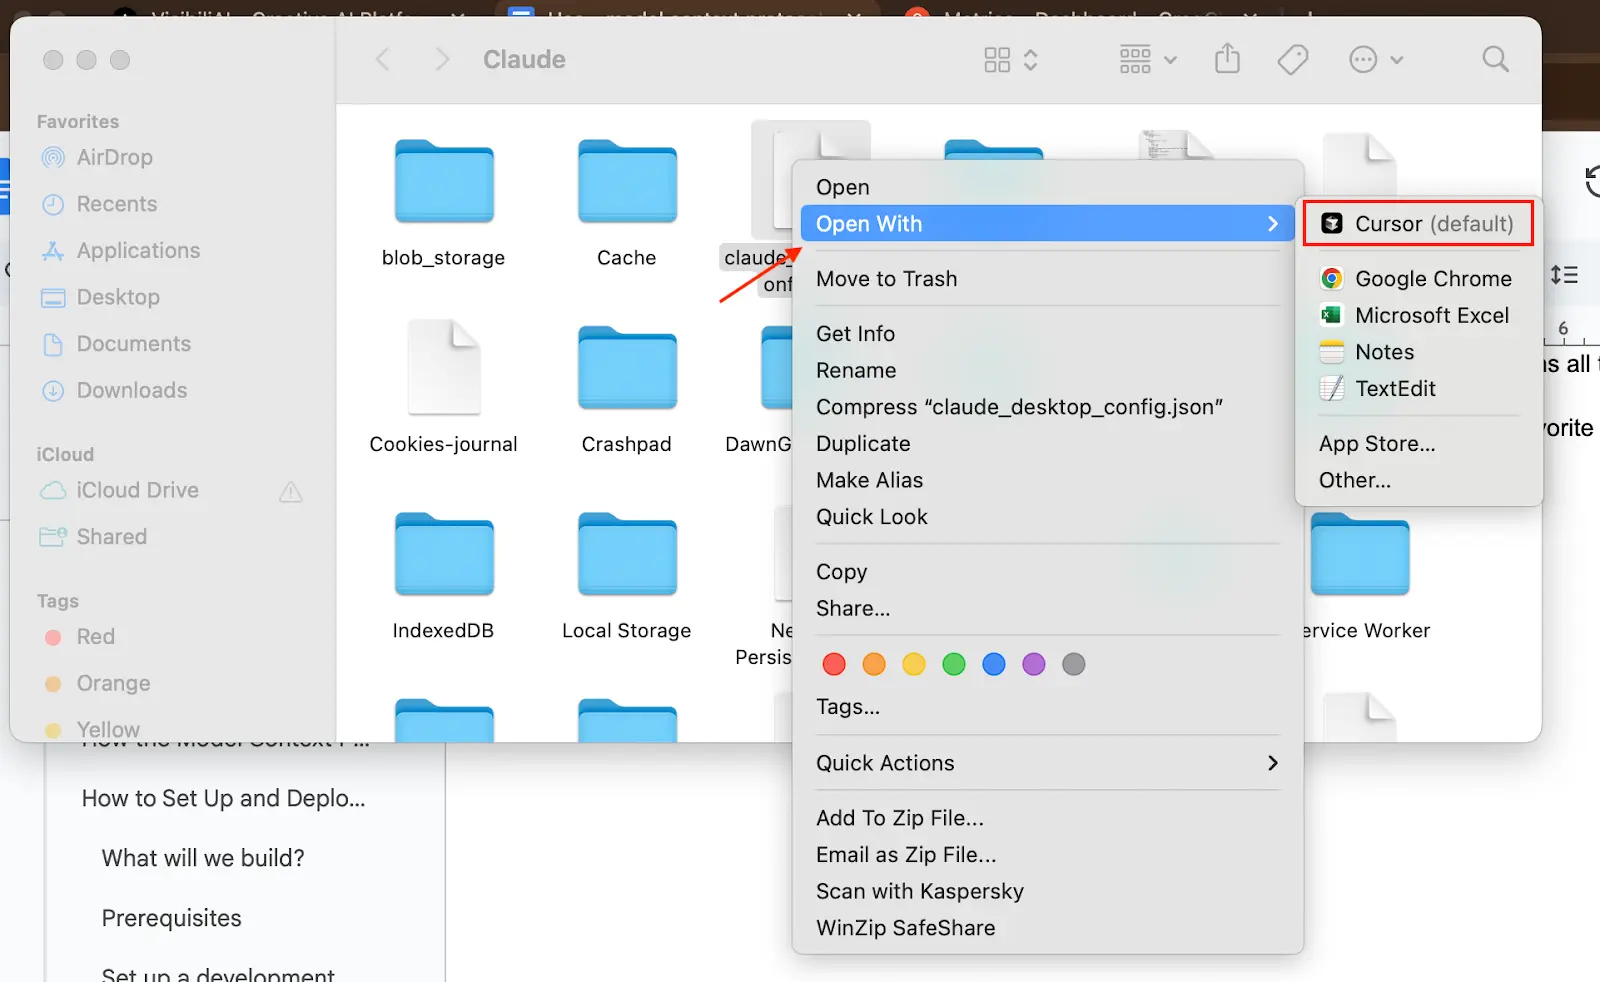
Now you should click to open this file. You can open this file with any of your favorite editor applications, e.g. Visual Studio Code, Cursor, Text Editor, Notepad. In my case, I will open it with Cursor.
>> Explore more:
- Cursor vs Copilot: Which is A Better AI-Powered Coding Tool?
- Tabnine vs Copilot: Which is A Better AI-Driven Coding Tool?
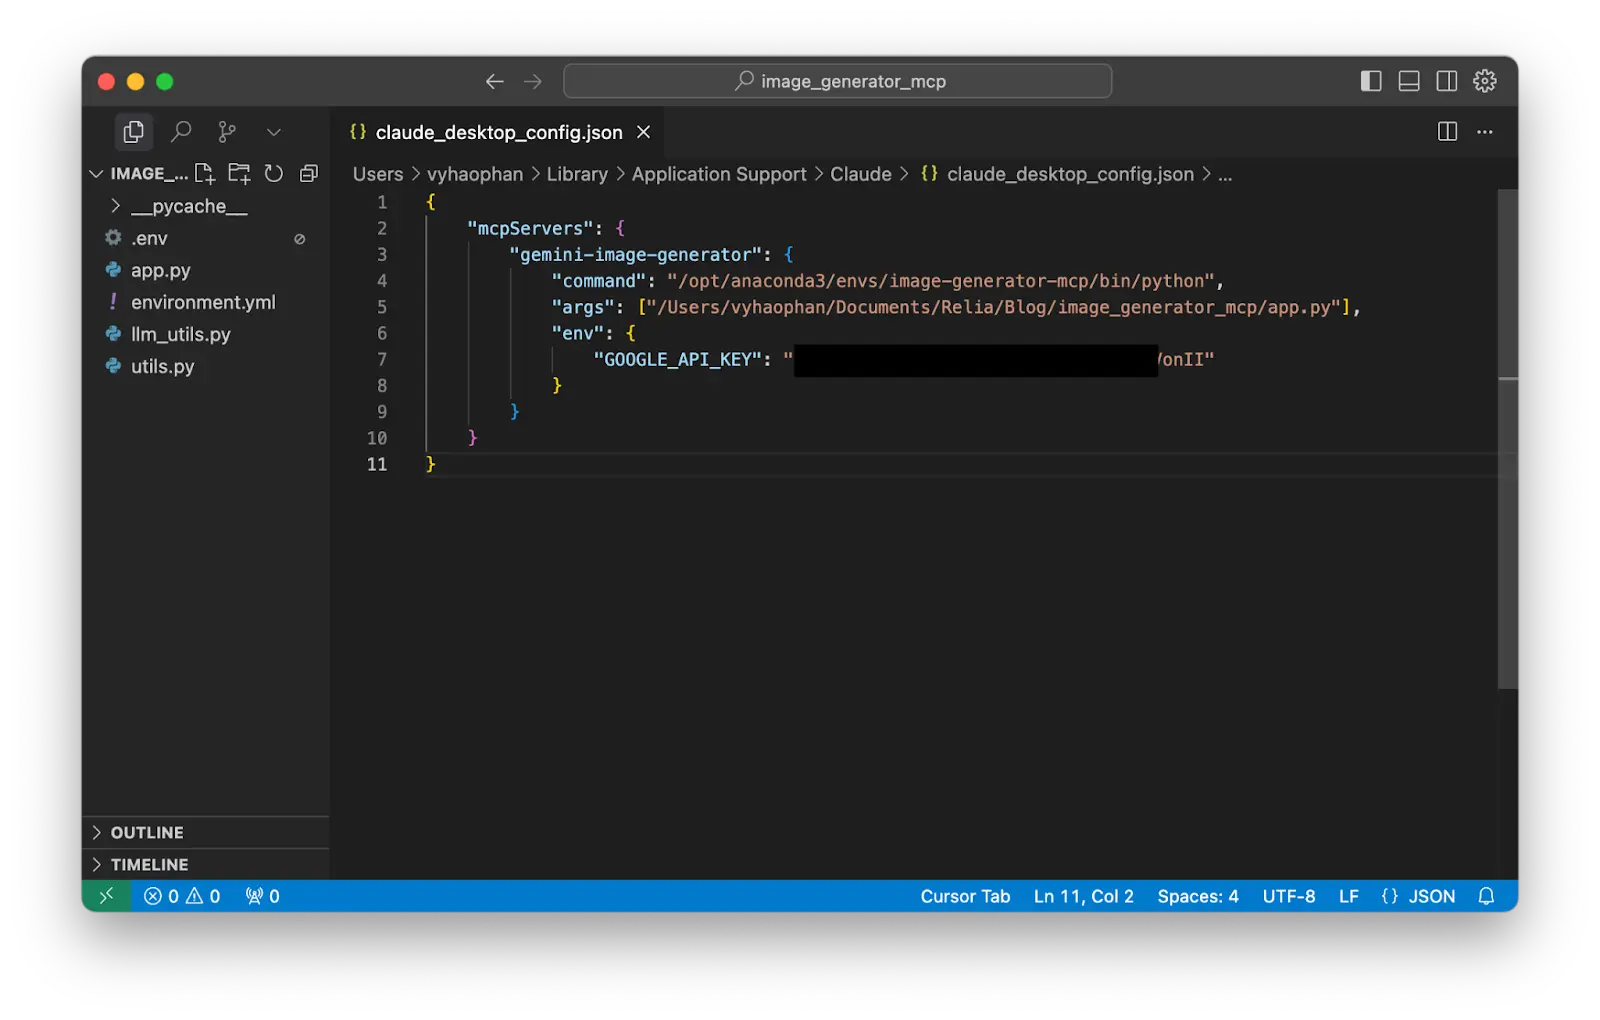
After opening the file, you will see the following content in the JSON file. There is not any content yet in this file.
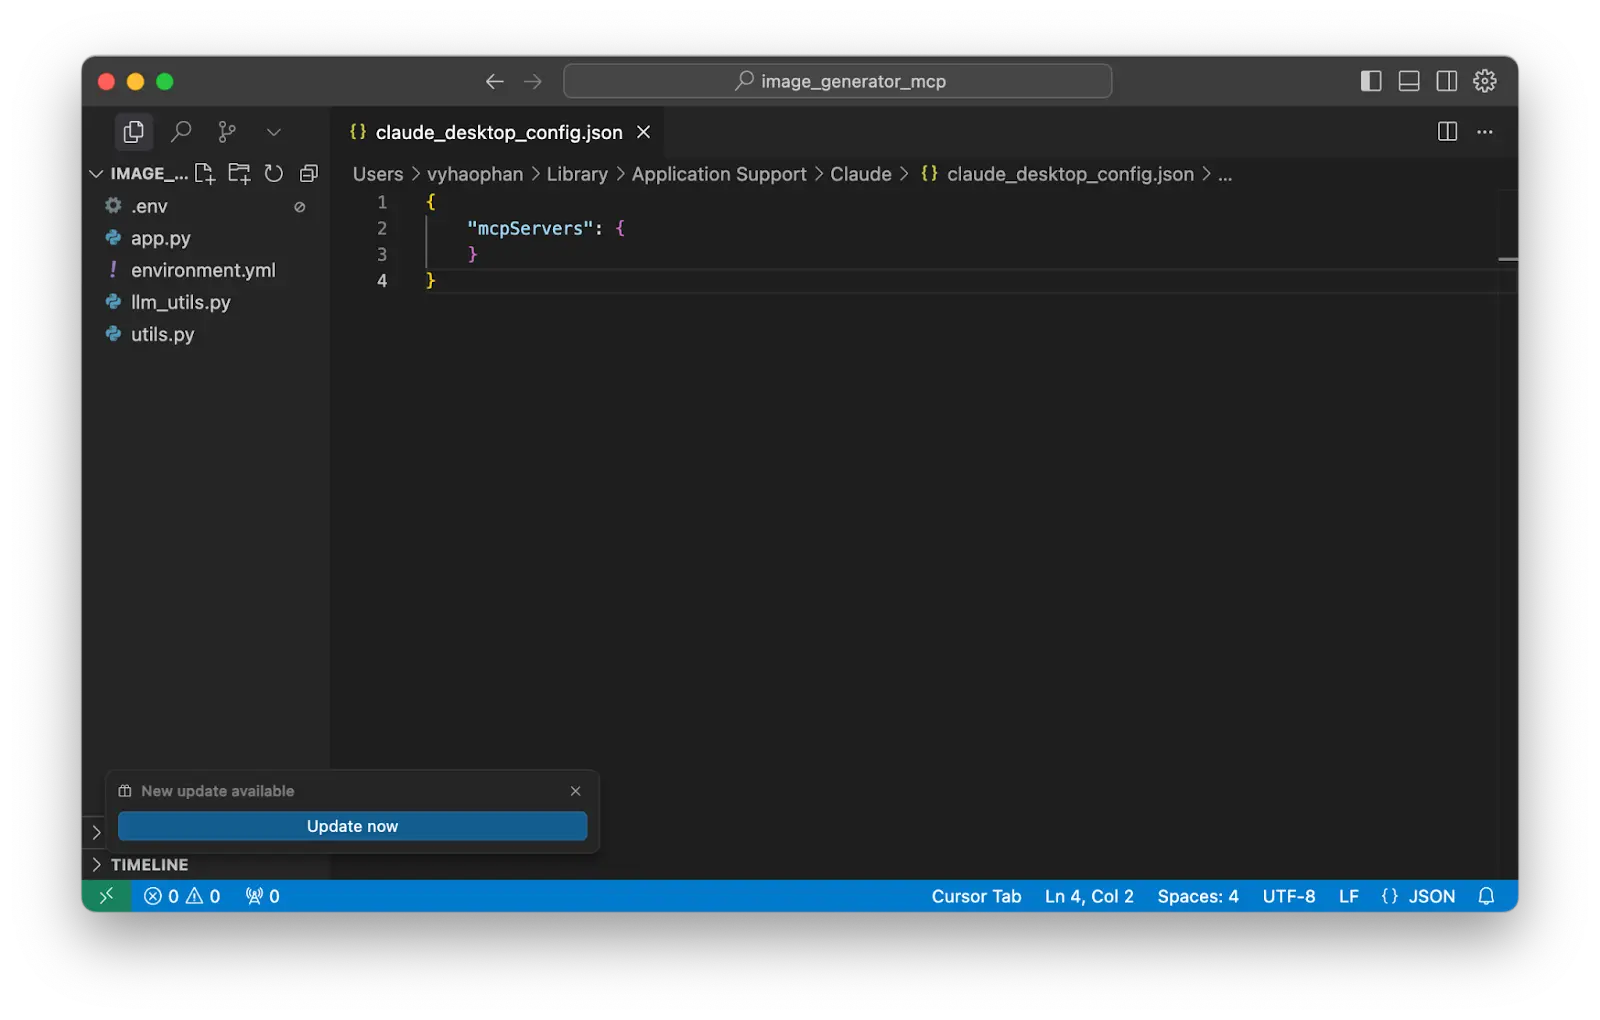
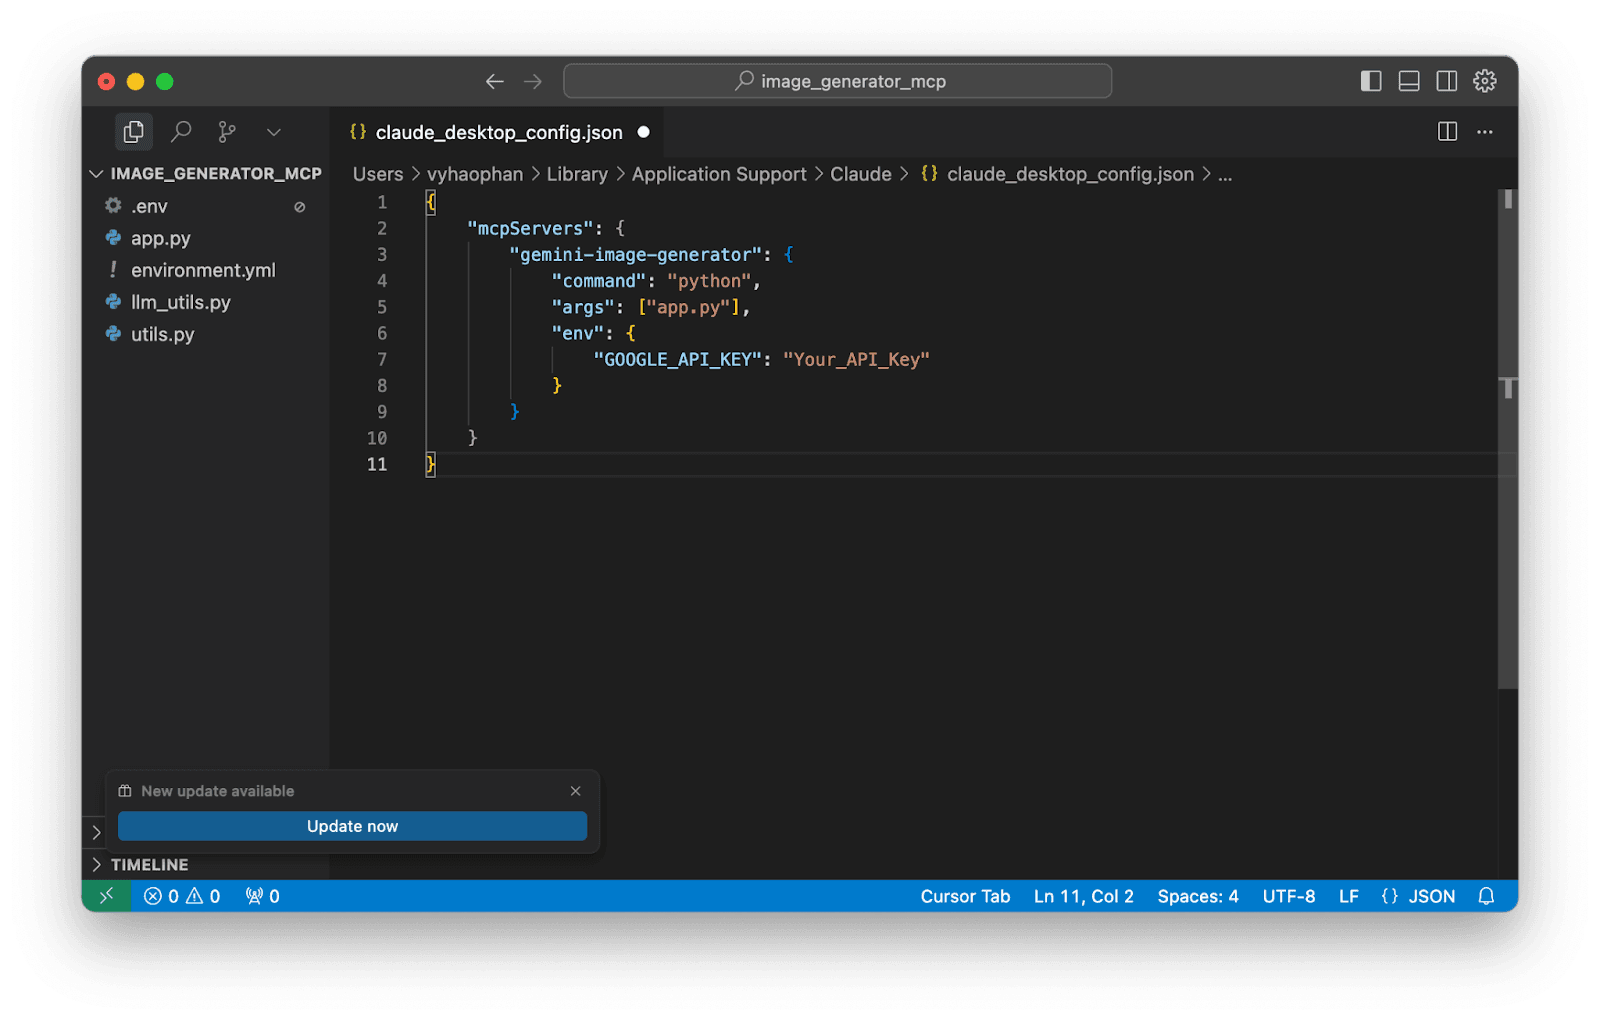
Basically, you have to set up your Claude config content like the one below.
{
            "mcpServers": {
                "gemini-image-generator": {
                    "command": "python",
                    "args": ["app.py"],
                    "env": {
                        "GOOGLE_API_KEY": "Your_API_Key"
                    }
                }
            }
        }
- However, Claude config must be available to work dependently, so Claude does not understand which Python version or which file named
app.pyshould be used to run the MCP server. Therefore, please clearly specify the Python package and the file path. - Open the terminal window, then activate your created Conda environment.
- Run the command
which pythonto search for the location of your current Python engine.
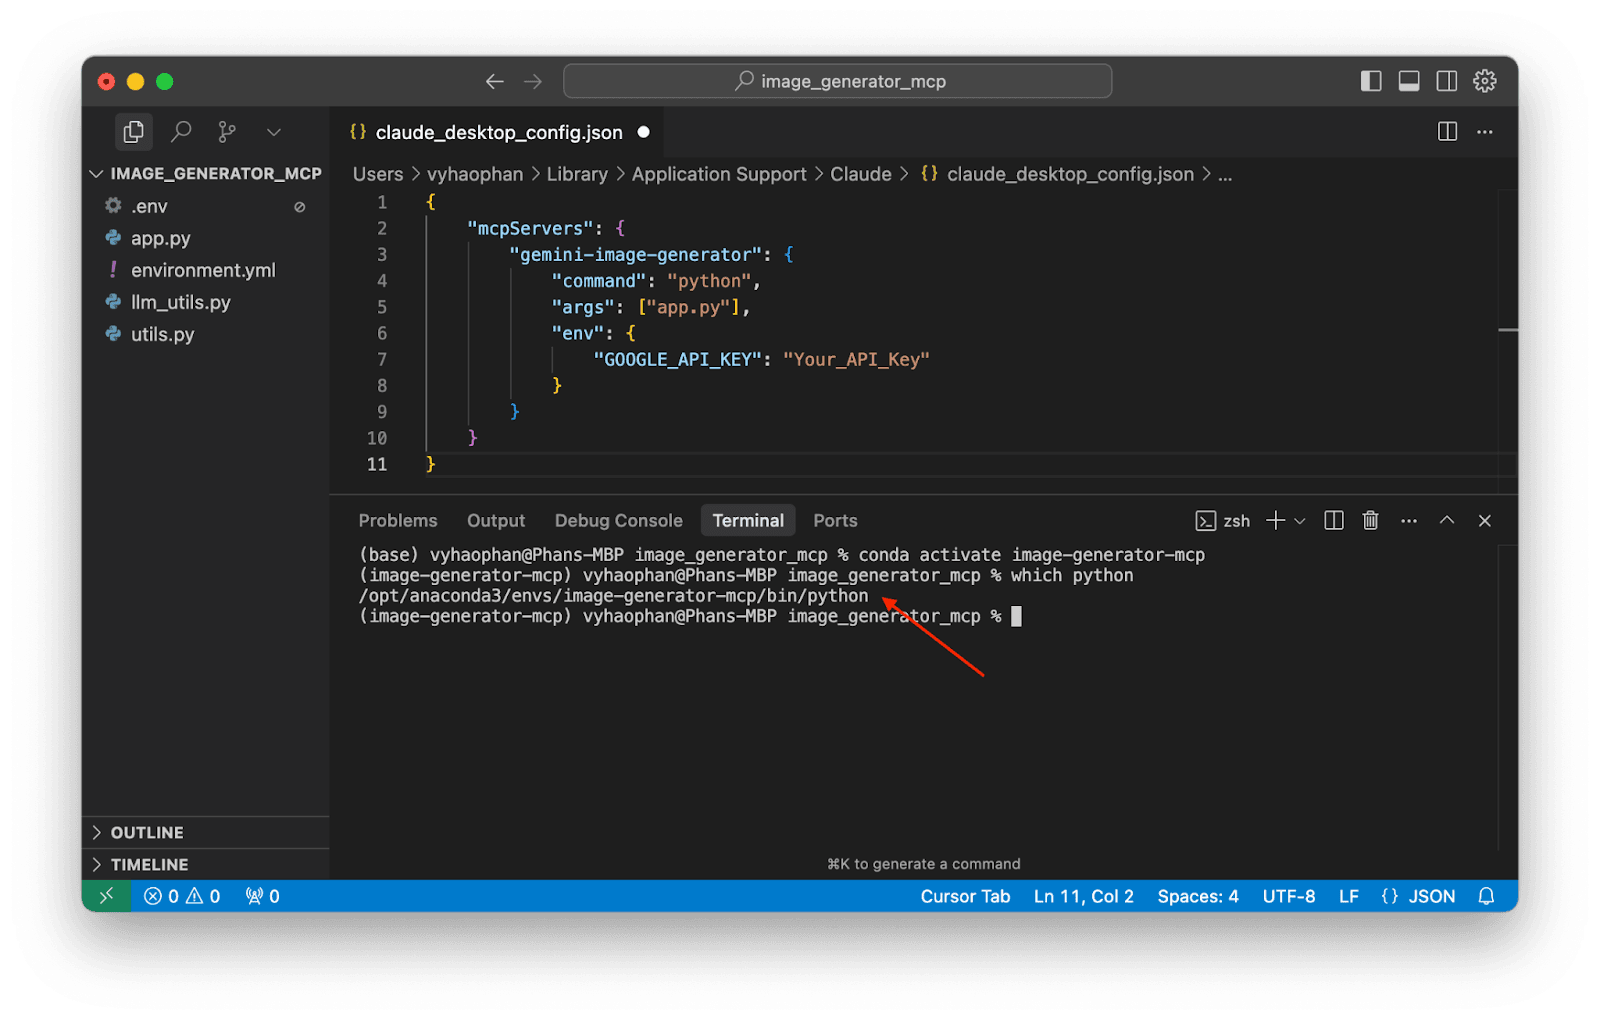
Copy this Python path and replace the current command in your Claude configuration JSON file.
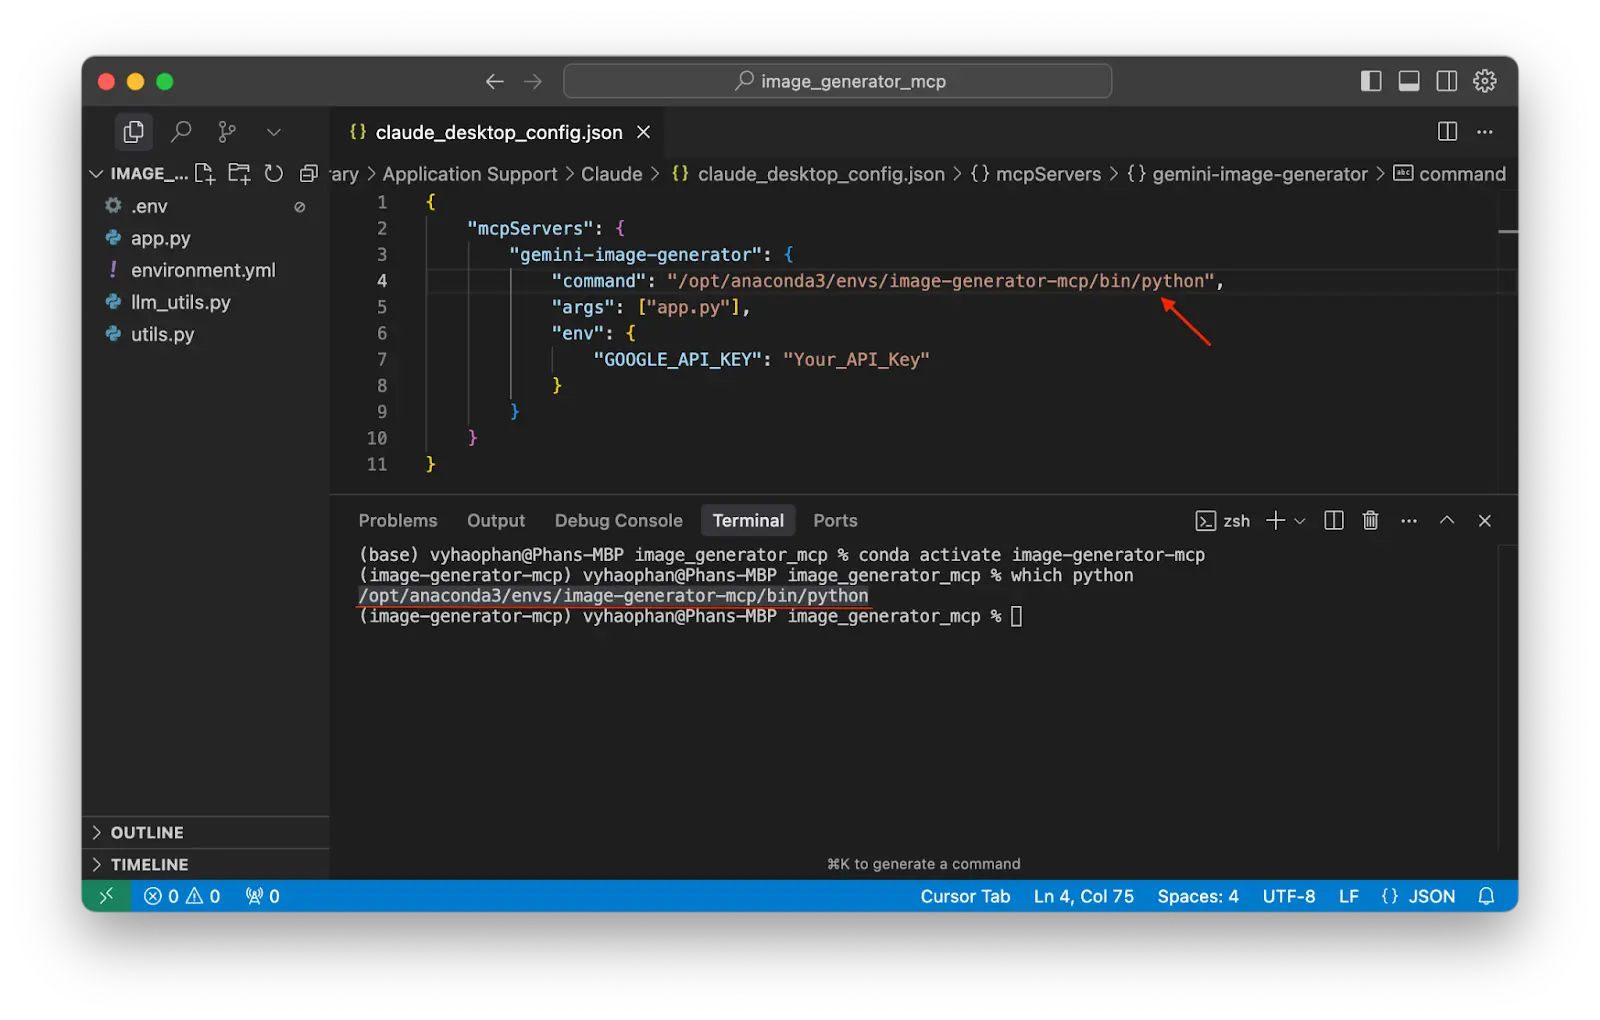
Copy the absolute path that leads to your main file app.py and replace this path in the configuration file.
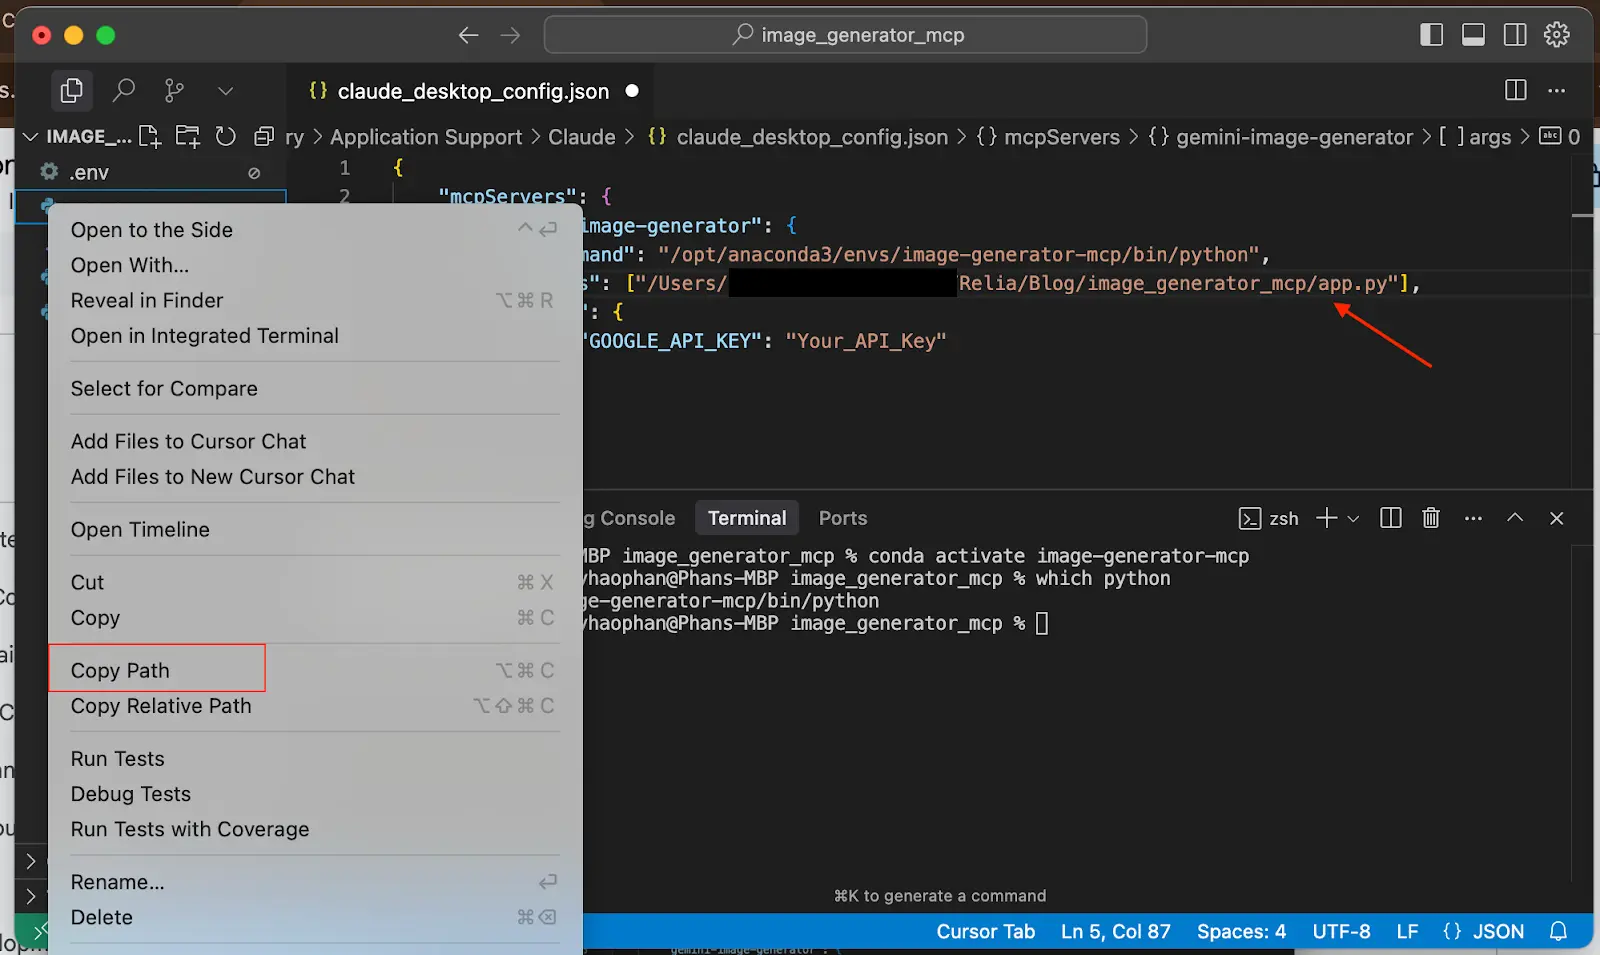
Also remember to replace your Gemini API Key in the file. Save it and you will have the MCP ready for your Claude.
Now quit or force close your Claude Desktop application. When you reopen the Claude, the MCP will be usable.
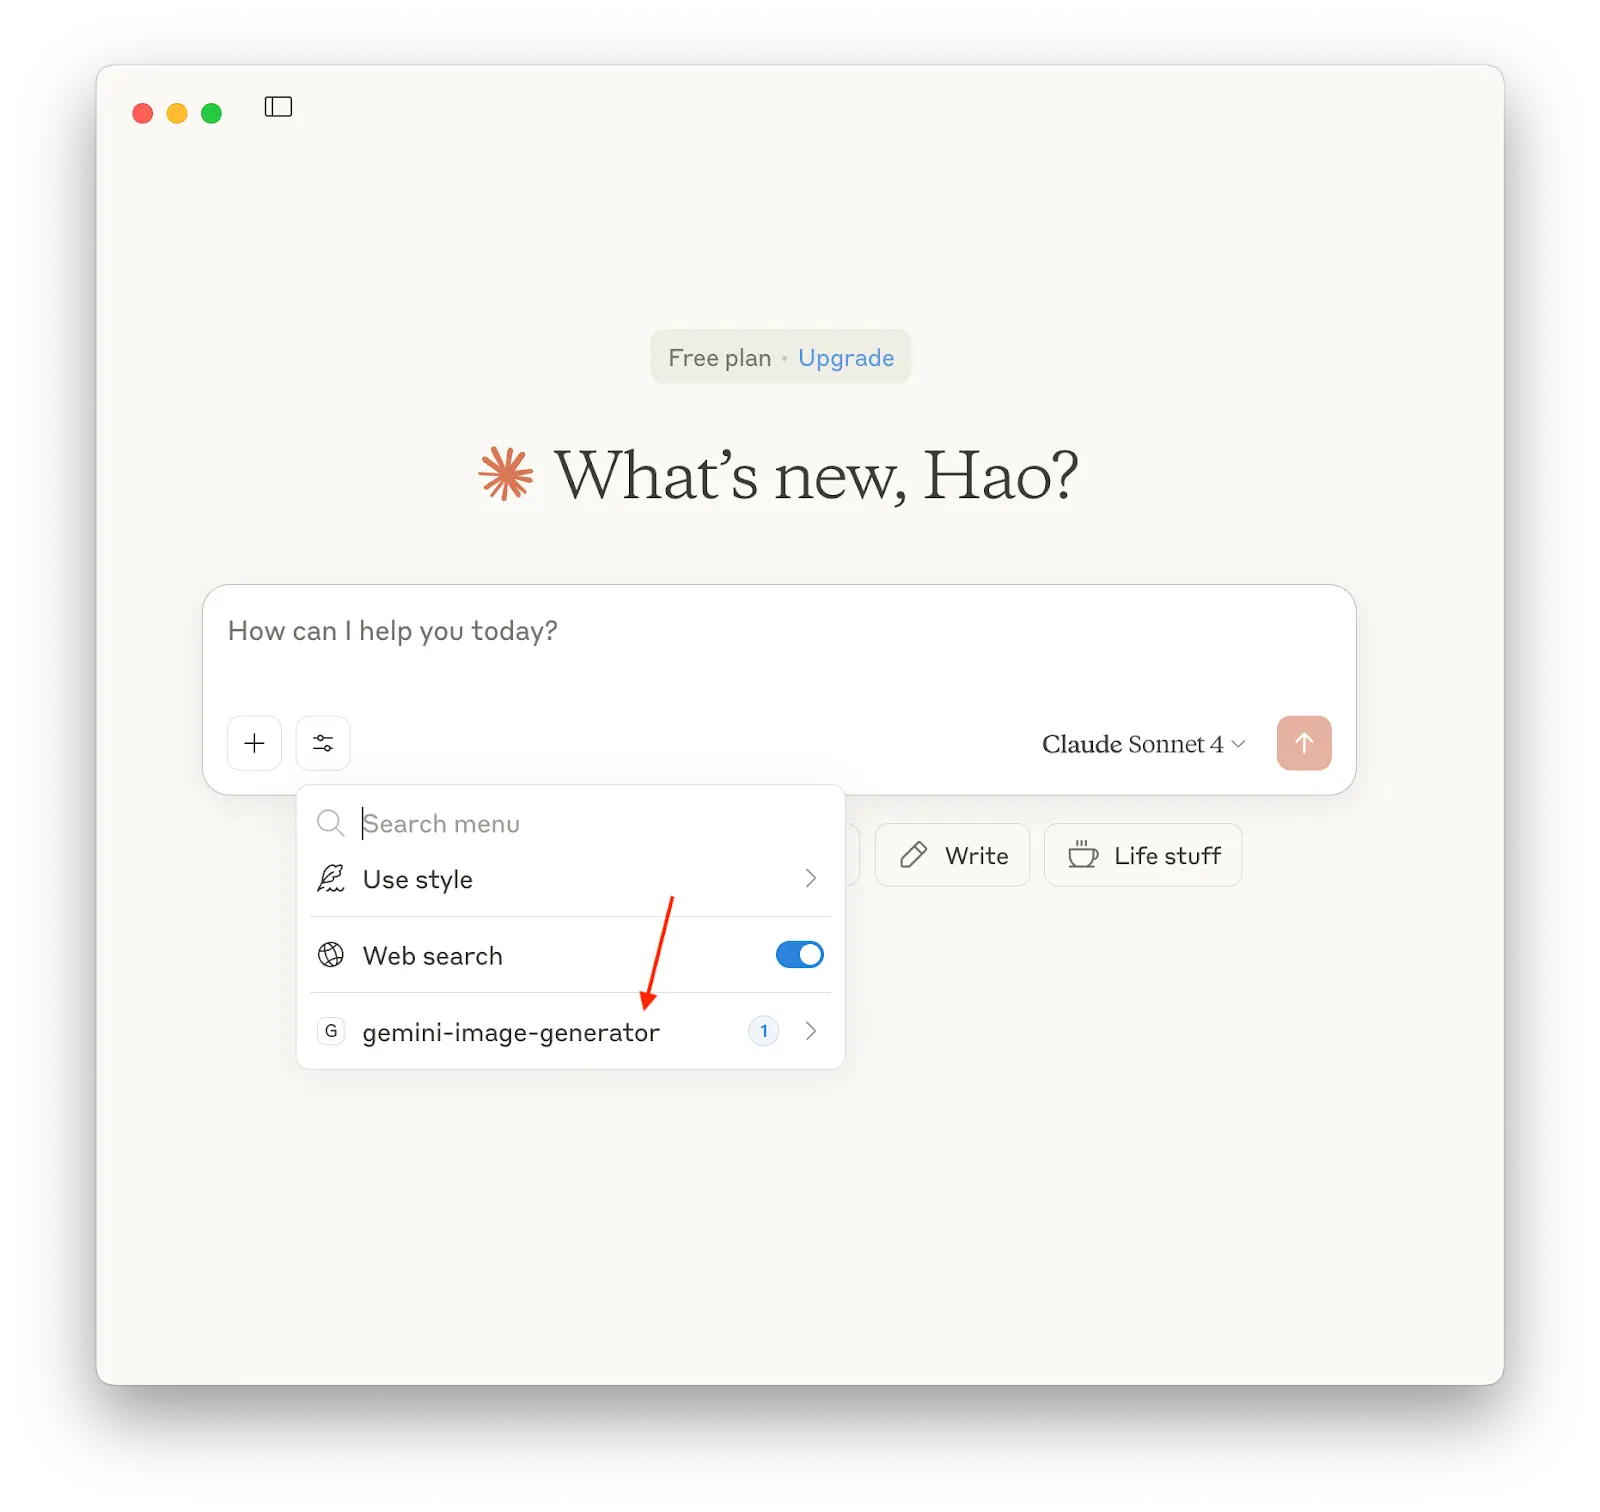
Use Image Generation MCP in Claude
Open your Claude Desktop application, you will see in the Menu option. There is a new Menu named ‘gemini-image-generator’ which is exactly what you have done and have defined so far in the previous sections.
When you click on this menu, there will be 1 tool shown up. It is named ‘generate_image’. In the previous section, we have only defined 1 MCP tool.
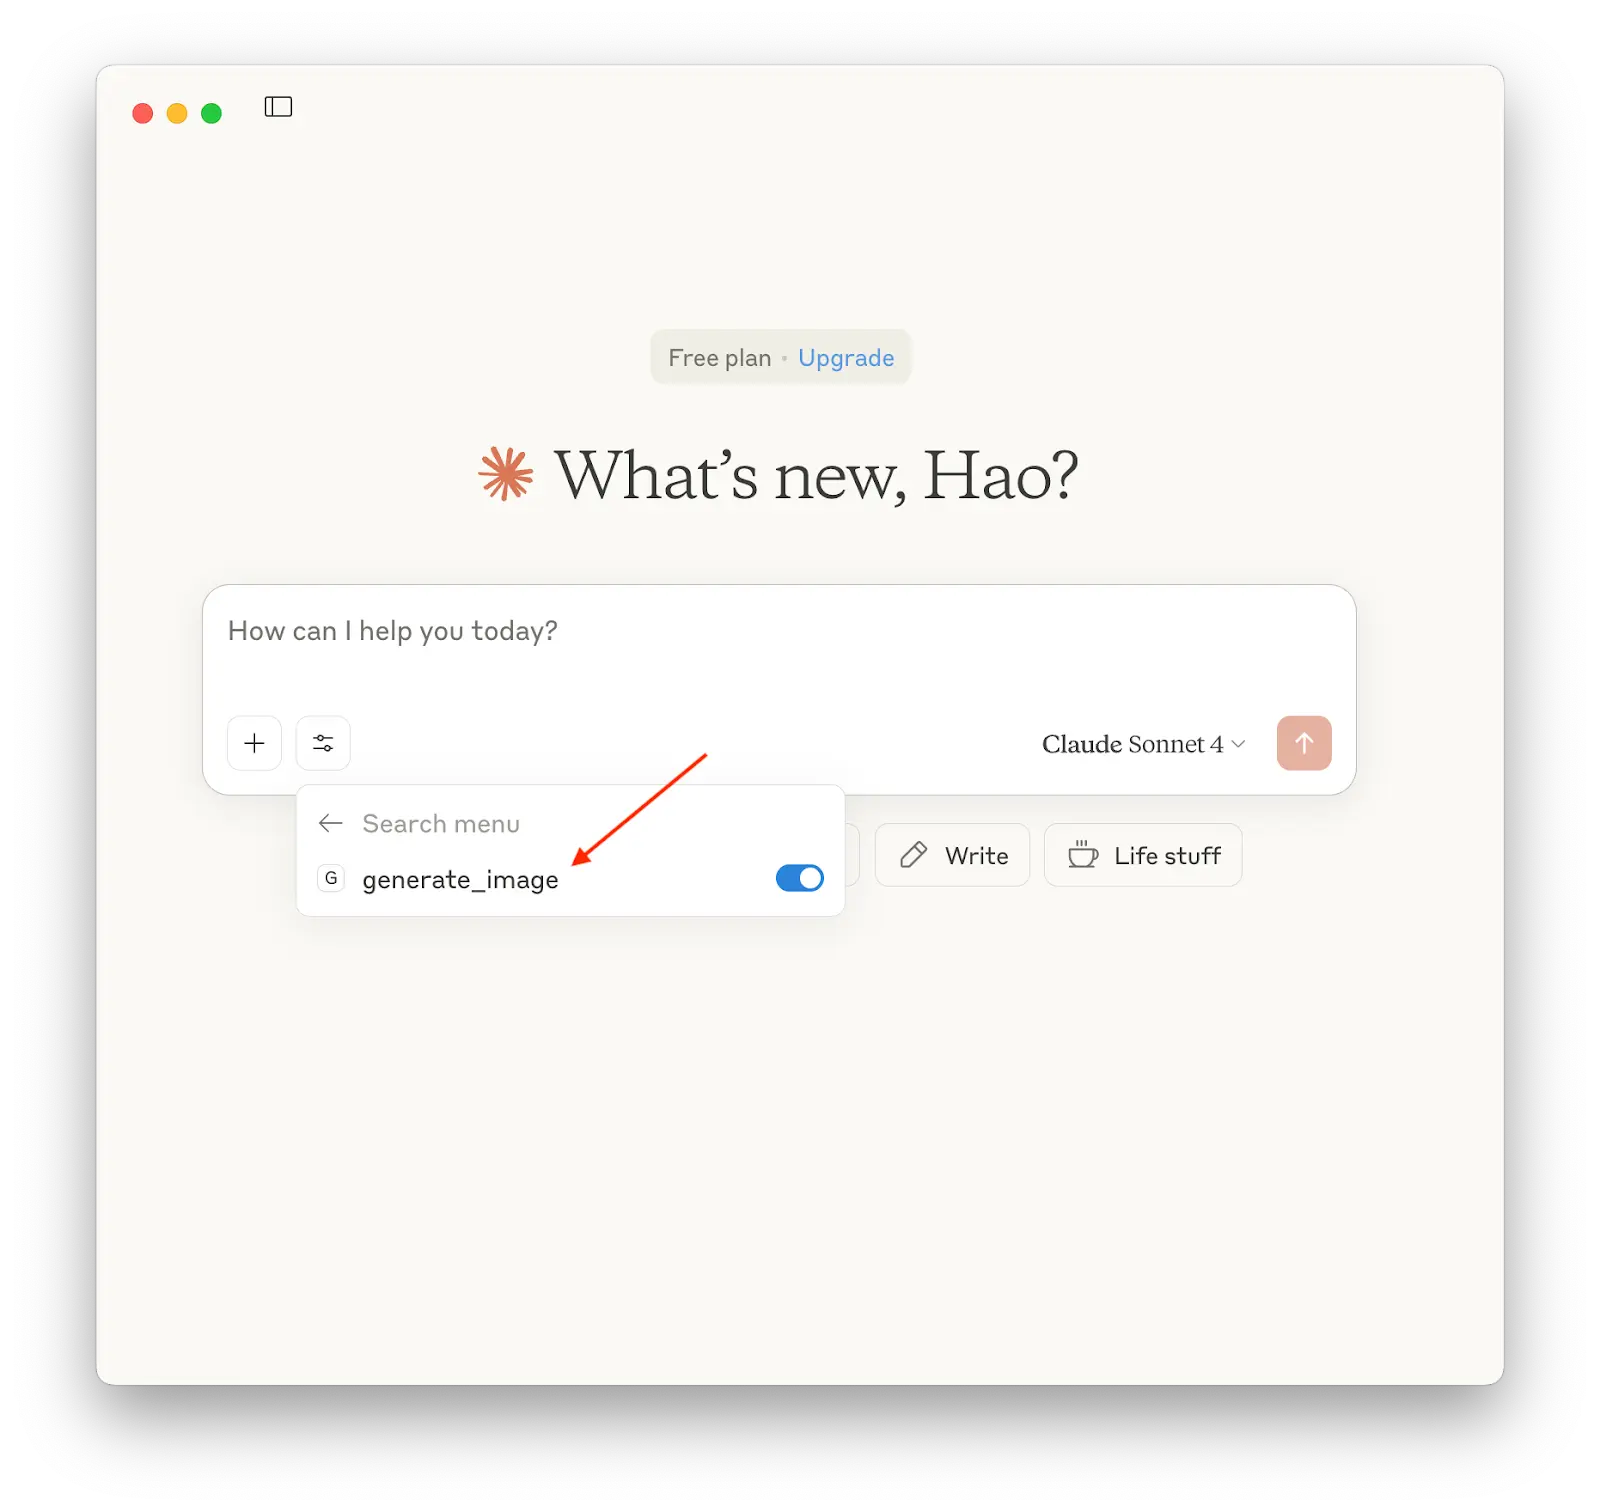
If you can see the MCP tool, you have done everything correctly.
Now try asking Claude to generate an image that matches your preferences. In my case, I would ask this question:
help me create a picture with style Sketchbook about a dragon flying in front of a tech company named Relia
After that, just wait for the miracle.
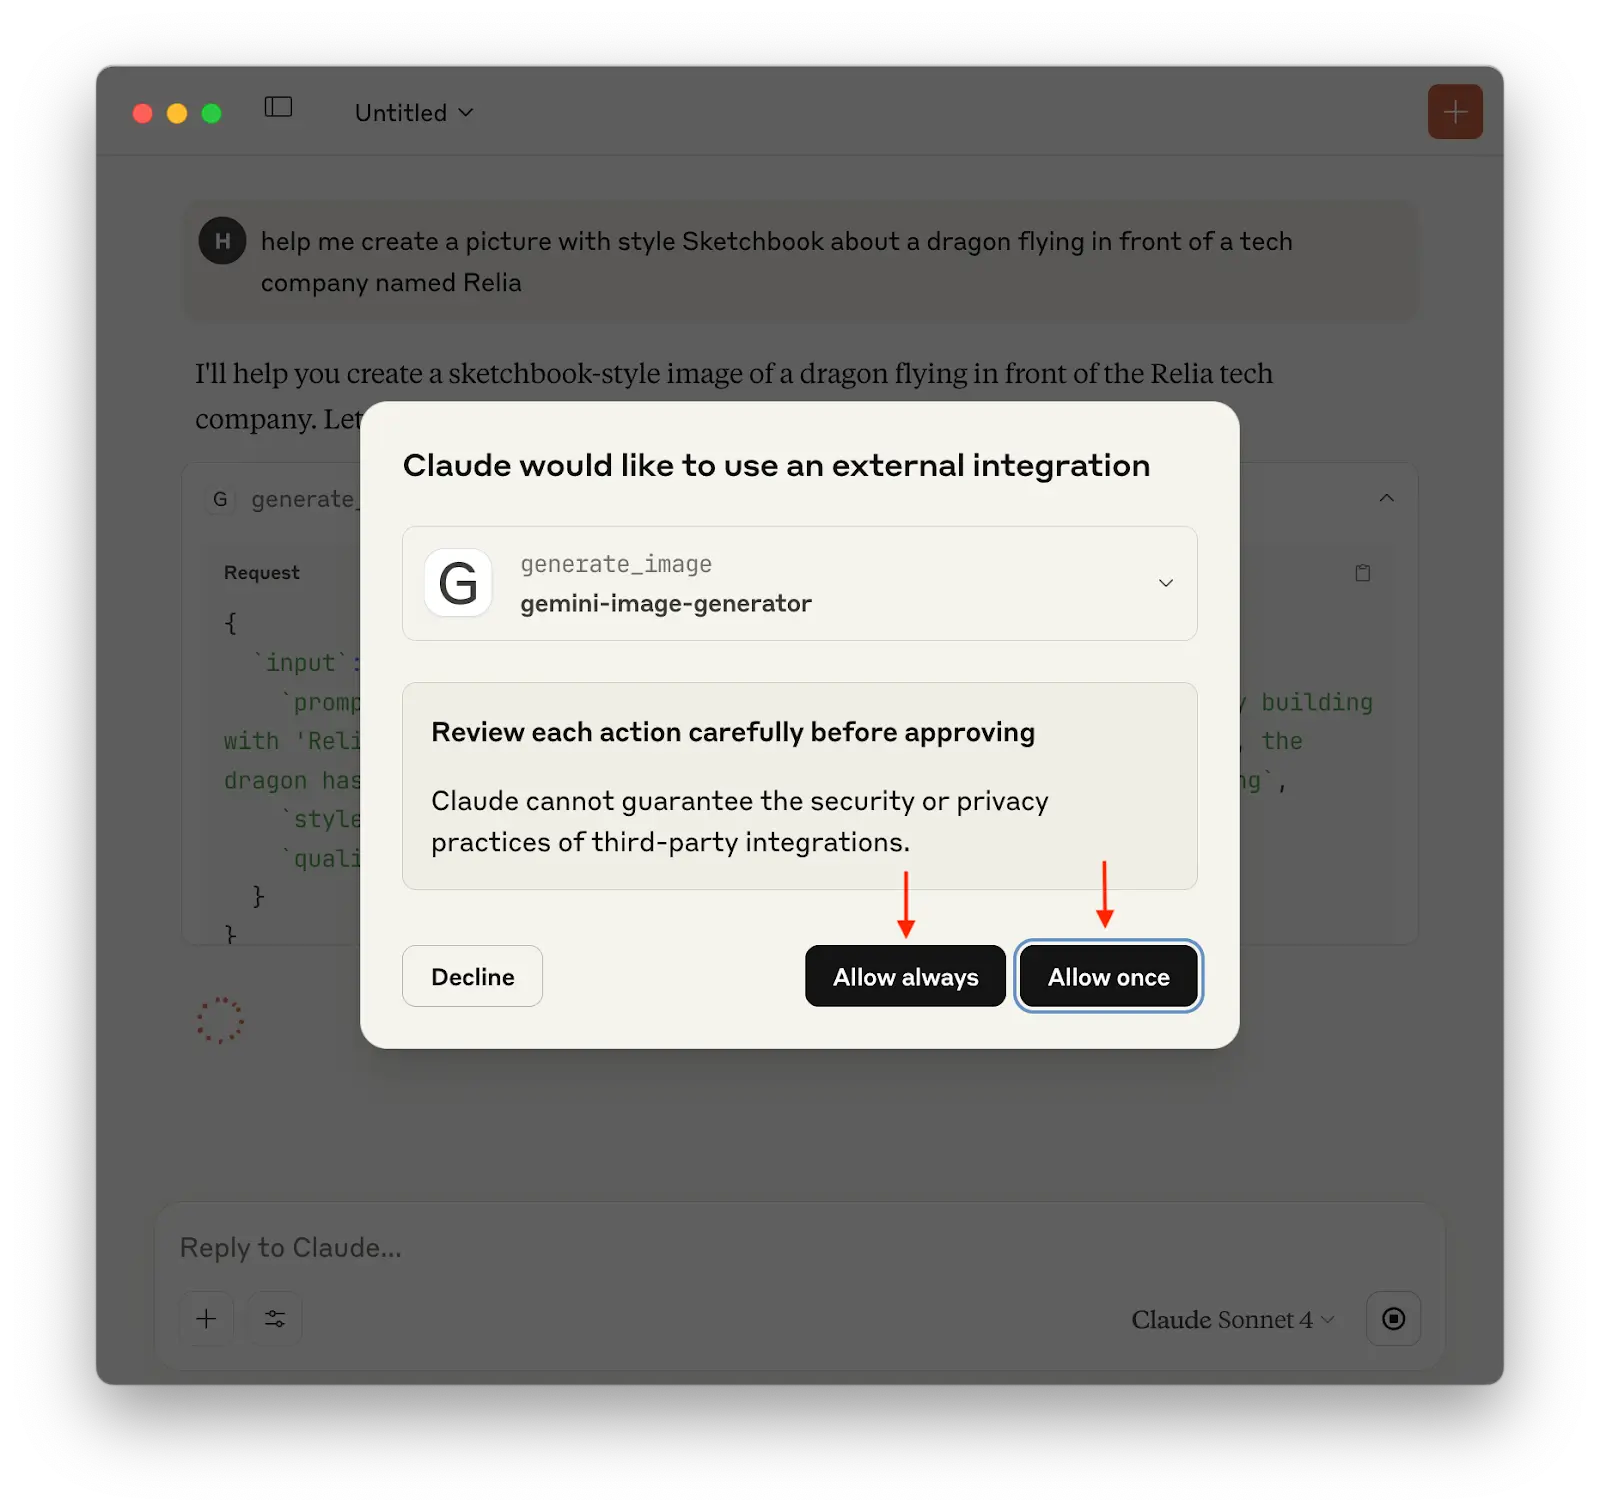
If Claude needs to run an external tool, or an MCP, it will ask for your permission to run. You can choose Allow once or Allow always.
Then wait a little bit. When it completes the MCP call, you will see the result image shown up.
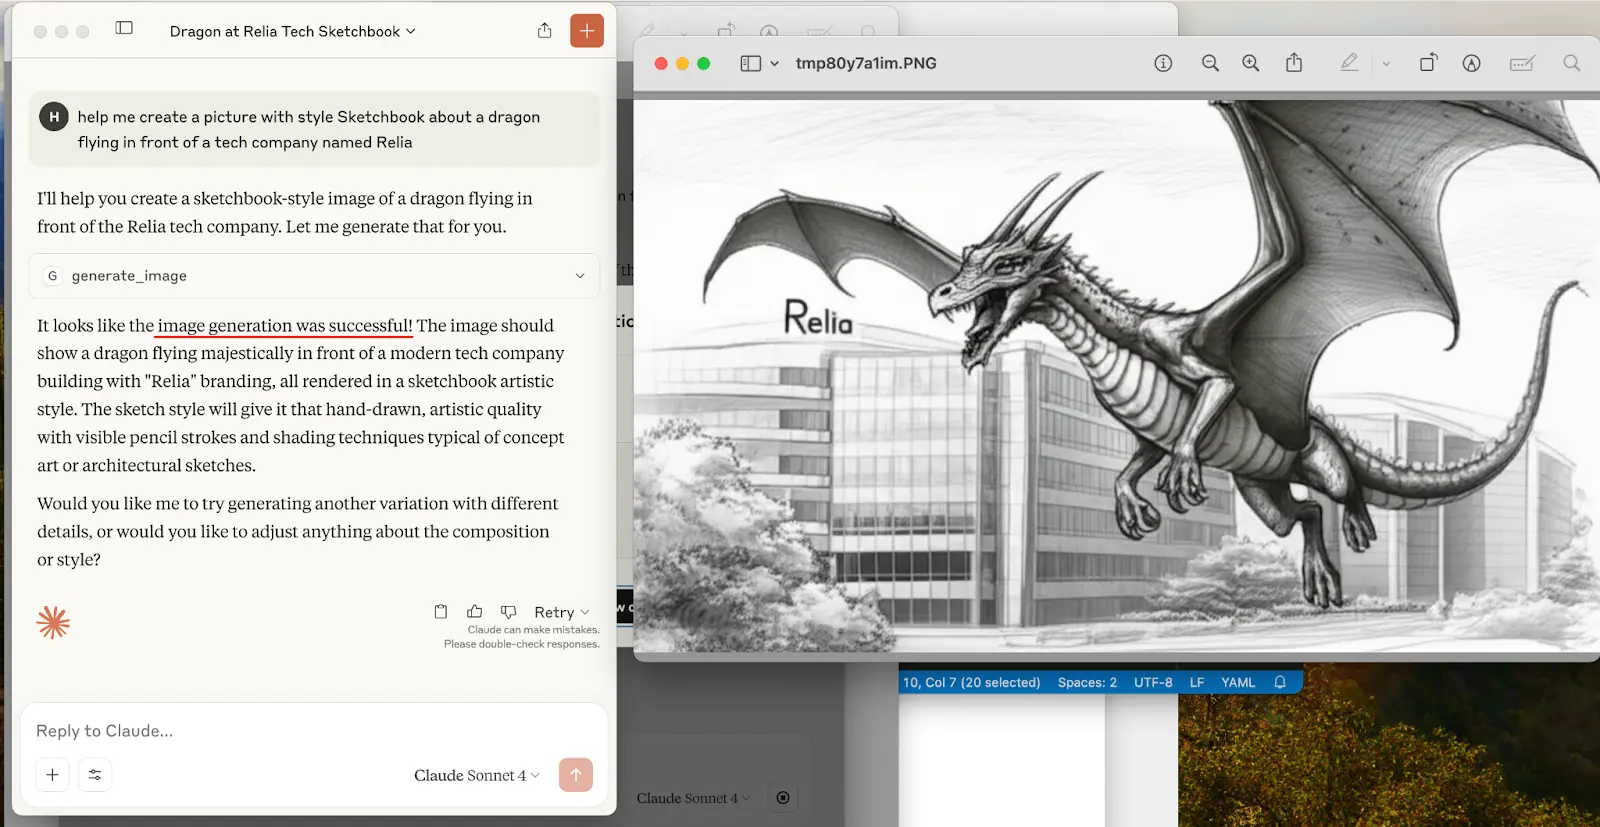
Besides generating the image, Claude also shares and describes the generated image.
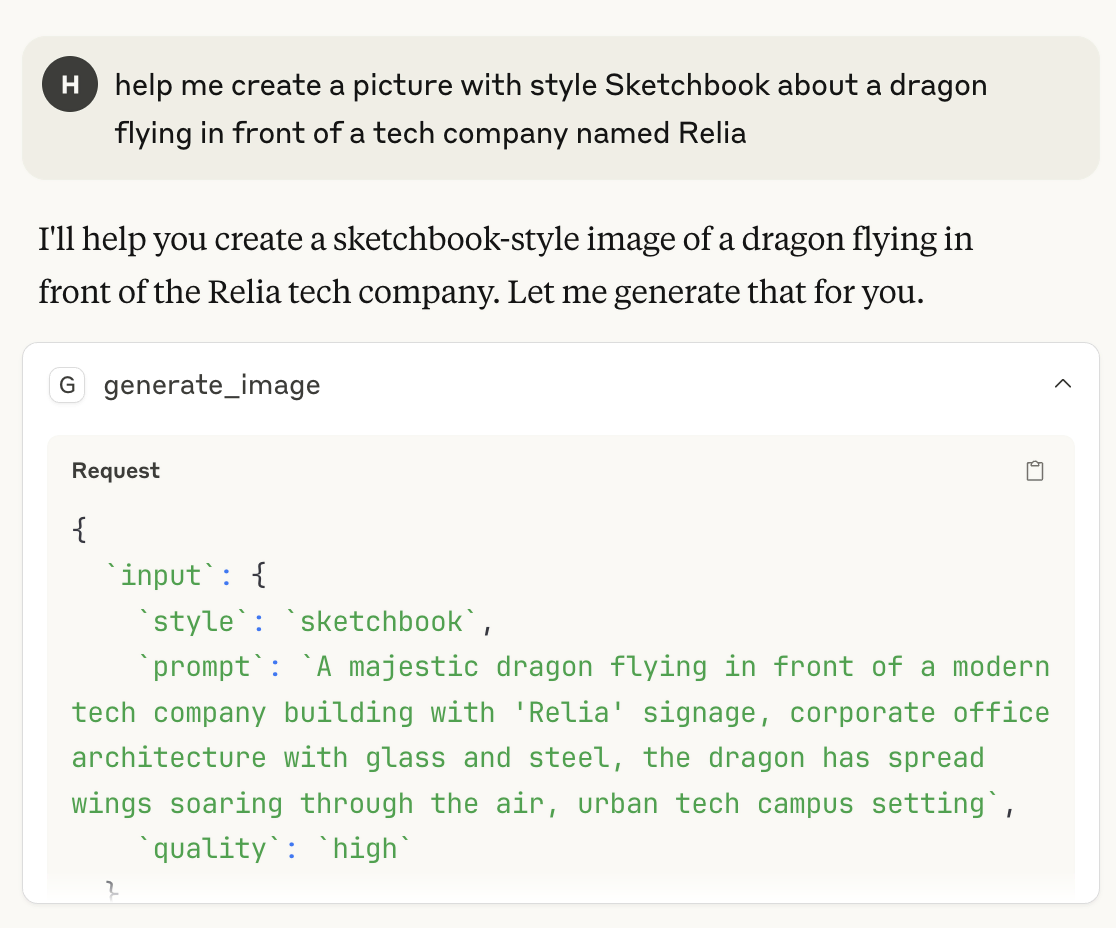
You can click on the tool call inside Claude to view the exact command that the Agent sent to the MCP tool. This lets you verify whether Claude correctly understood your request.
Now congratulations for your successful MCP implementation. You can try to ask multiple questions and try different styles, to see which suits you. I hope you will enjoy this application.
What’s Next?
If you enjoy this application, I think you should play around with it a little bit more to really understand the project structure, how the Agent and MCP work together.
Here are some of my suggestions:
- Try OpenAI’s MCP to make a comparison with FastMCP: https://platform.openai.com/docs/mcp
- Try to make a comparison between traditional LLM tool calling and this MCP concept.
- Try to implement MCP servers for other purposes: retail sales, marketing campaign analysis, Deep Research, etc.
>>> Follow and Contact Relia Software for more information!

- coding
- development
- automation