In this post, we will discuss implementing the AWS lambda function for processing uploaded content on S3. Suppose that we want to extract the images from video automatically every time the video is uploaded. We can implement the lambda function to do it.
We will use FFmpeg to process the video and use Ruby code for the lambda function. We will need two S3 buckets, one is the bucket where the videos are uploaded to. The other one is the bucket to store the extracted images.
>> Read more:
- An Introduction to Ruby on Rails Framework
- Top 10 Best Ruby on Rails Gems in 2023
- Top 10 Most Popular Ruby Frameworks For Programmers
Step 1: Create A Role for Lambda
Lambda function will need access to the buckets to get the videos and upload the images after extracting them. So we create a role for it:
-
Open the Roles page in the IAM console.
-
Choose Create role.
-
Under Use case, choose Lambda.
-
Choose Next.
-
Select the AWS managed policies AmazonS3FullAccess, AWSLambdaBasicExecutionRole and AWSXRayDaemonWriteAccess.
-
Choose Next.
-
Enter a Role name and then choose Create role.
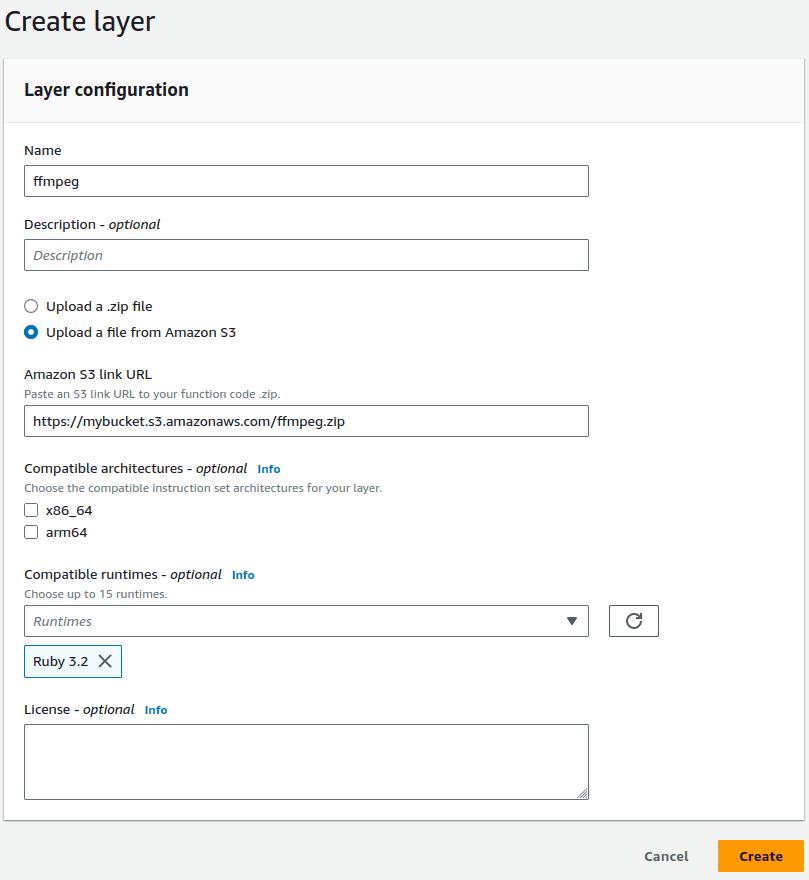
Step 2: Create the Lambda FFmpeg Layer
To use FFmpeg we will add a layer for the lambda. To do it you can make a zip package containing the FFmpeg library.
On your local machine download and make a zip file of FFmpeg:
wget https://johnvansickle.com/ffmpeg/releases/ffmpeg-release-amd64-static.tar.xz
wget https://johnvansickle.com/ffmpeg/releases/ffmpeg-release-amd64-static.tar.xz.md5
md5sum -c ffmpeg-release-amd64-static.tar.xz.md5
tar xvf ffmpeg-release-amd64-static.tar.xz
The FFmpeg binary is located in the folder “ffmpeg-6.0-amd64-static” (It depend on the latest version, in this case it’s version 6.0).
Create a ZIP package for the Lambda layer as follows:
mkdir -p ffmpeg/bin
cp ffmpeg-6.0-amd64-static/ffmpeg ffmpeg/bin/
cd ffmpeg
zip -r ../ffmpeg.zip .
Upload the ffmpeg.zip to Amazon S3. We will create a new Layer in the Lambda console pointing to the package.
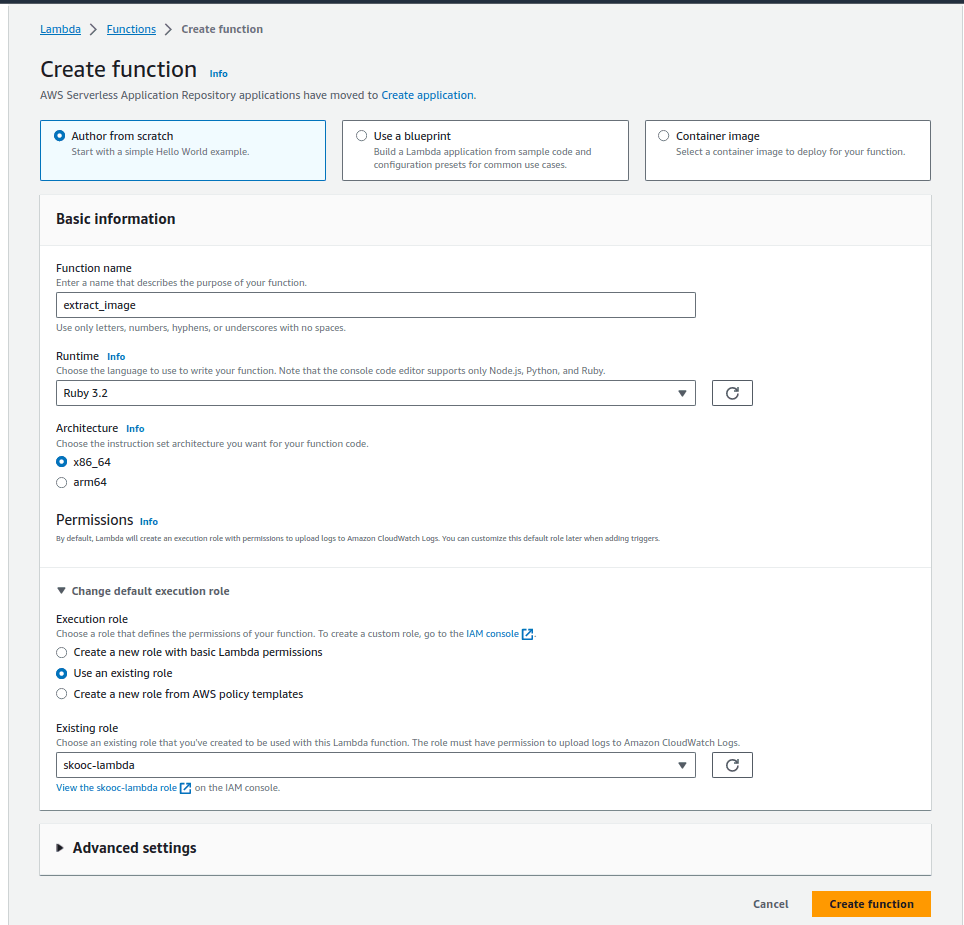
Step 3: Create Lambda Function
You can now create a new Lambda function in the console: choose the Author from Scratch option, fill in the Basic information, and choose Create function. Note: choose the role that we have created at the beginning of this post.
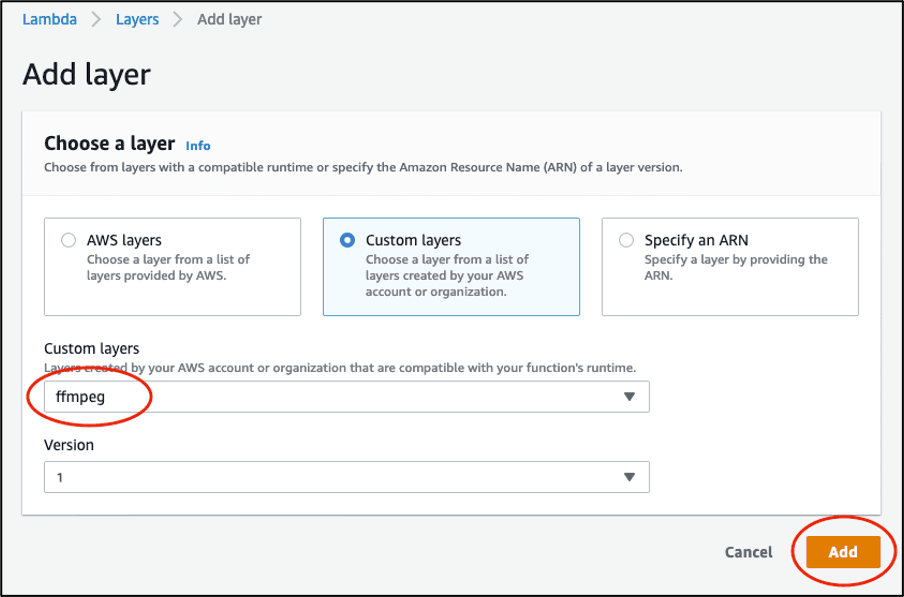
Once the Lambda function is created, on the function detail screen, you will see the Layers block at the bottom, choose Add a layer. Choose Custom layers. Select “ffmpeg” from the drop-down list under Custom layers and the Version, then select Add.
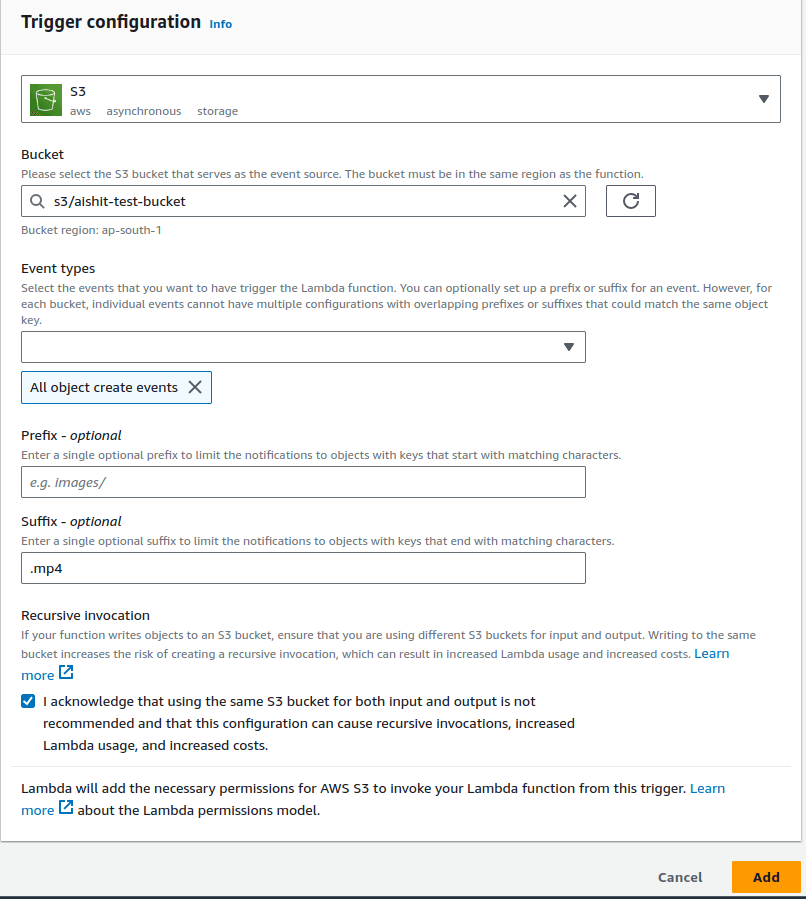
Back to the top of the function details screen, click + Add Trigger button to create an event.
Adding an Amazon S3 trigger from the source bucket to the Lambda function in the console: under Bucket, select the source bucket. Select “All object create events” for Event type. Input “.mp4” as Suffix. Read the Recursive invocation section, and acknowledge by checking the box, then choose Add.
Back to detail screen, choose the tab Configuration. On the left menu bar, choose General configuration and click Edit button. Select 1024 MB for memory and Ephemeral storage and 1 minute timeout. You can modify them depending on how large your video's length.

Step 4: Implement Extracting Image Code for The Lambda Function
All the setting is ready now, we will do the last step is to add ruby code to processing the video. Every time an .mp4 video is uploaded to the source bucket, this code will be triggered.
Choose the first tab Code
On the build in code editor, copy this ruby code:
require 'json'
require 'aws-sdk-s3'
require "open3"

DEST_BUCKET = "dest-bucket" #this is the bucket to store images

def lambda_handler(event:, context:)
    s3_source_key = event['Records'][0]['s3']['object']['key']
    base_path = "#{File.dirname(s3_source_key)}/#{File.basename(s3_source_key, ".*")}/"
    s3 = Aws::S3::Client.new(region: 'ap-south-1')
    path = "https://aishit-test-bucket.s3.ap-south-1.amazonaws.com/#{s3_source_key}" #path of uploaded video, change the source bucket to your source bucket
    duration = get_video_length(path)
    #extract one frame every one second and upload the image to destination bucket
    duration.times do |i|
        dur = sec_to_duration(i)
        stdout, exit_code = Open3.capture2("/opt/bin/ffmpeg -ss #{dur} -i #{path} -f image2 -vframes 1 -")
        key = "#{base_path}image#{add_zeros(i,4)}.png"
        s3.put_object(bucket: DEST_BUCKET, key: key, body: stdout)
    end
end

def add_zeros(num, len=2)
  zero_count = len - "#{num}".length
  return num unless zero_count.positive?
  "#{'0' * zero_count}#{num}"
end

def sec_to_duration(sec)
    h = sec / 3600
    m = (sec % 3600) / 60
    s = sec % 60

    "#{add_zeros(h)}:#{add_zeros(m)}:#{add_zeros(s)}"
end

#input: the video url, output: video length in seconds.
def get_video_length(path)
  stdin, stderr, stdout, wait_thr = Open3.popen3("/opt/bin/ffmpeg -i #{path}")
  output = stdout.gets(nil)
  idx = output.index('Duration') + 10
  duration = output[idx..idx+7]
  arr = duration.split(':').map(&:to_i)
  secs = arr[0] * 3600 + arr[1] * 60 + arr[2]
  secs
End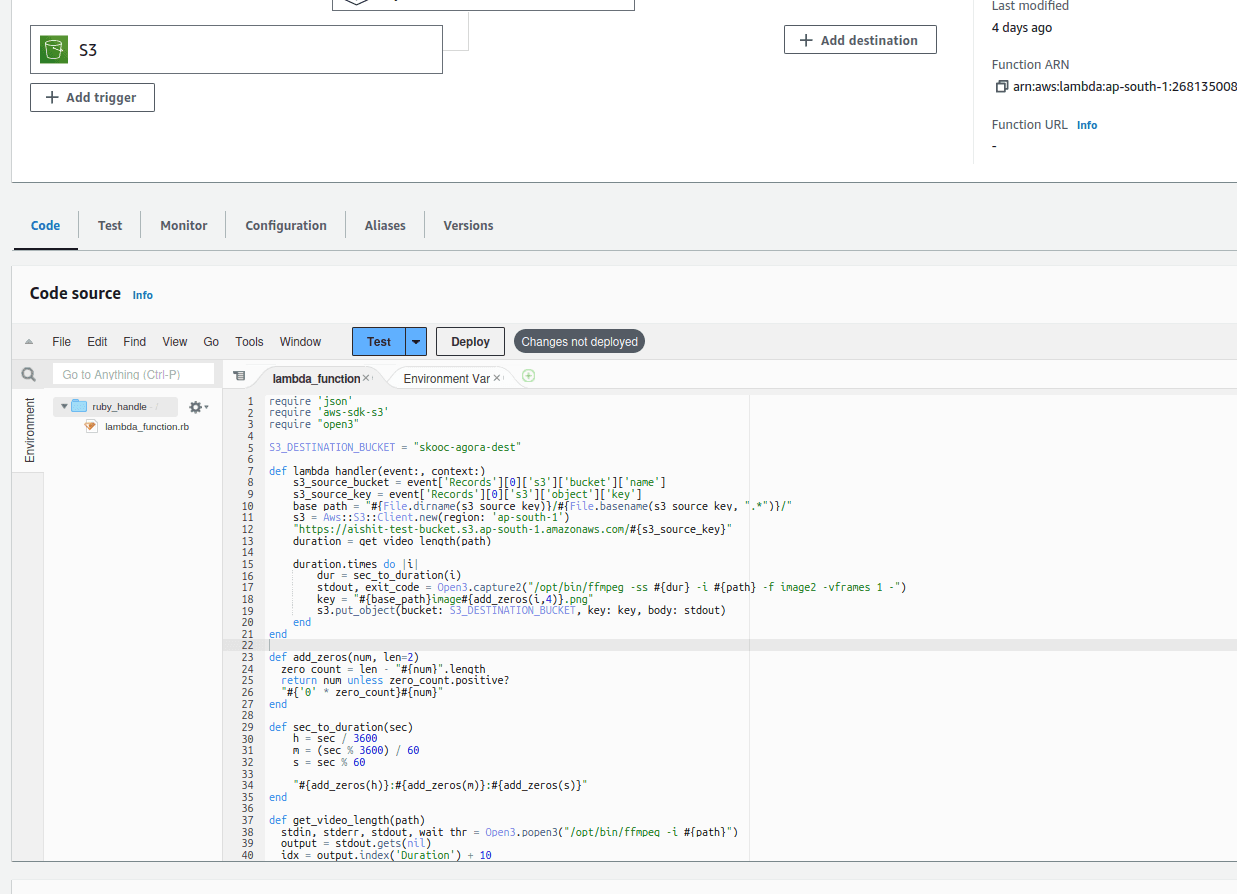
Choose Deploy to save and deploy the change.
Everything is done now, you can test by uploading a .mp4 video to the source bucket, and see it will create a folder in the destination bucket containing the extracted images.
>> Read more:
- Top 10 Ruby on Rails IDEs for Web Development Projects
- A Guide to Successfully Hiring Ruby on Rails Developers
Conclusion
Relia Software is here to assist you if you are having trouble constructing a Ruby on Rails application. We are a top full-stack development company and can help you create a high-quality application that is both sturdy and scalable.
>>> Follow and Contact Relia Software for more information!

- coding