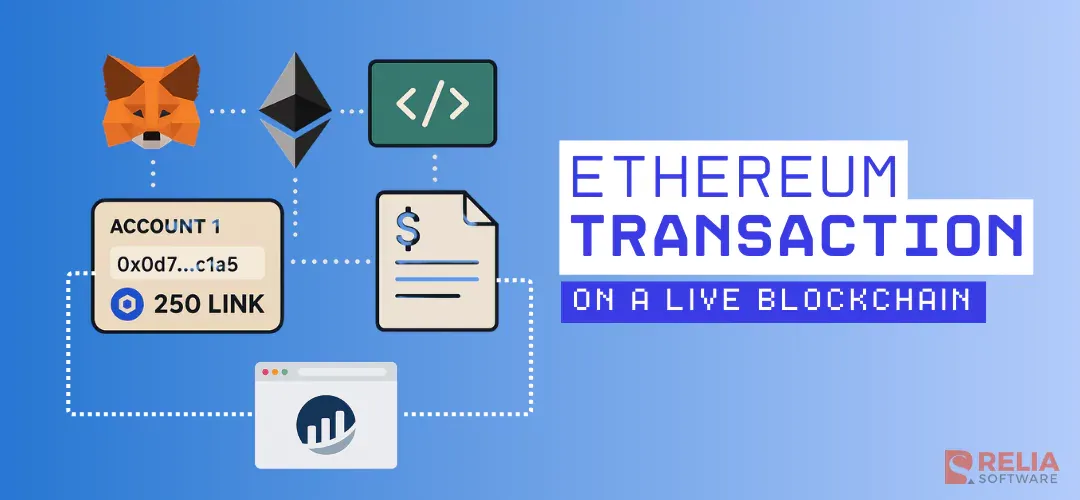
Now that we've gained a high-level understanding of blockchain and smart contracts and learned why blockchain is so advantageous. Now let’s take the next step: creating an Ethereum wallet and making our first transaction on a live blockchain. This hands-on approach will help you understand key activities and concepts in blockchain technology in real world.
Don’t worry about other blockchains, because most of them implement the equivalent concepts as Ethereum. Well, we’re going to:
- Create an Ethereum transaction.
- Examine what actually happened.
- Understand the technical mechanisms behind it.
>> Explore more: How Does Blockchain Work? Hash, Blocks, Mining
MetaMask Crypto Wallet
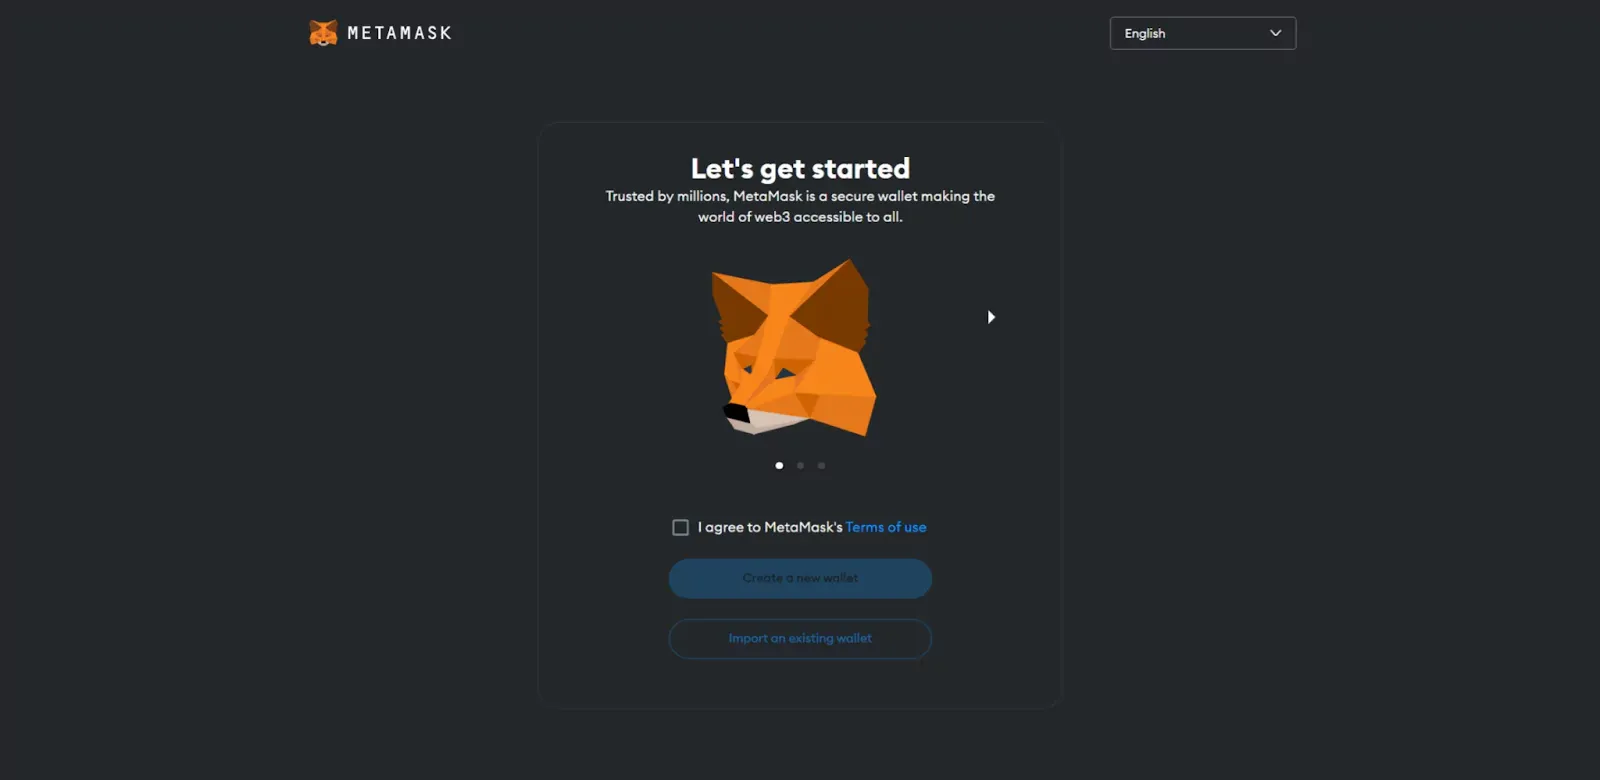
So in order for us to interact with blockchain, the first thing that we're going to need is an Ethereum wallet like MetaMask, one of the most popular wallets and one of the easiest to use. Let’s download MetaMask for our corresponding browser.
MetaMask installed successfully on MS Edge
Now, because we're new here, we're going to create a new wallet. Then, MetaMask will force us to create our passwords and secret recovery phrases (a.k.a. mnemonic phrases) to secure our wallets. We absolutely must keep these phrases secure in the case you want to interact with the real Ethereum network.
Some tips for password protection:
- Save a backup in multiple private places such as a piece of paper or a password manager like 1Password or encrypted storages.
- Never share the phrases with anyone.
- Be careful of phishing. MetaMask should not ask for providing passwords or secret phrases.
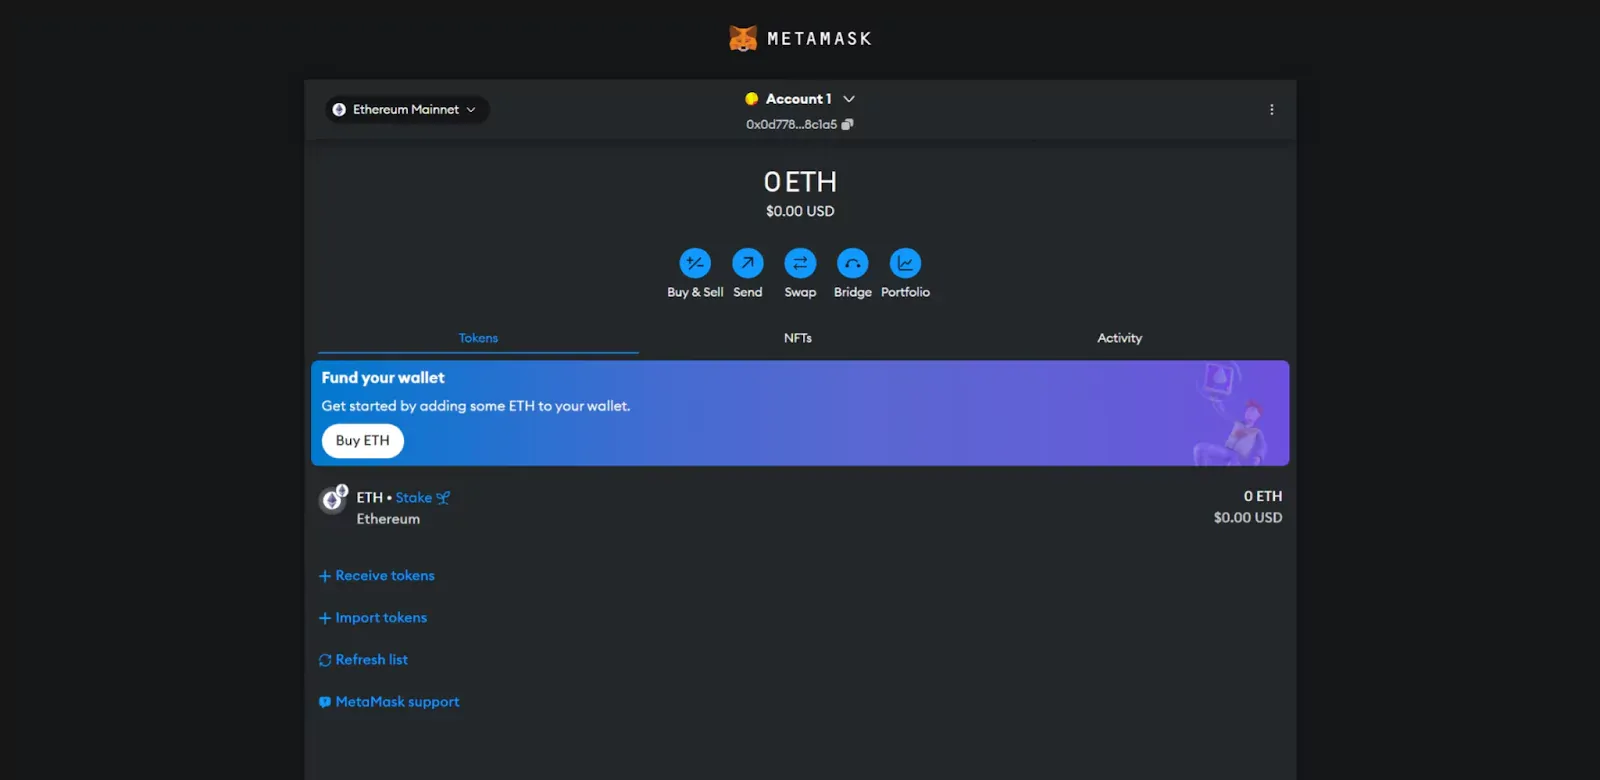
After we completed everything, we created our MetaMask wallets successfully. Now we can see the user interface of this wallet.
Home UI of MetaMask
Let's take some inventory of what is actually going on in here and what we actually have.
Public Address
We can see below the account name “Account 1” a string. That is exactly my address, 0x0d7785280fA17BD03B9a39E3472874A22788c1a5. We can use a tool like Etherscan to view different addresses and what's been going on with them.
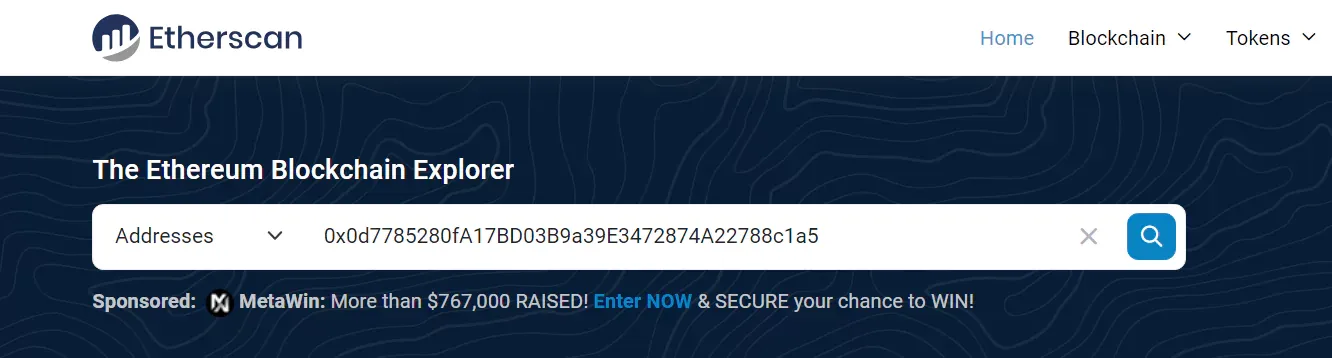
So if we look at this address on Etherscan we can see that no transactions have happened. It's empty. It has zero ether in it. It has zero dollar worth in it.
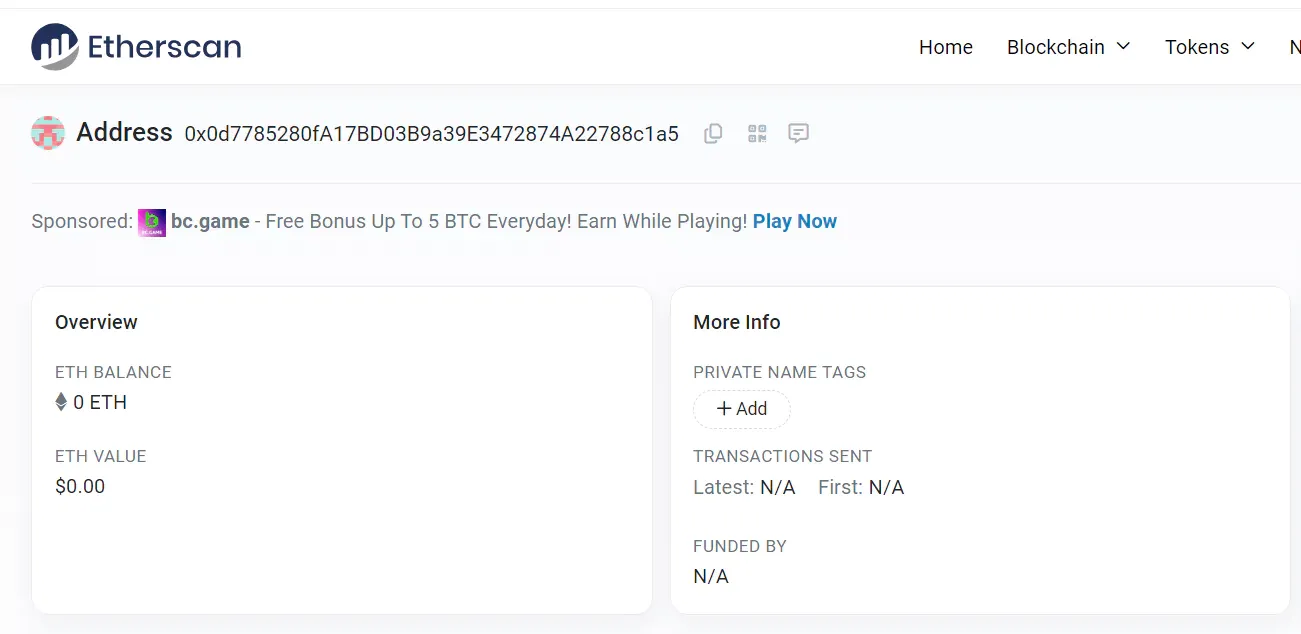
Nothing in look-up result
This address here is unique and represents exclusively this single account that we've just created.
Mnemonic Phrase
Our mnemonic that we've been given gives us access to manage multiple accounts in the wallet. With mnemonic, we can create, delete and access all wallet’s accounts. This is why securing your mnemonic is so crucial especially if you have multiple different accounts.
Private key
As we know, each account has a unique identifier called the public address. However there's also a private key to work with this account, or a secret key. Private key is a single password associated with a single account. This is why when people say store your private keys in a safe place, they're usually referring to both your mnemonic and your private keys.
Networks - Mainnet and Testnet
By default, we are going to use Ethereum Mainnet. But for programming, we will need to test our chains before publishing it, so we also have testnets for that purpose.
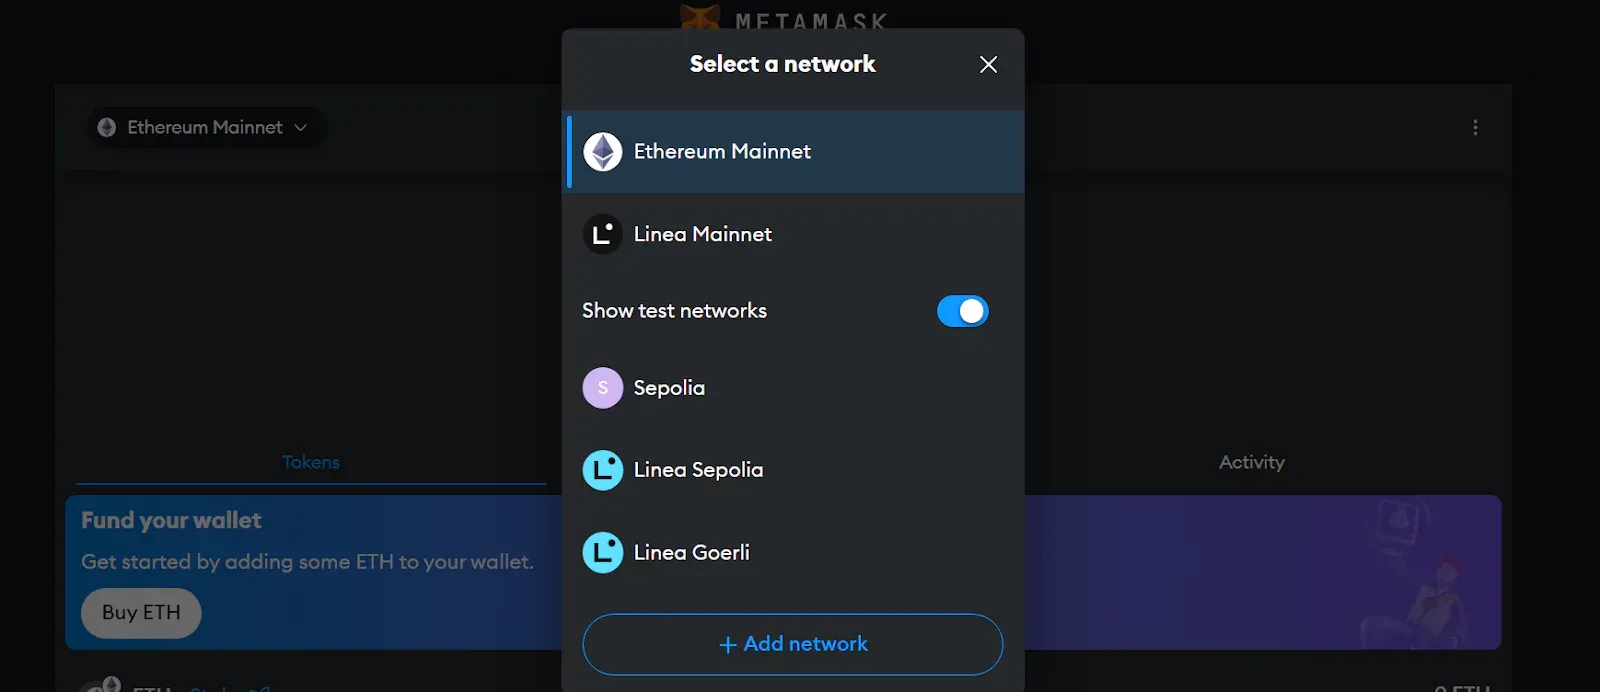
Network selection on MetaMask
We will change to the testnet Sepolia. But you can choose any testnets because their behaviors should be mostly the same.
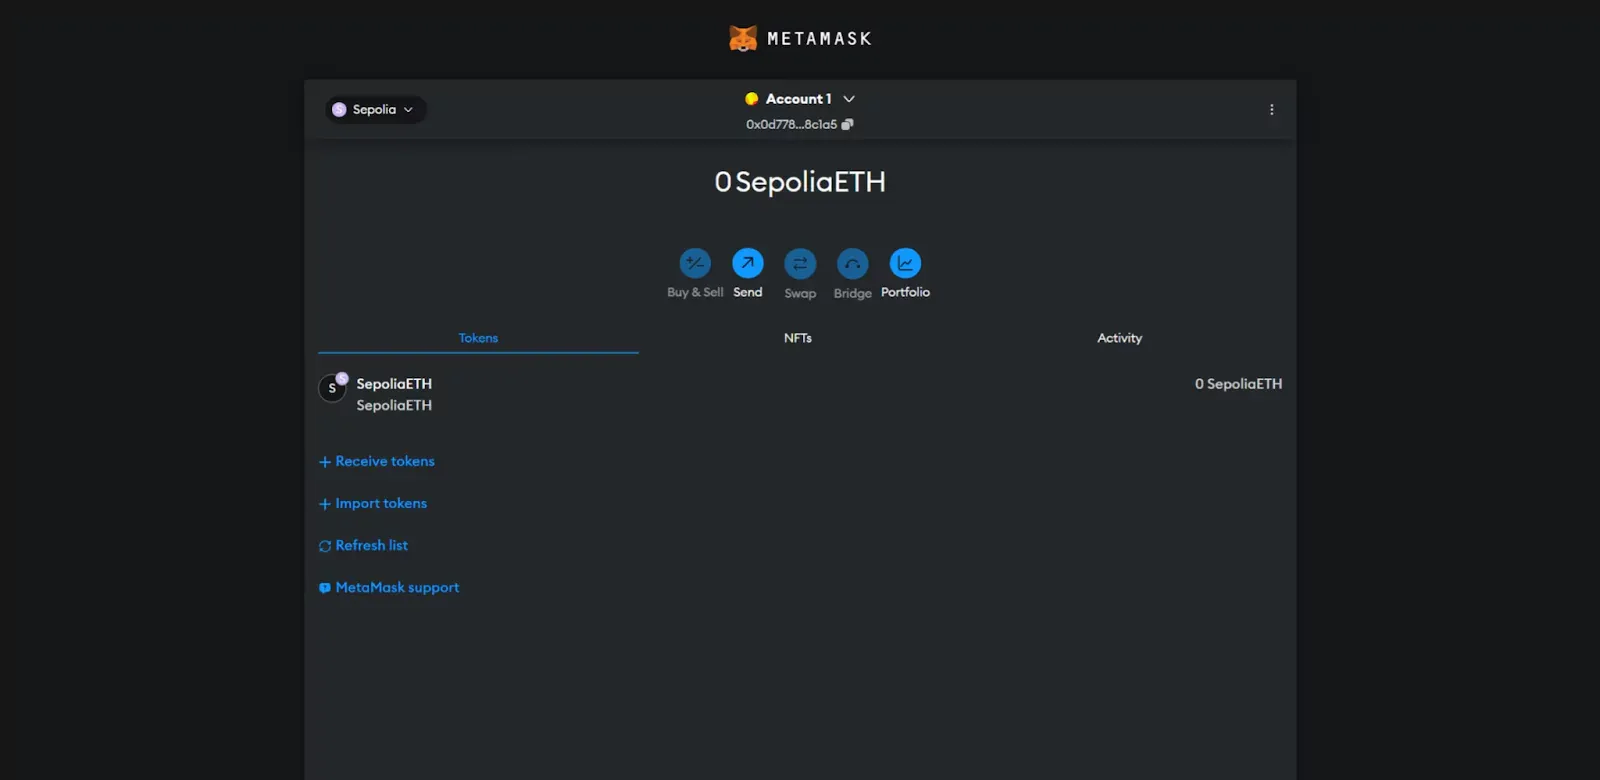
We can see that Sepolia is using the token SepoliaETH as the default token for transactions and our amount of SepoliaETH is 0. So, we have to earn some tokens before being able to create a transaction.
Faucet Application - Transaction Created by ChainLink Faucet
For testing on testnets, free tokens can be claimed from “faucet” applications. We can use any available faucets. Here, we are going to claim from https://faucets.chain.link/.
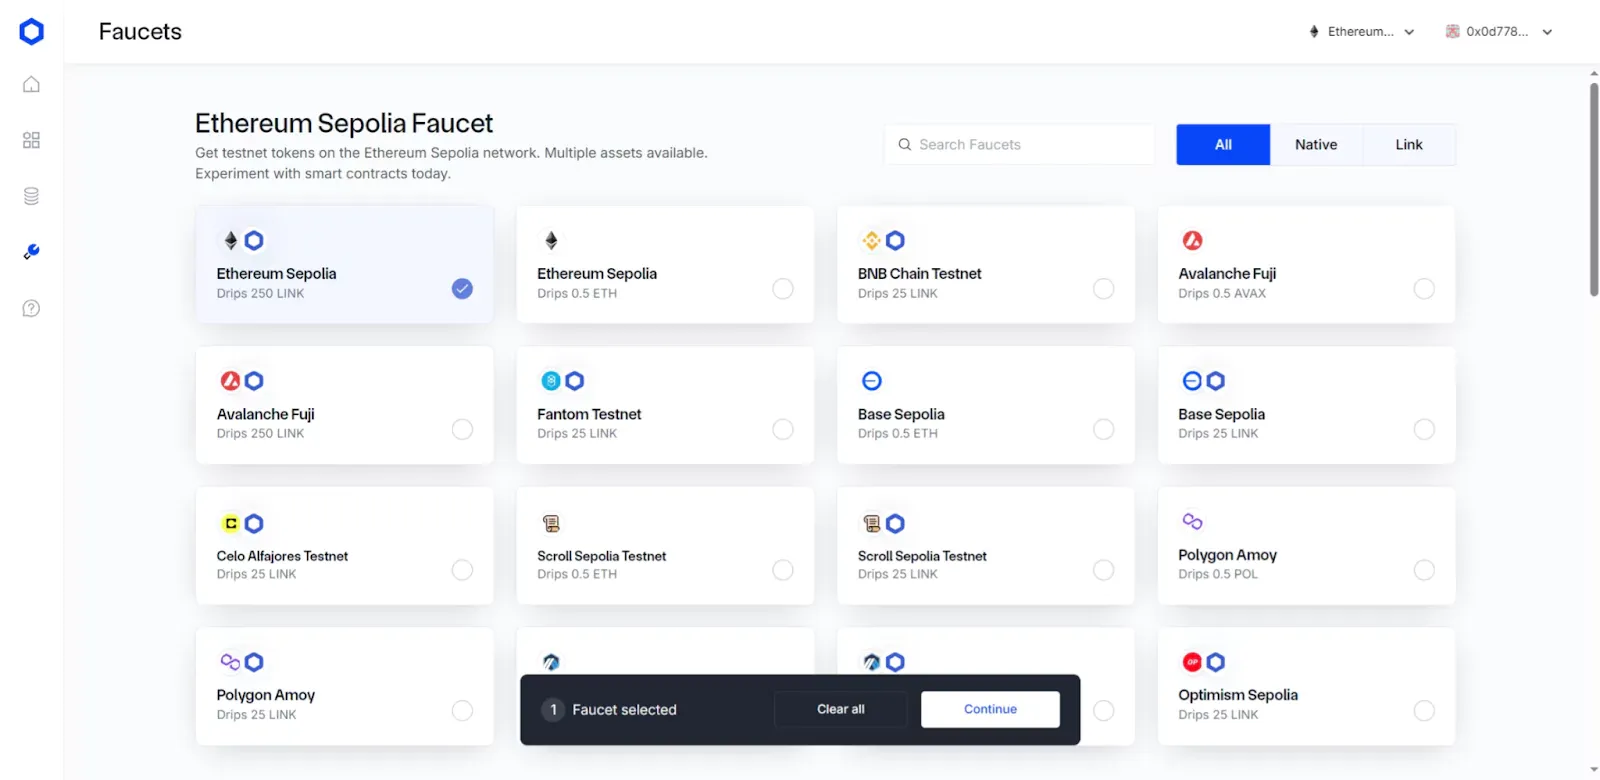
Select Ethereum Sepolia on ChainLink faucet.
As we are testing with Sepolia, we will pick the option “Ethereum Sepolia” that will drip 250 LINK to us. We can use LINK, another type of token, for transactions instead of the default token SepoliaETH. Then, click “Continue”.
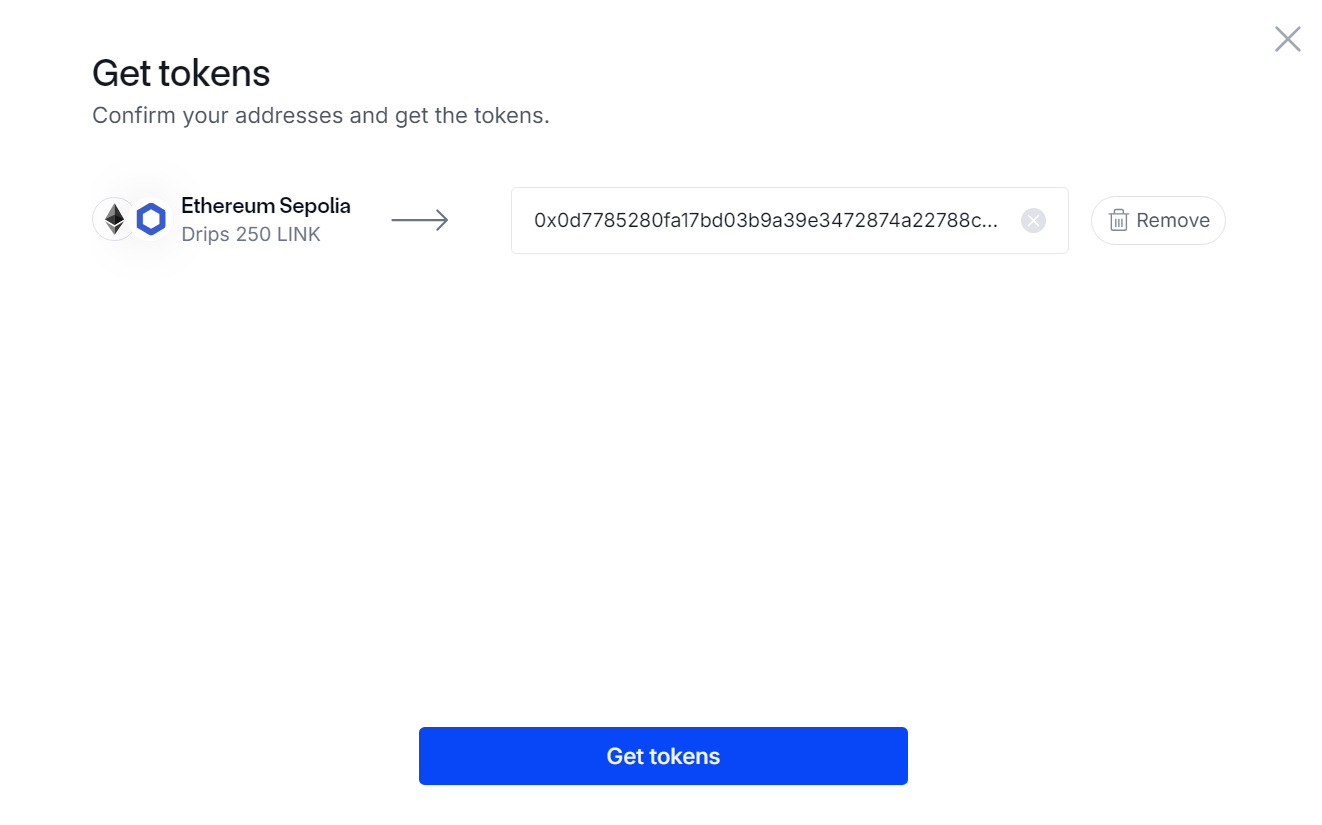
Now, enter the address of our “Account 1” and “Get tokens”. We’re going to wait a little bit. Once the token transfer is completed, go to Sepolia Etherscan - Etherscan for only Sepolia network (different from Etherscan we mentioned before that is for mainnet). Let’s search the address to see what happened.
How long does an Ethereum transaction take? An Ethereum transaction usually takes 15 seconds to 5 minutes, depending on network congestion and gas fee settings. On testnets like Sepolia, it can be even faster (often processed within a few seconds).
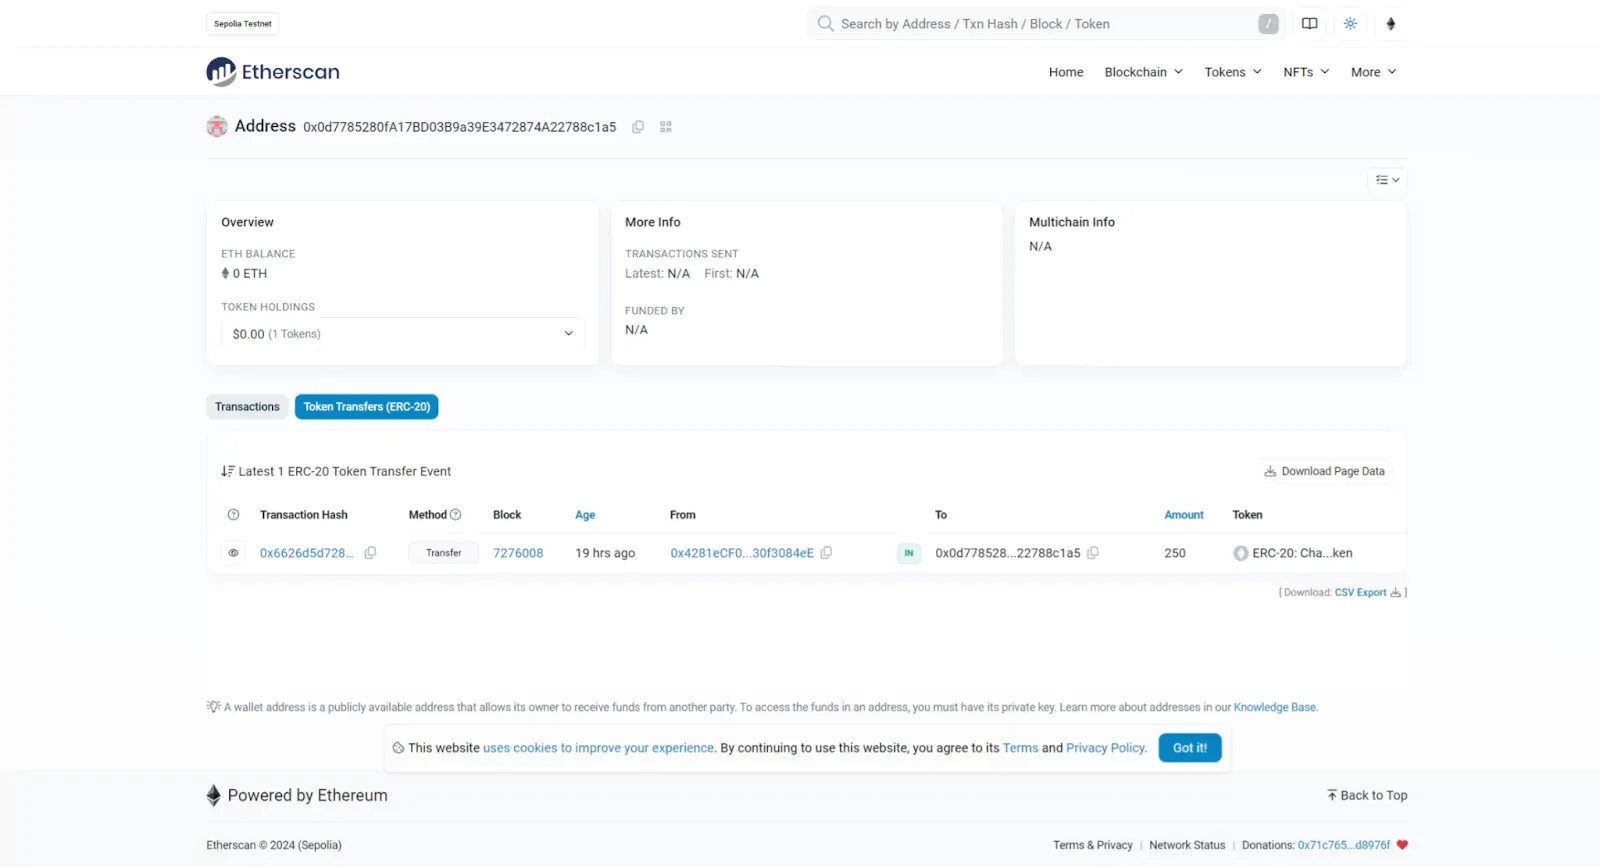
We can see a record that includes some information about “from” address of someone, “to” address that is mine, amount of token is 250. You can explore more by clicking on the transaction hash.
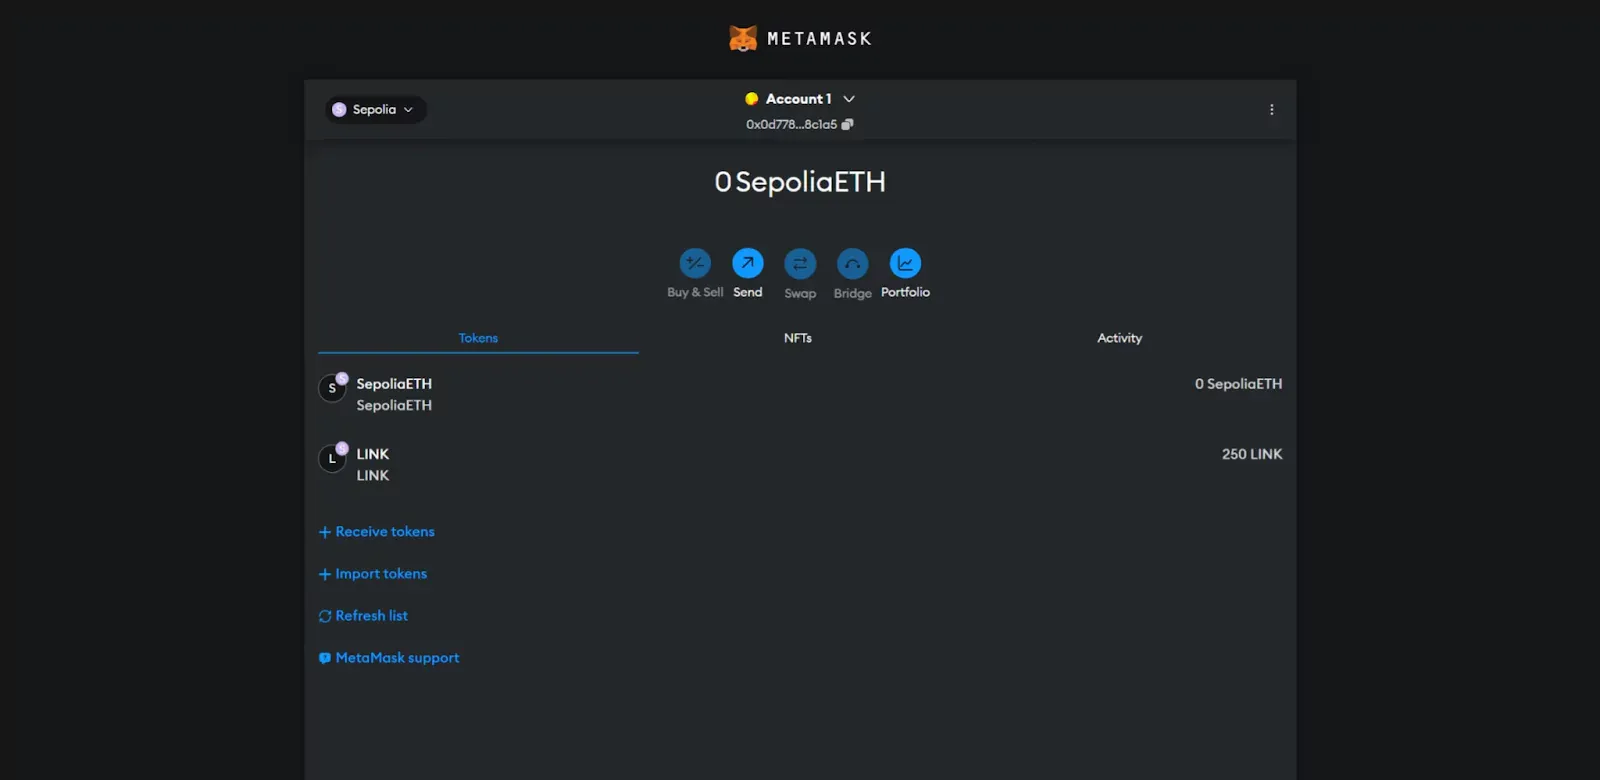
Going back to our MetaMask wallet, now, in “Account 1”, we should get 250 LINKs. This is a transaction ChainLink created.
Gas, Gas Price, Gas Limit, and Ethereum Transaction Fee
Let’s look further at the transaction details of the recent token transfer.
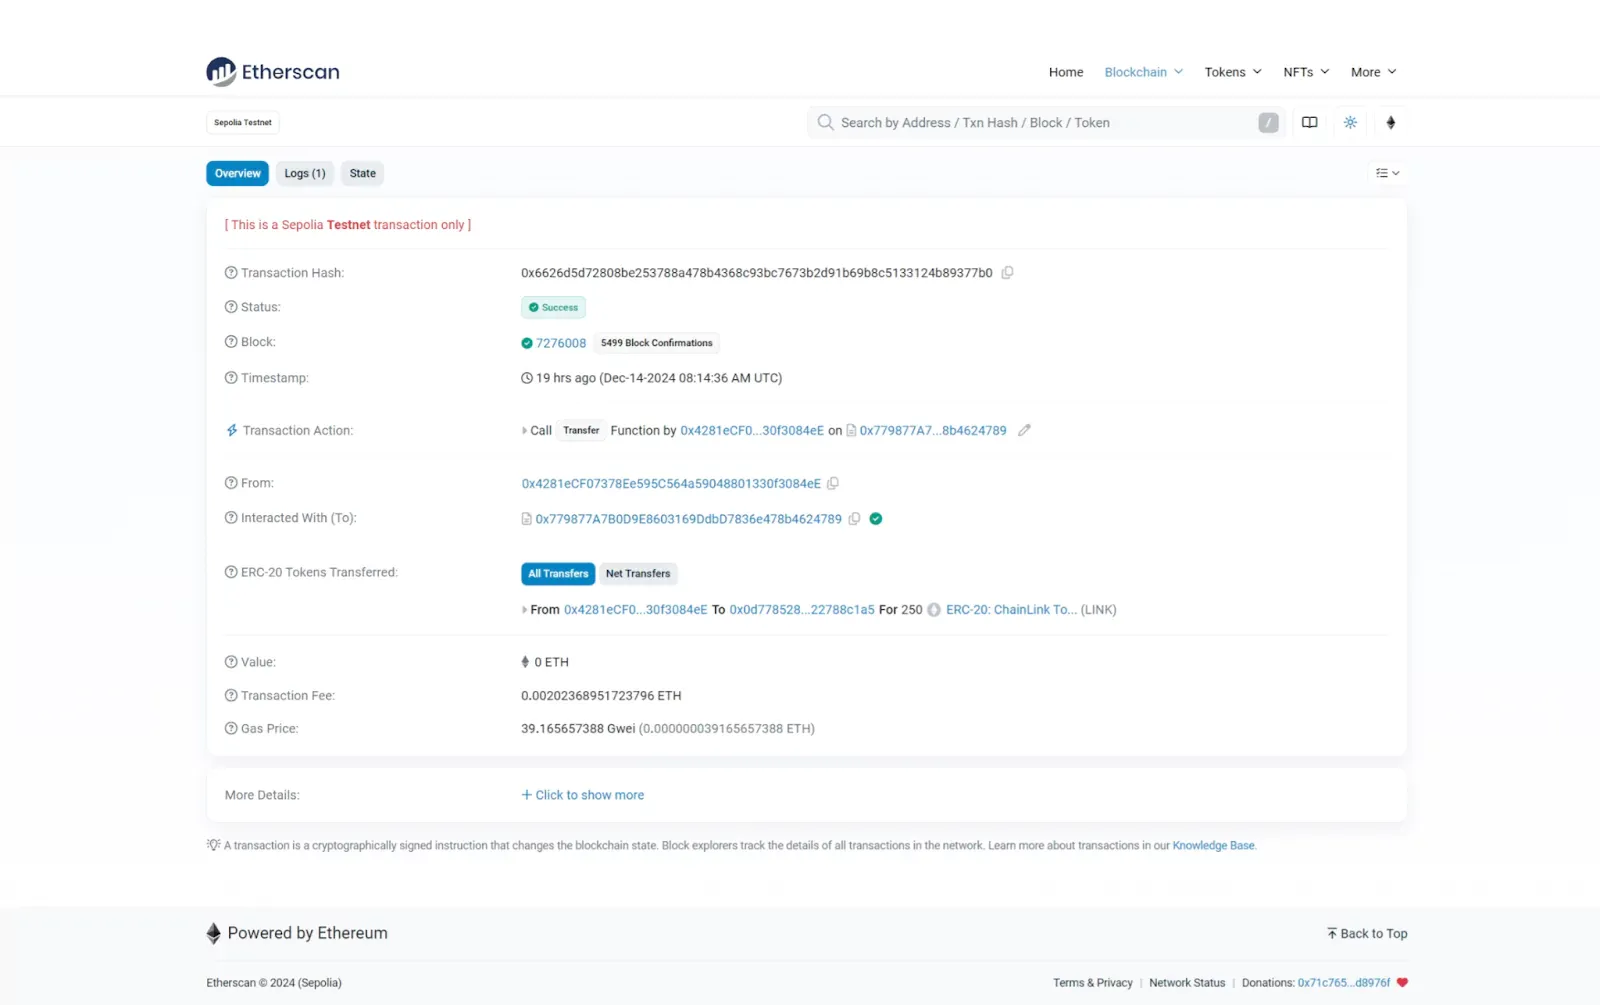
Token transfer - Transaction detail
We can see more about status, block, etc. But the crucial things we should notice are the “Transaction Fee” and “Gas Price”. What is gas and gas price? How can we calculate the fee for each transaction?
Gas is a unit of computational measure. The more computation a transaction uses, the more gas you have to pay for. Every transaction that happens on-chain pays a “gas fee” to node operators.
Wei is the unit for measuring gas price and fee.
|
1 GWei = 109 Wei 1 ETH = 109 GWei |
Gas Price is how much a transaction costs per unit of gas.
| Transaction fee = Gas Used x Gas Price |
For example: 21000 gas used x 1 GWEI per gas = 21000 GWEI
Summary
Transactions on a live blockchain are the fundamental units of activity, representing the transfer of value or data between accounts. These transactions are recorded in blocks, which are then added to the chain in order. By investigating Ethereum Sepolia Testnet, we have understood more basic concepts of a blockchain wallet and in advance explored a transaction in very details of Gas and Transaction Fee.
>>> Follow and Contact Relia Software for more information!

- development